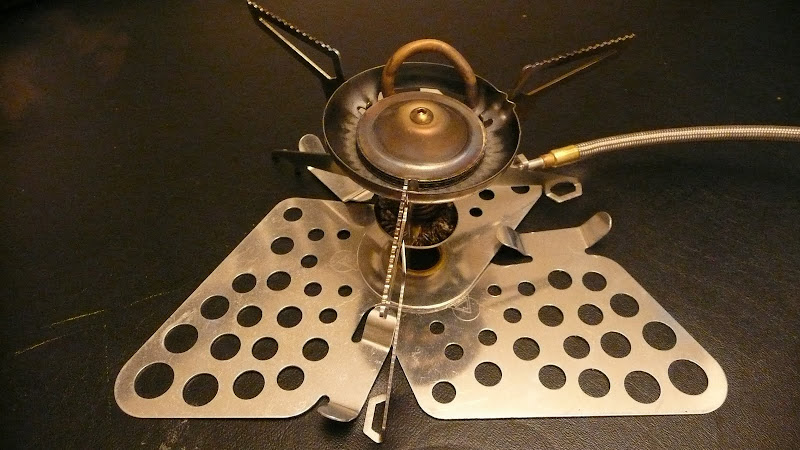
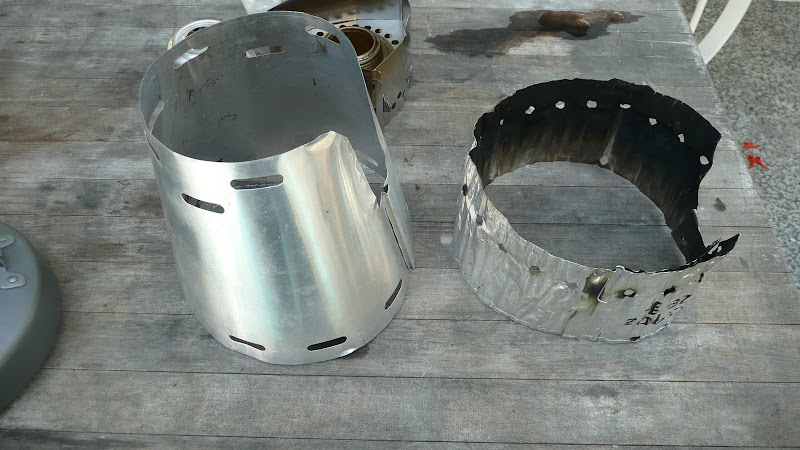
I've been very interested in lightening my pack weight lately. As a part of that interest, I've been investigating alcohol stoves. Since alcohol stoves (generally) aren't pressurized, alcohol stoves require no heavy vessel to contain the fuel. Neither do they require pumps, seals, etc. In fact, pretty much any non-flammable cup shaped object that can hold alcohol can be used as a stove.
Alcohol stoves are typically very vulnerable to wind. Since they're typically not pressurized, an alcohol stove's flame doesn't have a lot of force behind it. If a bit of a breeze kicks up, your flame can get scattered all over, your heat gets dissipated, and your dinner time looks like it's going to be some time in the next millennium. What to do? Use a windscreen of course. Windscreens are a good idea with almost any stove, but they're pretty much imperative with an alcohol stove. Not just any old windscreen will do. What you want is a
system, that is a windscreen that is really integrated with your stove so that the two work optimally together.
In this post, I'd like to describe briefly some testing I did of two alcohol stove systems: the Caldera Cone with the Trail Designs 12-10 stove and the Clikstand with a standard Trangia alcohol burner.

| Trail Designs 12-10 stove (left) and a Trangia burner mounted in a Clikstand (right) |
I've been using the Caldera Cone for a while, and I really like it. It's light, it packs well, and it handles wind really well.
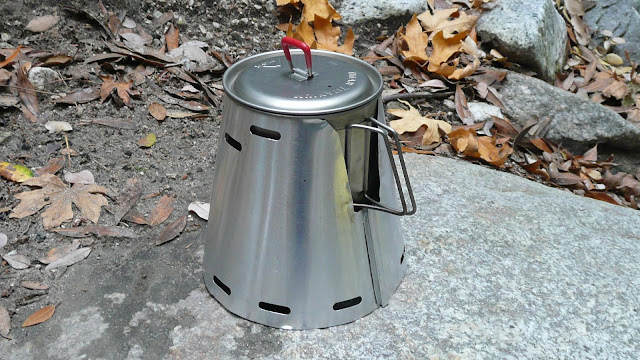 |
| The Caldera Cone |
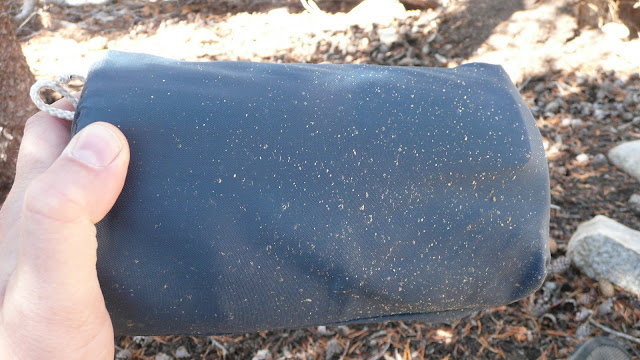 |
| The Caldera Cone Packed. Includes pot, stove, windscreen/pot support, bowl, eye dropper, 4oz fuel bottle with fuel, cozy, and small fuel measuring cup! |
The one drawback to the Caldera Cone is that the cone is particular to a specific pot. In other words, each cone fits only one pot. You have to buy the right cone for your pot, and once you buy the cone, you can only use that one pot. Wouldn't it be nice to have a little bit more flexible system? Indeed it would, but which one?
I've been hearing great things about the Clikstand, that it was flexible, stable, and worked well in wind. So, I managed to pick up a used Clikstand, and I thought I'd run a few tests. How well does the Clikstand work, and how does it compare to the Caldera Cone?
Note: all tests are described as though only one iteration were conducted. In fact, multiple tests were conducted.
First test: Efficiency test.
Test conditions: Fair weather, with intermittent light winds.
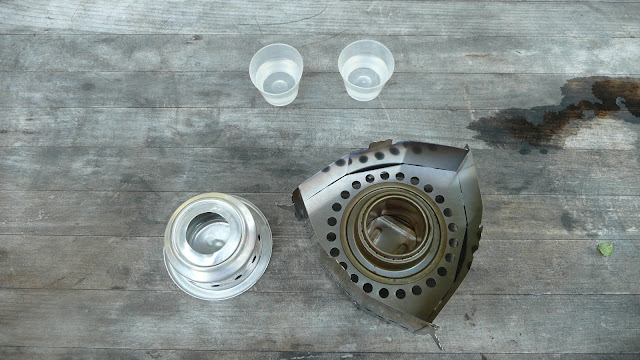 |
| Trail Designs 12-10 stove (left) and a Trangia burner mounted in a Clikstand (right). To the rear are two medicine measuring cups with 20cc each of SLX Kleen Strip Denatured alcohol. |
To test efficiency, I measured out a fairly meager amount of alcohol, 20cc. Having used the Caldera Cone a number of times, I knew that 20cc of denatured alcohol would be just enough to boil 500ml of cold tap water. Could the Clikstand equal this level of efficiency?
For the tests, I used an MSR Titan 0.85L kettle with the Caldera Cone and a Primus Litech 0.9L kettle with the Clikstand.
 |
| MSR Titan 0.85L kettle (left) and Primus LiTech 0.9L kettle (right) |
For windscreens, I used the following the Caldera Cone aluminum windscreen from Trail Designs and a BPL titanium windscreen. The ventilation holes in the BPL Ti windscreen were above the upper edge of the Primus Litech kettle. I do not believe the ventilation holes played a significant role in the tests because of their position.
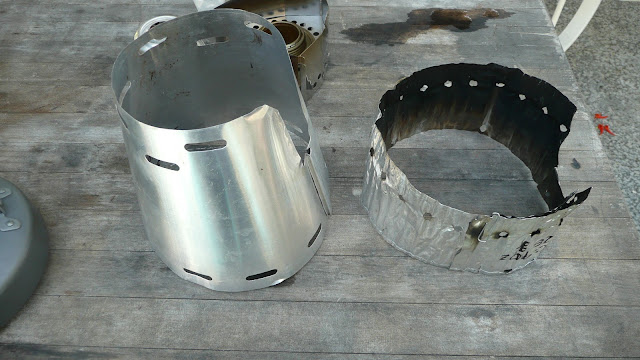 |
| Trail Designs Caldera Cone windscreen/pot stand (left) and BPL Ti windscreen (right) |
It should be noted that I did not use a Clikstand manufactured windscreen but rather substituted a windscreen of similar dimensions.
Here are the two side by side in action.
 |
| MSR Titan kettle in place on the Caldera Cone (left) and the Primus LiTech kettle in place on the Clikstand (right) |
Test results: With 20cc of denatured alcohol, the Clikstand system went out before the 500ml of water boiled. The Caldera Cone system came to a roiling boil, burned for a few more seconds, and then went out.
Conclusion: The Caldera Cone is more efficient than the Clikstand system.
UPDATE 26 Dec 2011: As for why the Caldera Cone is such an efficient alcohol stove system, please see
The "Magic" of the Caldera Cone.
Second test: Speed Test
Test conditions: Fair weather, with intermittent light winds.
In my second test, I used the same equipment in the same fashion with the same quantities of water, but I increased the alcohol allotment to 25cc of denatured alcohol per stove.
This time the Clikstand boiled up nicely -- and was much faster than the Caldera Cone.
Test results: With 25cc of denatured alcohol, the Clikstand system boiled 500ml of water boiled approximately 40 seconds faster than the Caldera Cone. The Clikstand went out after bringing the water to boil. The Caldera Cone burned about a minute beyond the point it brought water to a boil, and then went out.
Conclusion: The Clikstand system is faster than the Caldera Cone system.
Some stats:
Clikstand with Trangia Burner
Clikstand S-2: 94g/3.3oz
Windscreen S-2: 37g/1.3oz (note: In my testing I used a BPL Ti windscreen, 25g/0.9oz)
Trangia Burner: 67g/2.4oz
Trangia Burner Lid: 21g/0.7 oz
Trangia Burner Simmer Ring: 23g/0.8oz
Total Trangia Burner Weight: 112g/4.0oz
Grand Total: The Clikstand with Trangia burner set up is
242g/8.5 oz total, including windscreen, burner lid, and simmer ring.
Note: The above weights are taken from the
Clikstand.com website. SNOWGOOSE in Scotland wrote and gave me the actual weights for his Clikstand set up. His weights are a gram or two heavier in several cases. His total weight was 247g/8.7oz.
Disclaimer: I have no affiliation with Clikstand. The above link is provided as a courtesy only.
The Caldera Cone with 12-10 stove
Caldera Cone: 34g/1.2oz
12-10 stove: 16g/0.6oz
Grand Total: The Caldera Cone with 12-10 stove is
50g/1.75 oz
Note: The above weights are actual weights. The weight of a particular cone may vary depending on what type of pot it is designed for, the type of cone, and the material from which the cone is made (Ti or Al). See the
TrailDesigns.com for full details.
Disclaimer: I have no affiliation with Trail Designs. The preceding link is provided as a courtesy only.
The Clikstand with Trangia burner is approximately five times heavier than the Caldera Cone with 12-10 stove.
General observations:
The Caldera Cone is lighter both in terms of equipment weight as well as the weight of the amount of fuel necessary to operate the stove but is less flexible. The Caldera Cone is suitable only for boiling water, and the Caldera Cone can only be used with the specific pot for which it was designed -- unless you can find a pot with the same rim size. The Caldera Cone supports the pot by sliding up under the rim of the pot. Interestingly, a friend of mine had a pot marked with the REI brand but manufactured by Evernew that fit my Caldera Cone perfectly, but don't count on a coincidence like this. Buy the cone with the pot in mind; the cone will generally only fit one pot.
UPDATE, 25 Nov 2011: Several of you have written to me saying that the one
can actually cook with a Caldera Cone and have described various modifications such as simmer rings that allow such a thing. Although the Caldera Cone wasn't really put together with the idea of cooking in mind, the ingenuity of the individual backpacker should never be underestimated! Thanks for the feedback, everyone.
 |
| REI branded Evernew Ti kettle (left) and MSR Titan kettle (right) |
The Clikstand is heavier both in terms of equipment weight as well as the weight of the amount of fuel necessary to operate the stove but is more flexible. The Clikstand can use a wider range of pots and pans, and the Clikstand has a more controllable flame when the Trangia burner's simmer ring is used. Using the simmer ring of the Trangia burner, I was able to get the flame to a very low setting which allowed me to fry an egg in a fry pan. However, even though the Clikstand is more flexible in terms of pot and pan sizes which may be used, there are real limits. First, smaller pots and pans will not work well on the Clikstand. I tried a 780ml Snow Peak pot with the Clikstand, and the pot was too small to be stable. Second, a pot must be small enough to fit within the supported windscreen.
What do I mean by a "supported" windscreen? Take a look at this photo. Notice that the windscreen does not touch the ground. It is supported by the pot stand.
In order to use the supported windscreen, the pot must be small enough for the windscreen to fit into the notches that support it. My Primus Litech 0.9L kettle was a tight fit.
Concluding remarks.
I'll probably continue to use the wonderfully packable, lightweight, and efficient Caldera Cone system for serious backpacking trips, but for trips that are shorter and less weight sensitive, it's going to be really nice to have the more flexible Clikstand to use. With the Clikstand I can cook real food, and I have a certain degree of flexibility as to which pot, pan, or kettle I use -- within a limited range of widths.
HJ
P.S. This blog post is part of my series on the Caldera Cone. In case you missed any of the series:
Appendix
Other stats for the Caldera Cone set up
I didn't want to include the following weights in my above stats because I wanted an "apples to apples" comparison. However, the following weight stats for the Caldera Cone may be of interest:
Caldera Cone: 34g/1.2oz
12-10 stove: 16g/0.6oz
Total Caldera Cone with 12-10 stove: 50g/1.75 oz
Small fuel measuring cup: 1g/0.04oz
Eyedropper: 1g/0.04oz (for reclaiming unburned fuel)
Four fluid ounce flip top bottle with approximately 3.75 fluid ounces of fuel: 132g/4.7oz
MSR Titan kettle: 98g/3.5oz
Titan kettle lid: 37g/1.3oz
Total Titan kettle: 135g/4.8oz
Ziploc container (used as storage and as bowl): 55g/1.9oz
Reflectix cozy: 22g/0.8oz
Stuff sack: 17g/0.6oz
Entire kit (example shown below): 413g/14.6oz
My entire kitchen weighs about a pound (I carry a Bic type lighter and a spoon separately)
. Nice!
|
| The Caldera Cone Packed. Includes pot, stove, windscreen/pot support, bowl, eye dropper, 4oz fuel bottle with fuel, cozy, and small fuel measuring cup! |
Related posts and articles: