Investigations into and adventures with backpacking stoves including solid fuel (e.g. ESBIT), alcohol, gas, "white" gas (Coleman type fuel), wood, and kerosene.
A few questions have come up since I posted my Review of the new MSR Pocket Rocket 2. I therefore have put together this, which acts as a supplement to my original review.
The generations of the Pocket Rocket Line.
Left: The original Pocket Rocket. Center: The Micro Rocket. Right: The new Pocket Rocket 2
Availability
When I first inquired, I was told that the new Pocket Rocket 2 would be available in "January." However, I see that two sites already have the stove listed. I shall list links below as a service to you my readers. I receive no benefit from placing these links here, and I receive no benefit if you purchase. The below links in no way constitute an endorsement. These links are herein listed simply for your convenience. In no particular order:
I have purchased things in the past from LL Bean. I have no financial relationship with LL Bean other than that of an ordinary customer.
I don't think, going on my memory which is far less than fully reliable, that I've ever purchased anything from Backcountry Gear. I certainly nave no financial relationship with Backcountry gear.
Simmering
The stove simmers well. I was trying to illustrate just how good the flame control is in Appendix II (which is well worth referring to). Let me here show a photo of the food as opposed to the flame. Look at the photo below. If you look a bit to the left of center. You can just barely see a few bubbles. Now that's a true simmer (a simmer being the ability to hold contents of a pot at or just below a low boil). And look at the food debris left on the sides of the pot. Only moments before, I practically had a boil over, things were boiling so furiously. That's some nice flame control.
Note: The majority of the flame control occurs in the range of approximately 1/6th to 1/2th of a turn of the valve adjuster. You have to have a fairly deft touch, but with just a minimum bit of skill, you can have just about any flame setting you so desire.
An **extremely** low simmer can be achieved on the new MSR Pocket Rocket 2
And now, a flame shot. I mean who doesn't love flame shots? But, seriously, look closely. That's a nice, low flame (and you can get it even lower) – with absolutely no spillage up the sides of the pot. This is just the flame control you want to have on a stove.
The Pocket Rocket 2 – really good flame control
Pot Supports
I covered the subject in the general case in my Review of the new MSR Pocket Rocket 2, however, let me respond to one specific question and then give one more general example.
First, the specific question: "How do the supports on the new Pocket Rocket 2 fit on an MSR Titan Kettle?" Presumably they were referring to the standard sized (850 ml capacity) kettle.
Well, inasmuch as a picture is worth a thousand words, I give you:
An MSR Titan Kettle (850 ml) atop the new Pocket Rocket 2
Now, notice in the photo above that the inner circle of the bottom of the kettle match nearly exactly the inner diameter of the pot supports. With respect to the outer diameter, the pot supports extend a mm or two beyond the outer periphery of the kettle. I'd say that the Titan Kettle is a really strong candidate for use with this stove, particularly for a soloist. I think it a tad small for two.
Incidentally, MSR has announced that they are coming out in 2017 with the "Big Titan Kettle," a two liter version of the current Titan Kettle. Why they went all the way from 850 ml to 2000 ml (two liters), I'm not sure, but that's my understanding. I typically recommend something on the order of 750 ml per person in terms of pot capacity, so a 2 L kettle would be a pretty good match for a group of two or three people. I haven't seen one. I'll keep you apprised if I get any further information.
Now, for a more generic example: Here is a photo of the Pocket Rocket 2 with standard 355 ml (12 fl oz) beverage can. This particular beverage can has been made into a Trail Designs 12-10 alcohol stove, but the outside diameter of course has not changed. Now, the point here is not that you should use a Coke can to cook in, really it's not practical, but rather that this stove will support really small pot diameters. Note however that all you Heineken and Fosters "pot" lovers had best turn down the stove lest you ruin your pot.
The MSR Pocket Rocket 2 with a standard 355 ml beverage can
Valve block
The valve block of the Pocket Rocket 2, to include the threads, is made from anodized aluminum. Note that this is not "hard" anodization (the type of anodization that makes aluminum pots tougher) but is merely the means by which the valve block has been colored that nice MSR red. The valve spindle, at least what I can see of it, is brass. I have not disassembled the unit (nor do I intend to), but presumably it is all made of brass. The valve adjuster handle is stainless steel.
The valve block of the MSR Pocket Rocket 2 is made out of aluminum.
Some stoves* will have a brass insert in the valve block for the portion that threads on to a canister. Brass generally wears a bit better than aluminum, but aluminum has not been shown to to be a poor choice of materials. Many a through hiker has done a long trail (for example the Pacific Crest Trail) without a problem. The threads on all canister gas stoves, whether brass or aluminium, will wear with time. Do not over tighten.
I hope this review supplement will be of assistance,
HJ
*I just went into the gear room (the very room my wife detests but is of course entirely necessary) and pulled out a couple of canister stoves that my memory suggested had a threaded brass insert, specifically the Soto Amicus and the Snow Peak GigaPower. Both of those stoves do in fact have a threaded brass insert.
I'm going to depart from the normal here and put a commercial link in a blog post. May my readers forgive me.
Please understand that I derive NO BENEFIT from this post nor if you make a purchase*. This is just a good deal I noticed.
UPDATE 30 December 2016: I just noticed today that Campsaver has also placed the smaller but similar Amicus on sale as follows:
Version without ignition: $32.
Version with ignition: $36
Cold weather testing the WindMaster.
It's no secret that I consider the Soto WindMaster to be the best quality upright canister stove on the market today. I believe I said as much in my review of the WindMaster. It's wind resistant in a way other stoves of this class just aren't (well, except for its budget minded cousin, the Amicus), and it's a good balance of versatility, efficiency, and weight. Not only that, it's just quality in every respect.
The Soto WindMaster
That said, Campsaver.com has the Soto WindMaster on sale for about $20 less than MSRP. For your convenience here is a link: Soto WindMaster on sale at Campsaver.
As far as I know, Campsaver is a reputable establishment. Friends of mine have had good experiences. However, note that I have never done business with them. Caveat emptor. This is information only; do with it what you will.
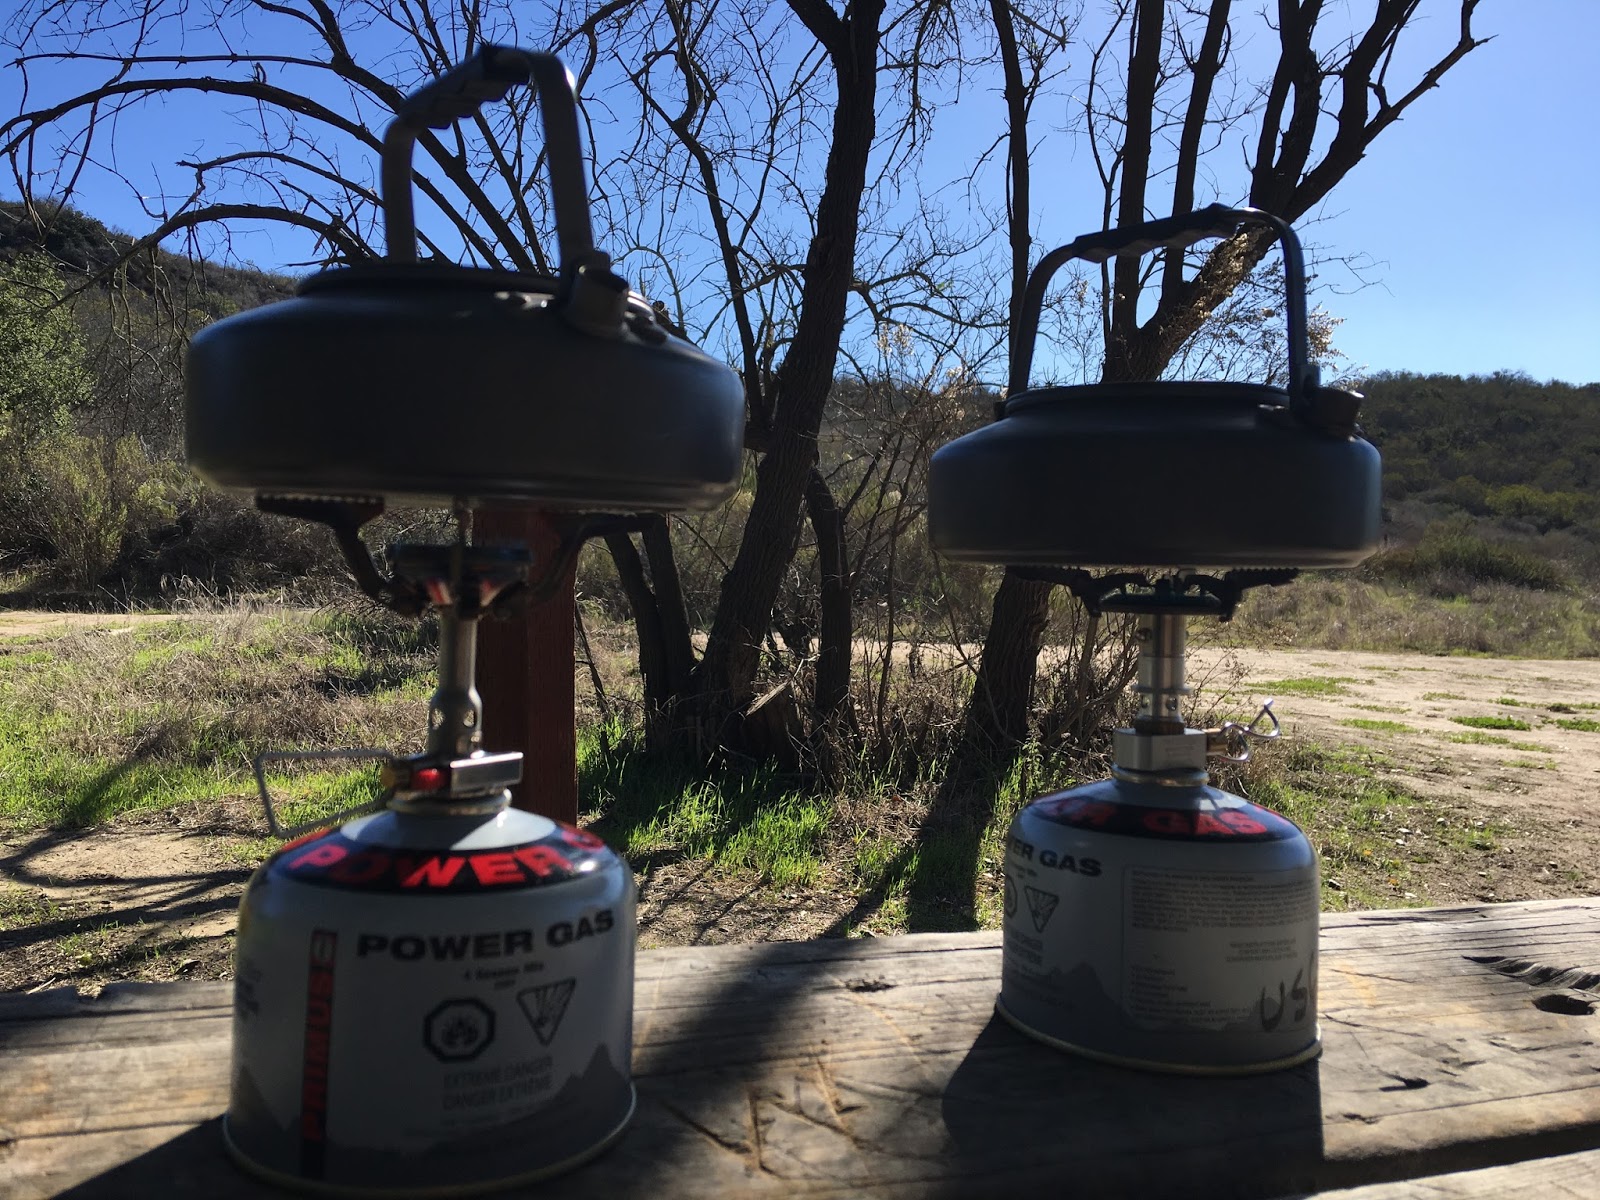
Simul-testing the WindMaster against a "control" stove.
The WindMaster is at left.
No matter the conditions, the WindMaster always came out ahead – while using less fuel.
I hope this is helpful to someone, and I do hope you will forgive the commercial intrusion on this, a site focused on what we do in our lives outside of work (well, unless you're a guide or something).
HJ
*Note to Campsaver if you happen to read this: I can't be bought, but it wouldn't hurt you to try, now would it? I like dark chocolate. :) Seriously though, Campsaver, I've been Jonesing like mad to have a look at one of those Optimus Polaris Optifuel multi-fuel burners. Send me one, and I guarantee all other stoves will go on hold. I will straight away review the Polaris. I'm completely serious about this. You can leave a comment below and I'll get an email and physical address to you forthwith.
Performance testing the Soto WindMaster against a "control" stove.
Note: The individual in the photo is a highly trained stove professional.
Don't try this at home (seriously, go for a hike; you have a much better stove already in your kitchen at home).
Apologies for the waste generating food. We got a free case because they were due to expire.
For those of you who are die-hard Pocket Rocket fans screaming "nooooo!" at your screen right now: Relax. There's a lot to like here, and you're giving up very little.
Note: Gone as well is the Micro Rocket.
Compactness
The obvious gain here is in compactness. For example, no matter how you turn it, the original Pocket Rocket just isn't going to fit into a 550 ml mug shaped pot, the kind that a 110 g canister of gas nests in. You can't lay it flat, you can't put it in diagonally, and you can't stand it up straight.
The original Pocket Rocket just won't fit in a little 550 ml mug shaped pot.
On the other hand, the new Pocket Rocket 2 lays flat, no problem – a dramatic difference.
The new Pocket Rocket 2 fits into a 550 ml mug type pot with room to spare.
Weight
There's also a fairly significant weight reduction over the original Pocket Rocket. The new Pocket Rocket 2 weighs in at 73 g (2.6 oz) vs. 87 g (3.1 oz) for the original.
The Pocket Rocket 2 weighs in at 73 g (2.6 oz).
Improved Pot Stability
Now, some of you are no doubt saying to yourselves, "um, gosh, but the Pocket Rocket 2 looks a whole lot like the Micro Rocket." Well, if you were thinking that, you'd be right, BUT there's just a bit more to it than that.
The Micro Rocket, left, and the new Pocket Rocket 2, right.
With the Pocket Rocket 2 come much improved pot supports. The complaint with the Micro Rocket? It was a bit "iffy" in terms of pot stability with small pots.
For example, if one were to use something small like, say, a Sierra cup, you were balanced on little more than a prayer.
The pot supports on a Micro Rocket are just barely there with smaller diameter pots.
On the other hand, with the new Pocket Rocket 2, you've got quite a bit of "contact length" with the pot supports. If you bump the stove or the pot otherwise shifts, you've still got a section of the pot supports in contact with your vessel, and nothing falls off.
The greatly improved pot supports of the Pocket Rocket 2 offer a lot more support for small diameter pots, cups, or mugs.
What's that? You use something a bit bigger than a Sierra cup? OK, great, but even if you use something bigger, the new pot supports are still better. The new pot supports are longer and have more teeth. If your pot shifts or gets jostled, there's less chance that your pot is going to fall. A dinner saved is a dinner eaten!
The new Pocket Rocket 2, upper left. The Micro Rocket, lower right.
More teeth (and longer) = better grip.
These improvements in pot stability come at no cost in terms of extra weight; the Pocket Rocket 2 weighs the same as the Micro Rocket.
Price
The original Pocket Rocket had an MSRP of $40. The Micro Rocket had an MSRP of $60. The new Pocket Rocket 2 has an MSRP of $45.
I think this is good news. One receives all the benefits of the improved features and reduced weight of the Pocket Rocket 2 at only a nominal price increase over the original. MSR is basically merging the two product lines (Pocket Rocket and Micro Rocket) into one and passing on the cost savings to you, the end user.
Generations.
The Micro Rocket, left. The new Pocket Rocket 2, center. The original Pocket Rocket, right.
Concluding Remarks
I think this new stove is a win for someone like you or like I – a back country stove user. It looks like MSR just didn't find the two pronged approach of having two very similar stoves (the Pocket Rocket and the Micro Rocket) advantageous. So, they've decided to cut costs – while at the same time improving the stove overall. In so cutting, they're able to offer a better stove, the Pocket Rocket 2, at a much cheaper price. Whereas one formerly had to pay a premium to get the compactness and lightness of the Micro Rocket, now one gets the improved features and reduced weight at a very much reduced cost.
There is additional information in the appendices, below, about flame control, height, and other changes.
For availability and technical data, see Appendix I.
For flame control (simmering capability), see Appendix II. Nice flame shots here. :)
For other changes (case and ignition), see Appendix III
For a height comparison, see Appendix IV
For disclosures, see Appendix V.
Lastly, is the new Pocket Rocket 2 revolutionary? Well, it's a heck of a lot better than the original Pocket Rocket, but... there's not a huge difference over the Micro Rocket (although there are the improved pot supports). Still, it's a good solid stove at a price that is in line with comparable stoves – and at a price well below what one formerly had to pay for this level of features.
So, the Pocket Rocket is dead, but long live the Pocket Rocket 2!
Summary The MSR Pocket Rocket 2 What's good about it.
Good price point
Nice compactness
Robust, simple, and solid
Good flame control – see Appendix II, below.
Reduced weight as compared to the original
What's not so good about it.
The tops of the pot supports aren't completely level when fully deployed. The supports all slope downward into the center toward the burner. Better grip would be achieved were the tops of the pot supports all level (i.e. in the same plane) similar to how the Soto Amicus is configured.
The open burner is vulnerable to wind.
A further weight reduction would have been most welcome at this juncture.
The MSR Pocket Rocket 2: Highly recommended.
I thank you for joining me,
HJ
Appendix I – Manufacturer and Technical Data
Date Available: January, 2017 – see MSR Pocket Rocket Review Supplement for any updates
Manufacturer: Mountain Safety Research (MSR), a subsidiary of Cascade Designs.
Manufacturer's Website: http://www.cascadedesigns.com/MSR
MSRP: $45
Weight (measured): 73 g/2.6 oz
Materials: Primarily steel and aluminum
Packed dimensions: 1 11/16" x 1 11/16" x 3" (43 mm x 43 mm x 76 mm).
Unpacked dimensions: 4 3/4" x 4 3/4" x 3 9/16" (121 mm x 121 mm x 90 mm)
Size/Model tested: Pocket Rocket 2.
Colors available: Silver with a red valve block.
Requirements: A standard threaded canister of gas, sold separately. (Well, that and a pot of course)
Warranty Information: Contact Cascade Designs through their website (see above).
Appendix II – Flame Control
Flame control on the new Pocket Rocket 2 is good. The flame ranges from a very robust full power flame.
The Pocket Rocket 2 – full power.
To a very nice moderate flame.
The Pocket Rocket 2 – medium flame.
To a nice low, simmering type flame.
The Pocket Rocket 2 – low flame.
With small pots, of course you want to turn the flame down. High flame on a small pot is going to result in flames spilling up the sides of the pot – and going to waste.
Big flames + small pot = big waste
The only efficient flame – especially with small pots – is a smaller one. Never exceed the diameter of your pot.
A flame, properly adjusted, never exceeds the diameter of the pot.
Notice the contrast in flame sizes between the above two photos. Yes, you'll boil faster with a larger flame. You'll also burn through a lot more gas. Appendix III – Other Changes
There are a few changes as the original Pocket Rocket and the Micro Rocket go the way of the Dodo (i.e. extinct).
There's a new, much easier to use case for the Pocket Rocket 2. The original Pocket Case wasn't bad, but it was a bit bulky, and sometimes it would warp a bit making it hard to get the stove in and then close the case.
The original Pocket Rocket's case, left, the Micro Rocket's case, center, and the new Pocket Rocket 2's case, right.
The new Pocket Rocket 2 case opens easily like a treasure chest, and it's a lot easier to get the stove in and out.
The Pocket Rocket 2 in it's completely re-designed (and much improved) case.
Gone also is the Micro Rocket's little hand held piezoelectric ignition. I think there is little lost here. If you're going to carry a separate ignition, you might as well just carry a regular butane lighter. A regular lighter will be a lot more versatile in that it can also light paper, wood, etc. whereas a piezoelectric ignition only lights your stove. However, if you like the hand held piezoelectric ignition, you can still get either MSR's (presuming they're still going to carry it) or Kovea's which is identical to the MSR except for the color and the logo. There's room in the case if you decide you want to carry one.
The new Pocket Rocket 2 doesn't come with a hand held piezo ignition, but there's room in the case if you want to carry one.
The ignition in the above photo is from Kovea but is identical to the one sold by MSR except for the color and logo.
Appendix IV – Height
The height of the new Pocket Rocket 2, when fully deployed, remains consistent with the original Pocket Rocket (as well as the Micro Rocket).
The original Pocket Rocket, left, the Micro Rocket, center, and the new Pocket Rocket 2, right – all about the same height.
Appendix V – Disclosures
The stove featured in this review was provided to me at no charge by MSR. I have no financial relationship with MSR. I do not receive any compensation from MSR for this or any other review except that I typically get to keep the stove. I have pretty much every MSR stove known to man including many stoves that no longer exist (Firefly, Rapid Fire, "G" stove, Simmerlite, non-shaker Jet Whisperlite, etc.), so one more stove isn't a particularly big deal to me and certainly did not influence the way this review was written. I go out of my way to be thorough and objective in my reviews.
Also, I don't make money through this blog, not really. Sure, I have ads, and on a good day, I make about $2 USD. On a typical day, I make more like $1. Let's call it $35/month. That covers hosting fees and fuel, but precious little else, and certainly doesn't compensate me for my time. This is just my odd little hobby, and that's about all it is. There are those who have suggested that this blog is a plot to achieve world stove domination. Nothing could be further from the truth – although it is odd that those making such suggestions have all met with a series of freak white gas stove priming accidents...
Here's an example of how I calculate the amount of fuel needed for a given trip. You should be able to do something along these lines and come up with a number that will work for you.
Planning for a trip in the back country? Sounds fantastic.
Um, how much fuel are you going to need for that?
First, I write down when and how much I'm going to boil throughout each day. For example, look at the chart below. I typically boil two cups (about 500 ml) of water per meal for breakfast and supper. Maybe I'll boil a little less for breakfast. I typically have a cold lunch. I also like to have a cup of coffee or tea in the morning, and then a cup of cocoa or tea in the evening, which means I'll boil another two cups per day for hot drinks. I typically use cold water for cleaning up after supper, so no fuel consumption there.
Given all of the above, I'm going to boil about 1500 ml per day. OBVIOUSLY this is just an example, and I'm making everything uniform so it's easy to understand. In real life, the amount you boil may vary from day to day depending on your menu, how much you eat, whether or not you use hot water for personal hygiene or dishwashing, etc. This example is all about round numbers and easy to follow calculations. The numbers are reasonable, but of course you need to adjust everything to how you cook, how often you cook, how many people you cook for, etc.
Wow. Looks like a beautiful spot.
How many days will it take you to get there, how many meals will you eat on the way, and how much fuel do you need?
Second, I write down how much fuel it's going to take to boil each amount of water I've written down in step 1. For most stoves, that's about 7 or 8 g per 500 ml boil although you can get by with less if you follow the rules of stove fuel efficiency.
NOTE: If you use a Jetboil or other similar integrated canister stove or you use a heat exchanger pot, then instead of 7 to 8 g being the typical amount of fuel needed to boil 2 cups of water, you might plan on 5 to 6 g of fuel per boil.
Yes, you'll have to adjust these numbers. Again, this is just one example, using the "backpacker's standard" of 2 cups per boil, which is about what most freeze dried meals require. As you adjust these numbers, remember that it's more efficient per cup to boil a larger quantity than a smaller. In other words, if 2 cups requires, say, 8 g (4 g per cup), 3 cups might only require 10.5 g (3.5 g per cup), and 1 cup might require 4.5 g. Something like that. You need to adjust all these numbers based on your experience of how much fuel you actually use. For this example, I'm going to choose a number of 8 g per 500 ml boiled which is neither overly generous nor overly optimistic.
Nice spot to camp. It'd be a shame to run out of fuel and spoil such a perfect camp.
Third, I total up the amount of fuel that I'll need for the whole trip by summing the amount needed for each day. Many people do not cook breakfast on the first day or supper on the last; in that case you would need to adjust these calculations. This total amount needed has to be less than the amount contained in whatever canister I intend to bring. You should also add a "margin for error," particularly on cold weather trips. The more experience you have, the smaller margin you can plan on.
Given the example presented in the chart, below, I need about96 g of fuel for a four day trip or about 24 g per day. Yes, I know we might get better actual results than 8 g per 500 ml boiled which would give me different numbers, but let's just go with 8 g per 500 ml boiled for this example. If I need 96 g of fuel, and I take a 110 g canister of gas, I would have 14 g as a margin for error. You'd have to think about whether or not that's going to work for you. If the weather's warmer, then maybe that's fine. If it's colder, maybe plan on more. If you're with a group, maybe that's fine. If you're going solo, maybe plan on more. And so on. Think it through and bring the the amount you feel comfortable with.
East Vidette as seen from the John Muir Trail.
Don't let poor planning ruin your dream hike!
While these numbers in the below chart aren't actual data from a trip, they're within the realm of reason. Therefore, allocating 25 g of fuel per day isn't unreasonable until you get a better sense of how much your cooking actually requires. Twenty five is a fairly easy number to work with, and the most commonly used canisters contain about 100, 200, and 450 grams of fuel. Twenty five divides easily into 100, 200, and 450.
NOTE: For your first several trips, if you're new to backpacking, assume you'll need more fuel rather than less until you get a feel for how much fuel your style of cooking actually requires.
Amt Boiled (ml)
Fuel per boil (g)
Day1
Breakfast
500
8
Supper
500
8
Hot Drinks
500
8
Day2
Breakfast
500
8
Supper
500
8
Hot Drinks
500
8
Day3
Breakfast
500
8
Supper
500
8
Hot Drinks
500
8
Day4
Breakfast
500
8
Supper
500
8
Hot Drinks
500
8
4
6000
96
Average g of fuel per day:
24
As always, I thank you for joining me,
HJ
Note: All photos are from my 2015 John Muir Trail section hike (Onion Valley to Whitney Portal).
The author, out on the trail where he belongs.
Why on earth am I indoors blogging on stoves right now?
Who is making the highest quality backpacking stoves available today? At least in the US market, it's Soto Outdoors of Japan. Their latest entry is the Soto Amicus (OD-1NV), an upright canister stove.
Note: In addition to this review, I have two preliminary posts on the Soto Amicus that contain additional information and photographs:
What's an upright canister stove? Please see my recent blog post: What is a Remote Canister Stove? which describes the two major types of canister gas stoves (upright and remote) and lists the advantages and disadvantages of each. It's worth knowing the difference.
Overview
The Soto Amicus is a small, relatively lightweight, relatively inexpensive upright canister stove. There are dozens of such stoves available on the market today. How is the Amicus any different from any other stove? Well, the Amicus is the best built of the lot and has a really nice design, but that's not what sets it apart. Soto claims that they have developed a new type of burner head, one that can handle wind better than other stoves. This windproofness would set the Amicus apart from other stoves. So, either the Amicus handles wind better or it's really nothing special. Therefore, wind testing was the major focus of my field testing. Is Soto just "blowing smoke" or are they really on to something here?
See the sections on "Wind Testing" and "The Bottom Line in Wind," below.
Simul-testing the Soto Amicus vs. the Optimus Crux at Crystal Cove State Park
Build Quality
Who is the largest auto maker in the world? Well, it used to be General Motors, an American corporation, but now, it's Toyota, a Japanese corporation. Why? They build a better automobile. We've seen this transition from American corporations to Japanese corporations in many fields such as bicycles, electronics, fishing gear, etc. Typically, the Japanese engineering, ergonomics, and build quality is just plain better, and people are willing to pay more for it.
We may now be seeing this trend in backpacking gear as well. Montbell (of Japan) is a much sought after brand among backpackers in the know. Evernew (again, of Japan) makes some of the best ultralight titanium pots. And Soto makes the best backpacking stoves available today.
The Soto Amicus deserves an award for excellence in engineering. Such attention to detail.
Pot Supports
Soto's engineering and build quality is beyond reproach, but that doesn't mean that they've always read the market perfectly. Their first upright canister stove available in the United States, the Micro Regulator, was a good stove and was met with wide acceptance, but there were those who found the pot supports "fiddly" (they had to be first moved to a particular spot on their arms and then rotated into place) and didn't like that sometimes the pot supports would flop down when there was no pot on when the stove was moved.
.
Soto then came out with the WindMaster, which I consider to be the best upright canister stove available in the US market today. For those who are interested, I have a review of the Soto WindMaster available here on my blog. Again though, the pot supports were "different." They detached when the stove was packed away. The detachable pot supports could easily be lost if one were not careful. I myself was not bothered by this; I simply used a micro carabiner to clip the detached pot support to the valve handle of the stove the minute I took the pot support off. However, a lot of people just absolutely hated this feature.
On this, the Soto Amicus, Soto's third entry of this type into the US market, I think they've finally gotten it right. One does rotate the support into place, but on the Amicus, one does not have to find the "sweet spot" on the pot support to get it to rotate. One simply pushes it up into place in one smooth, effortless motion, and, once in place, they're not going anywhere. One has to push up and then push out, against the spring loading, to retract the pot support. It's easy to retract the pot support, but it's unlikely to happen on its own.
The spring loaded pot support rotates into place in one smooth motion and then clicks onto a hook and stays put. Nice.
The pot supports are literally so simple that a child could do it.
The pot supports? So easy that a child can do it.
And they work. Not only are they easy to extend and retract, not only do they stay in place once set, they're just danged good pot supports. Of its class, the Amicus has the best pot stability that I've seen. The WindMaster, if one gets the optional 4Flex pot support, has far better pot stability, but the WindMaster is a larger, more powerful, ultralight stove and is really not in the same class as the smaller, budget minded Amicus. The only stove that really comes close to the Amicus in this class is the Snow Peak GigaPower.
Part of why the Amicus has such good pot stability is that it has not the typical three but rather four pot supports. The Amicus also has more "teeth" on it's pot supports than most stoves, and those teeth are precisely made, gripping pots better. Many pot supports on other stoves are a bit rounded off, and they just don't grip as well.
My daughter demonstrating the stability of the Soto Amicus with a 1.9 L pot, which is a pretty good sized pot for such a little stove – but it's really not a problem with the Amicus.
Now, I've said that the Amicus has good pot stability. Does that mean you can use any size pot you like? Probably not. Something on the order of a 3L pot is probably a practical upper limit, and you'd want to be careful when stirring. I compared the pot stability of the Amicus to each of the following stoves. The Amicus had better pot stability with a wider range of pots than any of these stoves except the WindMaster (with 4Flex support mounted) although the GigaPower came close:
MSR Micro Rocket
MSR Pocket Rocket
Optimus Crux
Snow Peak LiteMax
Snow Peak GigaPower
Soto Micro Regulator
Soto WindMaster
Compactness/Packability
The Amicus is a fairly small stove. It's about the width of my hand.
The diminutive Amicus. It packs down small.
When the pot supports are folded away, it packs down pretty small. It fits easily in a 550 ml mug type pot. However note: While I could get the Amicus and a 110 g sized canister of fuel into the 550 ml mug type pot, I could not close the lid. However also note, I'm not aware of any stove that could fit in my little mug type pot along with a 110g canister with the lid closed although the Snow Peak LiteMax comes very very close. Even the Optimus Crux, which is a pretty flat stove when the burner is folded, cannot fit in this 550 ml mug with a canister and have the lid closed. The Amicus is about as packable as an MSR Micro Rocket. A Snow Peak GigaPower is slightly more compact. An Amicus far more compact than the MSR Pocket Rocket. The Soto Amicis is more compact than either the Soto Micro Regulator or the Soto WindMaster.
The Soto Amicus in a small 550 ml mug type pot.
Special Features
One of the outstanding features of the Soto line of upright canister stoves is their "Stealth" piezoelectric ignition system. The wire is run up through the burner column (rather than being on the outside), and the spark point is in the center of the burner rather on the rim. The Soto ignition is far less likely to snag on things and is less obtrusive.
The simple red button and housing of the Amicus' excellent piezoelectric ignition.
Notice how there are no exposed wires and that there is nothing mounted to the side of the burner.
With the spark point of the Stealth ignition located in the center of the burner, it is not directly in the flame, giving it an edge in reliability over other ignition systems.
The silver strip of metal in the center of the burner head is the spark point of the Amicus' excellent Stealth piezoelectric ignition.
Of all the stoves I have in my collection that have various forms of piezoelectric ignitions (I have at least 10), the Soto ignition system is far and away the most reliable, most sophisticated, and least obtrusive. No one else in the industry even comes close to the quality and reliability of the Soto Stealth Ignition.
That said, "good" and "perfect" are not one in the same. The Stealth ignition is the best in the business (nobody else really comes close), but even the best ignition is subject to breakage or failure. Always carry a second (or third) source of ignition such as a lighter, matches, or fire steel.
Note that the Stealth ignition is optional. A version of the Soto Amicus is available without the ignition.
Weight
Per the Soto website:
The Soto Amicus weighs 2.6 oz/75 g in the version without the Stealth ignition.
The Soto Amicus weighs 2.9 oz/81 g in the version with the Stealth ignition.
However, on my scale, the Amicus with ignition weighs 2.8 oz/78 g. For comparative purposes, I'll list the weights of several stoves in the same class. For reference, I'll also list the weights of the other two upright Soto canister stoves even those are higher end stoves and are not in the same class. These weights were all measured in grams by me on my scale. Weights per the manufacturer may differ.
Stove
Grams
Ounces
Soto WindMaster (with ignition)
66
2.3
Soto Micro Regulator (with ignition)
69
2.4
MSR Micro Rocket (no ignition)
73
2.6
Soto Amicus (with ignition)
78
2.8
Snow Peak Gigapower (no ignition)
86
3.0
MSR Pocket Rocket (no ignition)
86
3.0
Optimus Crux (no ignition)
88
3.1
The weight of the Amicus is generally in line with other stoves of its class, however there are higher end stoves like the Snow Peak LiteMax that are quite a bit lighter. There are also some really inexpensive stoves coming out of China like the FMS-116T at 1.7 oz/48 g (sold in the US as the Olicamp Kinetic Ultra), the FMS-300T at 1.6 oz/45g (sold in the US as the Olicamp Ion Micro), or the incredibly light BRS-3000T at 0.9 oz/25 g. Note however that none of the stoves out of China has anywhere near as good pot stability, and neither do they have the sophisticated ignition of a Soto stove. But each to his or her own I suppose.
In addition, it is worth noting that Japan has some of the highest gas stove safety standards in the world. I am not aware of any Chinese stoves that have been able to meet the strict Japanese standards. I have seen some US (Coleman) and European (Primus) brands on my trips to Japan.
The BRS-3000T is not to my knowledge certified to operate in the US. You can get one sort of "under the table" on eBay or Amazon, but no company sells it in the US. If the stove causes an injury or fails, you have little legal recourse.
Cooking Ability
Canister gas stoves generally cook well. They have a highly adjustable flame. If you adjust the flame well and have appropriate cookware, there isn't really much in the way of limitations to what you can cook. The Amicus is no exception. On the Amicus, I was able to get a barely there flame capable of a very low simmer.
Wind Testing
OK, now to the heart of the matter. As I said in the beginning, either the Amicus lives up to its claims of windproofness or there's really nothing that sets it apart from a whole host of similar stoves. Sure, the Amicus has better build quality and the really nice Stealth ignition – which absolutely should be considered when evaluating a stove, but those qualities alone aren't enough to make the Amicus truly stand out. On the other hand, Superior wind resistance would absolutely put the Amicus ahead of the pack.
But first, why should anyone care about wind? Well, in the extreme, a stove can just plain blow out, and blow out so often that one just can't cook with it. See the rather dramatic first video in Windburner vs. Jetboil Wind Testing.
But that's the extreme case. What about more typical winds? Well, depending on the circumstances, wind can really cut your fuel economy. Instead of the heat going into the pot, the heat gets blown out and away and is wasted. Whereas you might normally be able to boil 500 ml of water with 7 g of fuel, in wind, you might take 10 or 11 g of fuel. If you normally use 25 g of fuel per day, you're on a four day trip, and you're carrying a 110 g canister of fuel, you can't afford to be burning an extra 3 to 4 g of fuel per 500 ml boiled. At 3 to 4 g extra per 500 ml boiled, you're talking about something like 6 to 8 g extra of fuel per day which over four days equates to 24 to 32 g more fuel needed than usual – you're going to run out of fuel before the end of your trip!
Note: The above numbers are intended to be illustrative. I chose 25 g per day because 25 is easy to work with when you have a four day trip and canisters are between 100 g and 110 g in capacity. They are reasonable numbers, but they are not not actual observations. See Calculating the Fuel Needed for a Trip for how to calculate gas consumption for a trip and for how I got the quantity 25 g.
A stove with better wind handling has more constant fuel consumption which allows you to plan more accurately so that you don't run out of fuel. Of course you're going pick a sheltered spot to cook and all that, but still, wind can make your stove unpredictable. So a stove that can handle wind well is a desirable thing.
So, how did the Amicus do? Well, check out the below video. I'm just using my iPhone to shoot the video, so you'll have to turn up the sound.
Basically, I found Soto's claims to be true. This isn't all that surprising given that I had already established that their WindMaster was better in wind than other stoves. See the video in my review of the Soto WindMaster. But I couldn't just assume that the Amicus would be as good. Yes, the Amicus did have the same type of semi-enclosed, concave burner head, but the Amicus' head was smaller and farther away from the pot.
How did I establish that Soto's claims of superior wind handling are true? By running simultaneous test after test after test.
Side by side, simultaneous testing of the Soto Amicus vs. the Optimus Crux.
My "baseline" stove was the Optimus Crux. Both the Crux and the Amicus are rated at 10,200 BTU's. In still air, they both boil water in about the same time; there's no significant difference in boil time between the two.
However, as soon as the wind kicked up, the Soto Amicus always pulled out ahead. Both stoves took longer to boil in wind, but the Crux was far more affected. Just in observing the flame, I could see that the Amicus' flame was far less affected by wind.
A highly trained Adventures in Stoving engineer observing the flame characteristics of the Soto Amicus in wind.
Not only could I visually observe that the Amicus' flame was far less affected, I could run the Amicus at a far lower setting. As low as I could turn down the flame, the Amicus never blew out. Not so with the open burner Crux. I was doing a simmer test with the Crux, the flame was steady and had been running for some time, but when a gust of wind came through, the Crux blew out, and I had to re-light the stove.
But it is the boil times that speak the loudest. The normally equal Amicus would boil 40 to 45 seconds faster than the Crux in moderate winds with occasional gusts. Clearly, the Amicus is the better stove in wind.
Are these results fairly universal? I mean I just tested the Amicus against one stove, right? Well, it is true that I did test against just one stove, but burner heads are fairly generic. With open burner heads, the flames are just more vulnerable. In addition, I got the same results with the WindMaster (which was tested against a different stove). The Windmaster has the same type of burner head as the Amicus. I am therefore pretty confident that the Amicus will fare better in wind than any unprotected burner head.
Now, does this mean that you can cook in gale force winds with the Amicus? Uh, no. If you want that kind of windproofness, you've got to go with something like the MSR Windburner or the MSR Reactor.
The Bottom Line in Wind
The Amicus will be far more consistent and predictable than other stoves, giving you the ability to a) plan more accurately, b) conserve fuel, and c) simmer better in wind.
Price
The $40 MSRP of the Amicus (without ignition, add $5 for the ignition version) is something of a first for Soto. Soto has heretofore introduced fairly high end stoves. Their first upright canister stove available was the Micro Regulator, MSRP $70, and their second was the WindMaster, MSRP $75. The Amicus, with ignition, has an MSRP of $45, and without ignition, the MSRP is $40. This is a huge jump in affordability for a Soto stove, and you're getting a heck of a lot of quality and functionality for that low price.
As of 7 December 2017, Backcountry Edge has the Soto Amicus on sale for $31.96 without ignition or $35.96 for the version with the ignition. That is a steal of a deal. Note: I have a) no financial relationship with Backcountry Edge, and b) I have never purchased anything from them. This is just information; this is not a recommendation. Caveat emptor.
Summary – The Soto Amicus
What's good about it?
Excellent build quality
High quality piezoelectric ignition system
Best of breed pot stability
Good packability/compactness
Easy to use, well thought out pot supports (I think they finally got it right with the Amicus)
Affordable (excellent value for the dollar compared to other major stove company prices)
Clearly superior wind resistance
What's not so good about it?
It's a little heavier than I would like.
The Soto Amicus: Highly recommended
In conclusion, as I reflect on the Soto Amicus, I find that there isn't much that I dislike about it except that perhaps it could be a bit lighter. It's a nice stove that's head and shoulders above the other stoves in its class.
As always, I thank you for joining me.
HJ
Appendix I – Technical Data
Manufacturer: Soto Outdoors
Date Available: Currently available
Manufacturer's Website: http://www.sotooutdoors.com
MSRP: $40 (no ignition); $45 (with Stealth ignition)
Weight (measured): 78 g/2.8 oz
Materials: Primarily steel
Packed dimensions: 1 9/16" x 1 9/16" x 2 7/8" (40 mm x 40 mm x 73 mm).
Unpacked dimensions: 4 1/8" x 4 1/8" x 3 5/16" (105 mm x 105 mm x 84 mm).
Size/Model tested: The version with the Stealth ignition.
Requirements: A standard threaded canister of gas (sold separately).
Warranty Information: Contact Soto Outdoors through their website (see above).
Colors available: Silver.
Appendix II – Disclosures
The stove used in this review was provided by Soto Outdoors at no cost to me. Inasmuch as I own three other Soto stoves as well as over 100 other stoves of various types, sizes, and vintages, a free stove is highly unlikely to influence my review one way or the other. I have reviewed this stove as objectively as I am able. I have had no business dealings with Soto Outdoors other than to contact them in order to obtain the stove used in this review. I receive no remuneration from Soto or anyone else for my reviews. I receive no benefit when someone purchases a Soto stove. I do own multiple Soto stoves; all such stoves were obtained through third parties except the stove used in this review.
In addition, just so you know, I earn very little from this blog – typically about a dollar a day, maybe a little more. I've earned $30.71 according to Google for this month. That's enough to pay for hosting fees and for fuel, so in that sense the blog is self-supporting, but that amount of money is nothing when one has a family of three to feed, house, etc. Basically, this is my oddball little hobby, and that's about all it is.
Appendix III – Calculating Fuel Needs This section has been moved to a separate blog post: Calculating Fuel Needs.