
Hyperbole? Am I being a little "over the top?" Maybe. But maybe not. Let's check it out. At the end of the post, I'll discuss why I think this triple fuel system is so darned useful that I really do consider it the ultimate lightweight stove system, particularly for mixed elevation (above and below the elevation where fires are permitted) backpacking.
 |
| The Ti-Tri Caldera Cone in wood burning mode. |
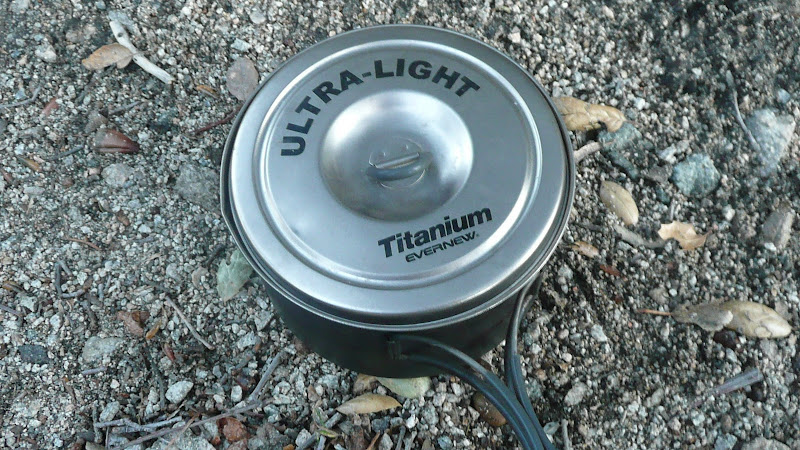 |
| An Evernew 1300ml titanium pot |
Well, "Ti" is short for "titanium" and refers to what the cone (not necessarily the pot) is made out of (titanium), and "Tri" refers to the fact that this is a triple fuel stove system. This stove system will run on three fuels: alcohol, hexamine (e.g. ESBIT), or wood. Now, if you've seen my previous posts on the Caldera Cone (see links at the bottom of this blog post), those were all aluminum cones. Aluminum Caldera Cones will warp and or melt if they get too hot, so you can only burn low heat fuels like alcohol or hexamine in them.
On the other hand, titanium cones can handle heat just fine. With a titanium cone, you can burn wood. Why might burning wood be an advantage? Burning wood is an advantage because you don't have to carry it on your back. I mean, think about it: When was the last time you saw fuel-grade alcohol welling up out of the ground? When was the last time you picked fuel off of the ESBIT tree? The point being that if you use alcohol or hexamine, you're not generally going to find it out on the trail. You have to carry the fuel with you. Wood on the other hand is frequently available from your surroundings.
In today's blog post, I'm primarily going to discuss wood burning using a Ti-Tri Caldera Cone.
OK, let's open up that pot we saw earlier and see what's inside.
 |
| The wood burning components of a Ti-Tri Caldera cone |
Now, let me mention that with the set up I'm showing today, I have the "Inferno" option. The Inferno option is what transforms a regular cone into an efficient wood burner. With the Inferno option, wood becomes your "go to" fuel. Without the Inferno option, you can still burn wood, but efficiency and ease of use suffer. Inside the rolled up cone are the floor, two titanium tent stakes, and the Inferno insert. Underneath the rolled up cone is a grate. To one side, is a rolled up wire mesh that is similar to hardware cloth.
Let's take everything out of the pot for a little better look, shall we?
 |
| The components, removed from the pot |
 |
| The dovetail joint slides together. |
 |
| An extra layer of titanium sheet is used as a reinforcement for the dovetail. |
 |
| The inner cone of the Inferno option |
Next, we roll out the floor. On top of the floor we set the wire mesh, formed into a circle, and on top of the mesh, we place the grate.
 |
| The floor of a Ti-Tri Caldera Cone with the wire support and grate of the Inferno option |
Now, I'm going to set the outer cone in place. Notice that the inner cone is left off to the side just for now. I'm leaving the inner cone out just so that the various components can be seen easily. In practice of course the inner cone goes inside the outer cone.
 |
| The floor, wire support, grate, and outer cone with tent stakes. Note that the inner cone is left out temporarily for photographic purposes. |
 |
| The Ti-Tri Caldera Cone with Inferno Option, all set up and ready to go. Just add wood. :) |
OK, let's add fuel. Here, your fire building skills are going to come into play. Today, I'm going to use the "log cabin" fire lay. I pull off the outer cone for ease of access.
 |
| A "log cabin" fire lay |
When I've completed my fire lay, I touch off the tinder on the very bottom layer.
 |
| Starting the burn |
How did I handle it? I let the fire burn completely out, and then I added a capful of alcohol.
 |
| Re-starting the fire, this time with alcohol. |
 |
| The fire takes hold |
What's that? This is a bit contrived?
Well, maybe. I mean I did deliberately go out on a rainy day. But, guys, this is real world stuff. Wood fires are not automatic. Wood fires are not like your little gas stove where you just turn the knob, hit the piezo button, and you're cooking, come rain or come shine. You're far more at the mercy of Mother Nature.
And in case it's not obvious, you have to plan your trip such that you can find wood. I typically like to pull into camp with plenty of daylight left if I'm going to be using a wood fire. Finding wood in the dark is a royal pain. You also need to allocate time for building the fire lay and getting the fire started. Wood fires are definitely a lot more "fiddle" than using a stove with fuel that you've carried with you. Wood fires take a lot more time, are a lot more work, and are far from guaranteed. Of course, people have been using wood fires for centuries, so there's no reason you can't do it too, but spend some time thinking, planning, and practising. Remember the five "P's:" Prior Planning Prevents Poor Performance. Wood fires are great, but don't enter in to it too lightly. Do you're homework or you may be in for a cold, wet night out on the trail.
OK! Enough lecturing from worry wart Jim. Let's get on with it.
Now, when you put the pot on, place the handles away from the cut out where the handle would stick out if you were using alcohol or hexamine. Flames are going to come shooting out of that spot. It's no place for a handle!
 |
| Flames will come out of the handle opening. Position your pot accordingly when using wood! |
 |
| Flames exiting out the handle opening. |
 |
| A plume of flame exiting out the opening for the pot handles |
Now, as a stove, how well does this ensemble work? It works great. In fairly short order, I had a pot of boiling water.
 |
| Water boiling on a Ti-Tri Caldera Cone fueled by wood |
 |
| A vigorous boil on a wood fired Ti-Tri Caldera Cone |
 |
| A look in through the handle opening |
OK, let's pull the pot off and have another look.
 |
| The Inferno option at work |
Hmm. A nice consistent heat, eh? Let's try something. Let's put that pot of boiling water back on.
 |
| Water NOT boiling over a wood fire. |
Now, in the process of cooking and experimenting with this stove, I filled it with sticks and let it burn down four times over the course of the evening without emptying the stove. Well, with all that wood, you'd think I'd have a big pile of ash.
 |
| Even though I reloaded four times, all that was left at the end was this little bit of ash |
And no difficulty putting out the fire. I've had wood fires that were a huge, time consuming hassle to put out. I had to go multiple times back to the creek fill all my water carriers and schlep water back up to camp to put the darned thing out. With a Ti-Tri Caldera cone, it'll combust so completely that it will burn itself out. There's really no fire to put out. Just hand check the ashes to make sure they're cool, and you're pretty much done. The ashes can be disposed of in small cat hole.
DISCUSSION
OK, so it's a nice stove, but c'mon. The ultimate ultralight stove system?
Well, why might I call this the ultimate ultralight stove system? OK, what's generally the heaviest portion of an ultralight stove set up? The fuel. With the Ti-Tri in wood burning mode, there is no fuel to carry. There is no fuel lighter than no fuel at all. In wood mode, your fuel weight is zero. Pretty tough to top that.
OK, yeah, zero fuel weight is pretty cool, but aren't there a lot of other wood burners out there?
Indeed there are, but this one, being titanium, is pretty doggone light. Not only is it light, it's compact. It rolls up and fits in your pot (note that there are different types of Caldera Cones out there that store different ways. Refer to TrailDesigns.com for further information.)
But those things alone aren't why I call the Ti-Tri Caldera Cone the ultimate ultralight stove system. The real key here is flexibility. With a lot of wood stoves, you pretty much have to burn wood every time you cook. Not so with the Ti-Tri Caldera Cone. The Ti-Tri Caldera Cone runs equally well on hexamine (e.g. ESBIT) or alcohol as it does on wood.
Consider a recent backpack I went on. The first night, I camped at 5000ft/1500m. The second night, I camped at 8000ft/2400m. The third night, I camped at 10500ft/3200m. The fourth night, I camped at 11,500ft/3500m. Wood fires above 10,000ft/3050m are generally illegal in the Sierra Nevada where I like to hike.
Do you see what's going on here? A stove that only burns wood is no good to me. I need a stove that can work in wood or non-wood mode equally well. The Ti-Tri Caldera Cone is that stove.
And look at the advantages. The first two nights, I can cook with wood. That's half the nights of my trip. I can bring half the fuel. What's the weight penalty for bringing the Inferno option?
| Item | Grams |
| Wire roll | 9 |
| Grate | 15 |
| Stakes | 14 |
| Floor | 18 |
| Inferno | 25 |
| Total Wood | 81 |
With the inferno option, I can also adopt a different style of use, one that doesn't need to skimp on fuel. What would you do if you have a virtually unlimited supply of hot water? How about a hot shower? Yes, I'm serious. OK, it's a bit of a luxury, but you rig up your hydration bladder, and... Well, you get the idea. I mean, if you've got wood, why limit your thinking? This could be pretty sweet after a week on the trail. :)
That and there's something to be said for the satisfaction of working with a wood fire. A gas stove? Well, it's almost too easy. With wood, you really feel like you've earned it. And there's just something primordially satisfying about cooking on a wood fire.
Is a wood stove for everyone? Certainly not. If you're planning on long days on the trail where you're getting up before first light and stopping to camp at last light, then maybe wood isn't for you.
But on those trips where you need to have a mix of fuels and you have time to prepare and use a wood fire, the Ti-Tri Caldera Cone is the ultimate ultralight stove system.
Special thanks to Randy from Colorado who made his Ti-Tri Caldera Cone available for my evaluation.
HJ
Other wood fired backpacking stove posts:
- The BushBuddy Ultra. Craftsmanship has not gone out of style.
- The Ti-Tri Caldera Cone -- The Ultimate Ultralight Stove System?
- Why a Wood Stove? More Thoughts on the Caldera Cone Ti-Tri.
- Wood Fired Cooking on a Caldera Cone. Cooking real food with wood.
- BushBuddy vs Ti-Tri Caldera Cone. Wood stoves compared.
Other posts on the Caldera Cone:
- Caldera Cone Alcohol Stove Review (on Seattle Backpackers Magazine)
- Caldera Cone Review Supplement -- Additional Photos and Technical Appendix with Weights
- Caldera Cone vs. Clikstand Alcohol Stove Tests
- The Caldera Cone's 12-10 Burner
- What "Color" is your Caldera?
- The "Magic" of the Caldera Cone (Why is the Caldera Cone so efficient?)
Technical Appendix -- Weights
Key weights
Full Wood Mode (Inferno Option) 126g/4.44oz
Minimum Wood Mode (with floor) 77g/2.72oz
Non-LNT Wood Mode (no floor) 59g/2.08oz
Alcohol Mode (no stakes*) 60g/2.12oz
Hexamine (ESBIT) mode 57g/2.01oz
The above weights are for a Ti-Tri Sidewinder Caldera Cone sized for an Evernew 1300ml pot. Weights include a strap that weighs 3g to keep the cone rolled. Weights do not include the pot, stuff sack, or any fuel.
Detailed Weights
Inner Cone (Inferno) | 25g | 0.88oz |
Floor | 18g | 0.63oz |
Cone | 42g | 1.48oz |
Strap | 3g | 0.11oz |
Gram Cracker hexamine (ESBIT) stove | 12g | 0.42oz |
ESBIT tab (one) | 15g | 0.53oz |
12-10 Stove | 15g | 0.53oz |
Inferno, Cone, Floor, and Strap | 88g | 3.10oz |
Ti Tent Stakes (each) | 7g | 0.25oz |
Grate | 15g | 0.53oz |
Wire Roll | 9g | 0.32oz |
Evernew 1300ml pot with lid | 133g | 4.69oz |
Pot Only | 98g | 3.46oz |
Lid Only | 35g | 1.23oz |
Full Wood Set Up (With Pot) | 282g | 9.95oz |
Plastic bag | 7g | 0.25oz |
Evernew Stuff Sack | 23g | 0.81oz |
Total (All wood, alcohol, and hexamine items) | 345g | 12.17oz |
Note: You'd probably never carry all wood, alcohol, and hexamine items at once. Why would anyone carry both the hexamine and alcohol set ups simultaneously? The total listed above is for reference only.
OK, but does it simmer?
ReplyDeleteAside from the question of whether you can burn wood, finding fuel and getting the fire started is the big thing. Around here, dead standing wood is usually the best source of fuel for a small fire like yours. A dead limb on a tree is usually drier than one on the ground. Around here, we are mostly hardwoods with a few softwoods mixed in. A small fire, like yours, made with trigs and small branches, won't require much in the way of tools. Getting a small wood fire started may not be as easy as it might seem and you don't want to waste any of your liquid fuel, if you plan to need it later. Having something that will help start a wood fire is probably a good thing. I carry a bit of rolled up newsprint that has been soaked in a mixture of beeswax and paraffin. You just peel off a little strip and light it. You might consider carrying a handfull of wood pellets for fuel. I have never used them, but hear about them occasionally. I understand that you can buy them at home stores. Yes, there's always the question of why should you carry fuel when you can find it along the way, but I don't think that it's a bad idea to carry enough for your next meal. That way the foraging comes after you've eaten.
Nice review and glad to see more reinforcement of my purchase choice; well I didn't get the inferno option but otherwise I have the same setup. Really impressed with it so far.
ReplyDeleteBill,
ReplyDeleteThanks for all the tips.
As for simmering, that depends largely on the fire skills of the individual. I might take it out later today or tomorrow and see if I can do some real cooking with the darned thing.
HJ
@Aushiker,
ReplyDeleteYes, this is the nicest UL system I've seen. It really is a flexible system, and it works well on all fuels. Some things I've seen can be kludged into working with fuels other than their primary fuel, but they're just that -- a kludge. There's no kludging with the Ti-Tri.
HJ
Great review as always. I have been using Ti cones since the prototype came out in 2007. I think the design is brilliant and far better than any of the other wood stoves out there. I pack mine in the plastic Caldera Caddys and Antigravity Gear cozys, which I also use for mugs and which creates a complete cooking system for two. I have not used the Inferno insert, but have been very satisfied without it.
ReplyDeleteThe big advantage I see is that I can use it for extended trips without resupply and have a virtually unlimited fuel supply. I have used them in the winter with good results. If I'm going to be camping in a spot where fuel availability is in question, then I pick up some branches on my way and strap them to the outside of my pack. Sitll less weight overall than packing fuel.
A couple points: My experience is that Trail Designs will make you a cone that fits the pot you already have if you special order it. For assembling the cone, rather than sliding the dovetail together, place the outside dovetail directly over the inner and snap them together. Then, to disassemble, slide them appart. I ran into a problem sliding them together where the inner one bent.
Thanks; glad you liked the review.
ReplyDeleteI really like the Ti-Tri on wood. It's got nice capacity and is really easy to load.
I'm not quite sure about snapping the dovetail together. I guess if snapping works, go for it, but I haven't had any problems with sliding it together.
HJ
You got me interested but then I thought about the woodsmoke. Woodsmoke soaks into everything. Right now I use a lightweight woodstove (tigoat cylander stove) and it allows us to cook inside of the tent with no woodsmoke. The stove weighs around a pound (i think - it might even be lighter). I did a 10 day trip into the Brooks range of Alaska and all we used to cook was the woodstove. We found wood to burn up to 4500 feet elevation. The tent and woodstove weighed 4 pounds total. hard to beat a woodstove! And with a woodstove i am not likely to use my pocket rocket in the future. Patrick
ReplyDeleteIf you can get a tent and a wood stove together for only four pounds, that's FABULOUS. I don't know how you did it though.
ReplyDeleteThe Ti-Tri shown here weighs about four and one-half ounces in full wood mode which is very light. I cook outside the tent, so I don't have too much trouble with wood smoke affecting things in the tent.
HJ
Hi! Are you still as enthusiastic about this ti-tri stove system as you where back in 2012 when you wrote this? Curious about this...but it seems quite expensive, GBP 175 + postage! Have you tried the Littlbug Jr stove with accessories, for wood buring and for alcohol (with or without supplemental pot hanging chain). It can also be placed in a supplemental firebowl to protect the ground, but this can also be hung hung from a tree with supplemental chain...Very nice and fairly light weight (steel not titanium though), but not very well know if you ask me. see Littlbug.com.
ReplyDeleteBut then again, if you buy your own gear for reviews, you probably can understandably not afford to try everything on the market :)
fyi the price I quoted for the ti-tri (GBP 175) was for a full set Sidewinder Ti-Tri Stove, Toaks 1350ml Pot, Wood Burner and Floor
DeleteI have heard of the Littlebug, but I haven't tried it. To date, I haven't found anything I like better than the Ti-Tri. I'm still using it quite a bit, especially when weight counts. I used my Ti-Tri on my John Muir Trail trip, for example, this past summer.
DeleteAnd, yes it is expensive, but specialty gear is made in small lots. They don't have the volume that the big companies like Primus and MSR have. They have to charge more; it's just the nature of the beast.
HJ