
QuietStove.com

Showing posts with label pre shaker jet. Show all posts

Thursday, March 3, 2011

Stove of the Week: MSR Whisperlite (Pre-Shaker Jet)

In 1980 Mountain Safety Research (MSR) was bought out by Recreational Equipment Incorporated (REI).  Prior to the buy out, MSR was mainly a fairly specialized equipment manufacturer catering mostly to mountaineers. REI wanted to change that and turn MSR into a company that would cater to a wider audience.  One of the first big projects undertaken during the REI years was the MSR Whisperlite.

Prior to the Whisperlite, MSR stoves all had roarer type burners.  As the name "roarer" implies, such burners tend to be rather noisy.  MSR therefore decided to go with a different type of burner, a baffled burner, which is a far quieter type of burner.  To herald this change, MSR named the stove the Whisperlite. Indeed, I've had friends remark on just how quiet the Whisperlite is compared to other stoves. The "lite" portion of the stove's name, as one might expect, reflects the fact that the Whisperlite was at that time MSR's lightest stove.  MSR had another goal:  to produce an economical stove that would have broader appeal than the higher end stoves that they had theretofore been producing.  In this regard, MSR hit a home run, launching one of the most successful of modern white gasoline type stoves.  Introduced in 1984, the Whisperlite is still sold today.  Backpackers quickly adopted the Whisperlite despite its occasional clogs.  In a survey of through hikers on the Appalachian Trail in 1989, the number one most commonly carried stove was the Whisperlite, and this only five years after its introduction.  In about 1996, the Whisperlite's jet was redesigned.  MSR made the jet larger and inserted a weighted cleaning needle.  When the stove was shaken up and down, the weighted needle would move in and out of the jet's orifice, clearing the jet.  MSR named this redesigned jet after its method of use:  the shaker jet.  Unfortunately, MSR stoves with the shaker jet generally do not simmer as well as pre-shaker jet models. Now why the average person couldn't simply use the wire pricker to clean the jet I am not sure, but MSR apparently felt that they needed to do something to allay customer's fears about clogs.

Well, let's have a look shall we?  This week's stove is the pre-shaker jet version of the MSR Whisperlite.    The early Whisperlites came with this red stuff sack, marked with the MSR "Matterhorn" logo:

These older stuff sacks are in my opinion nicer than the newer black stuff sacks.  The old red stuff sacks included small pockets which were handy for holding spares, matches, a lighter, etc.

The Whisperlite is a fairly compact stove, certainly more compact than its predecessors, the XGK line of stoves or the Firefly. 
I should mention that this particular stove is special to me:  This is my very first pack stove.  I bought it from Sport Chalet in La Canada in about 1987.  It has served me faithfully for now almost a quarter of a century with very few problems.
The early Whisperlites came with a fabric covered rubber fuel hose that was crimped at both ends.

Later versions came with a woven metal sheath with brass fittings on either end.  The later fuel lines are generally superior to the earlier ones.

Well let's assemble her and get ready to fire her up.  Here are the basic components (clockwise from top, left):  The burner, the fuel bottle with windscreen wrapped around it and fuel pump in place, and the heat reflector.  Tip: Note that I have wrapped the windscreen around the fuel bottle.  This helps prevent the windscreen from getting all bent up when packed and avoids having to fold the windscreen for storage.  The points at which windscreens are folded often become points of failure.  Believe it or not the windscreen shown in the photo is the original windscreen that came with this stove that I purchased in about 1987.  I keep the windscreen wrapped as shown, and then I put the whole ensemble in a plastic bag before I put the fuel bottle in my pack.  This technique protects not only the windscreen but also the contents of the pack from damage.  I also put my burner in a small plastic bag before placing it in the stuff sack.  This keeps the inside of the stuff sack clean.  Tip:  Note also that I keep the pump in the bottle when in the field.  I leave the bottle's cap at home.  Do be sure to release the pressure when the stove is not in use.  Do not release the pressure near the stove when the stove is hot.  Release the pressure away from flame or heat sources.

Here's a photo of the heat reflector unfolded.  Note the hole in the center.
The legs of the stove, while still folded, are inserted through the hole...
...then the heat reflector is moved up around the mid section of the burner...
...and then the legs are rotated into position.  The "hourglass" shape of the legs holds the heat reflector in position above the fuel line and below the burner.
This is a good design and when combined with the windscreen makes for efficient cooking.  In later models of the heat reflector, MSR removed the center hole.  This is most likely a cost cutting measure.  The heat reflector, instead of sitting just below the burner now sits underneath the whole stove.  This is a bad idea for two reasons:  1.  Now the reflector is farther away from the burner which is less efficient and 2. the aluminum reflector is slick.  Putting a stove on a slick surface on uneven ground invites the disaster of the spilled supper.  The original design was better.  One can improve the newer heat reflectors by cutting the hole oneself or one can simply omit the heat reflector.  The heat reflector does make the stove more efficient, but the reflector is not essential on newer stoves.  On older stoves that have the fabric covered fuel line, I recommend that you always use the heat reflector lest heat damage the fuel line in some way.

After the reflector is in place, emplace the windscreen.  Early MSR windscreens had a diagonal cut on the lower corners of the windscreen.  When the ends were joined, a small "V" shaped opening remained.  One is supposed to thread the fuel line through the "V" as shown.

The only problem with this is that if one has a smaller pot, then a substantial gap will exist between the edge of the pot and the windscreen.  Wind can enter via this excessively large gap, reducing the effectiveness of your stove.
What I prefer to do is to wrap the windscreen more tightly and hold it in place with a paper clip.
Note that in the second photo, the gap is reduced but not eliminated.  Because of the reflector, it's difficult to reduce the gap further than shown, but the reduced gap that we do have should buy us some increased efficiency.  If one were having trouble in higher winds, one could curl the edges of the heat reflector upwards so that the windscreen could be drawn more tightly around the pot.

Now, in drawing the windscreen more tightly around the pot, we've closed the little "V" shaped opening, but this is no big deal.  Simply place the windscreen on top of the fuel line.

Yes, there is now a bit of a gap between the ground and the lower edge of the windscreen, but in practice I have not found this gap to cause any trouble.  In really windy conditions if wind were sweeping in through this small gap, one could pile up dirt to close the gap.

Now, let's get some water from the creek.  By the way, boiling water is the most effective treatment for killing water borne pathogens and is more effective than filtering, ultraviolet treatment, or chemical treatment.

Now, we'll need to prime the stove.  You can prime the stove with the stove's own fuel, white gasoline, but I prefer to bring a small squeeze bottle of denatured alcohol.
Why alcohol?  First, it's hard to control the amount of fuel dispensed when using the stove's own fuel.  Too much fuel, and you can get a very large "soccer ball sized" fireball (MSR's words).  It's easy to control how much alcohol is dispensed from a squeeze bottle.  Second, alcohol burns more cleanly and leaves less soot on your stove.  Third, alcohol is less volatile which further reduces the chance of a fireball.  To prime, squirt in some alcohol, fire it up, let it burn down a bit, and then just as the priming flame is about to go out, open the stove's valve a bit to add fuel.  I typically open the valve just a crack and then immediately close it, allowing the flame to burn down a bit before opening the valve again.  I go through a couple of iterations of opening the valve a crack, closing the valve, letting the flame burn down a bit, and then opening the valve again before I leave the valve open.  This sounds complicated, but after a few times of doing it, it becomes second nature.

When your stove is fully warmed up, your flame should be a nice steady blue and should look something like this.
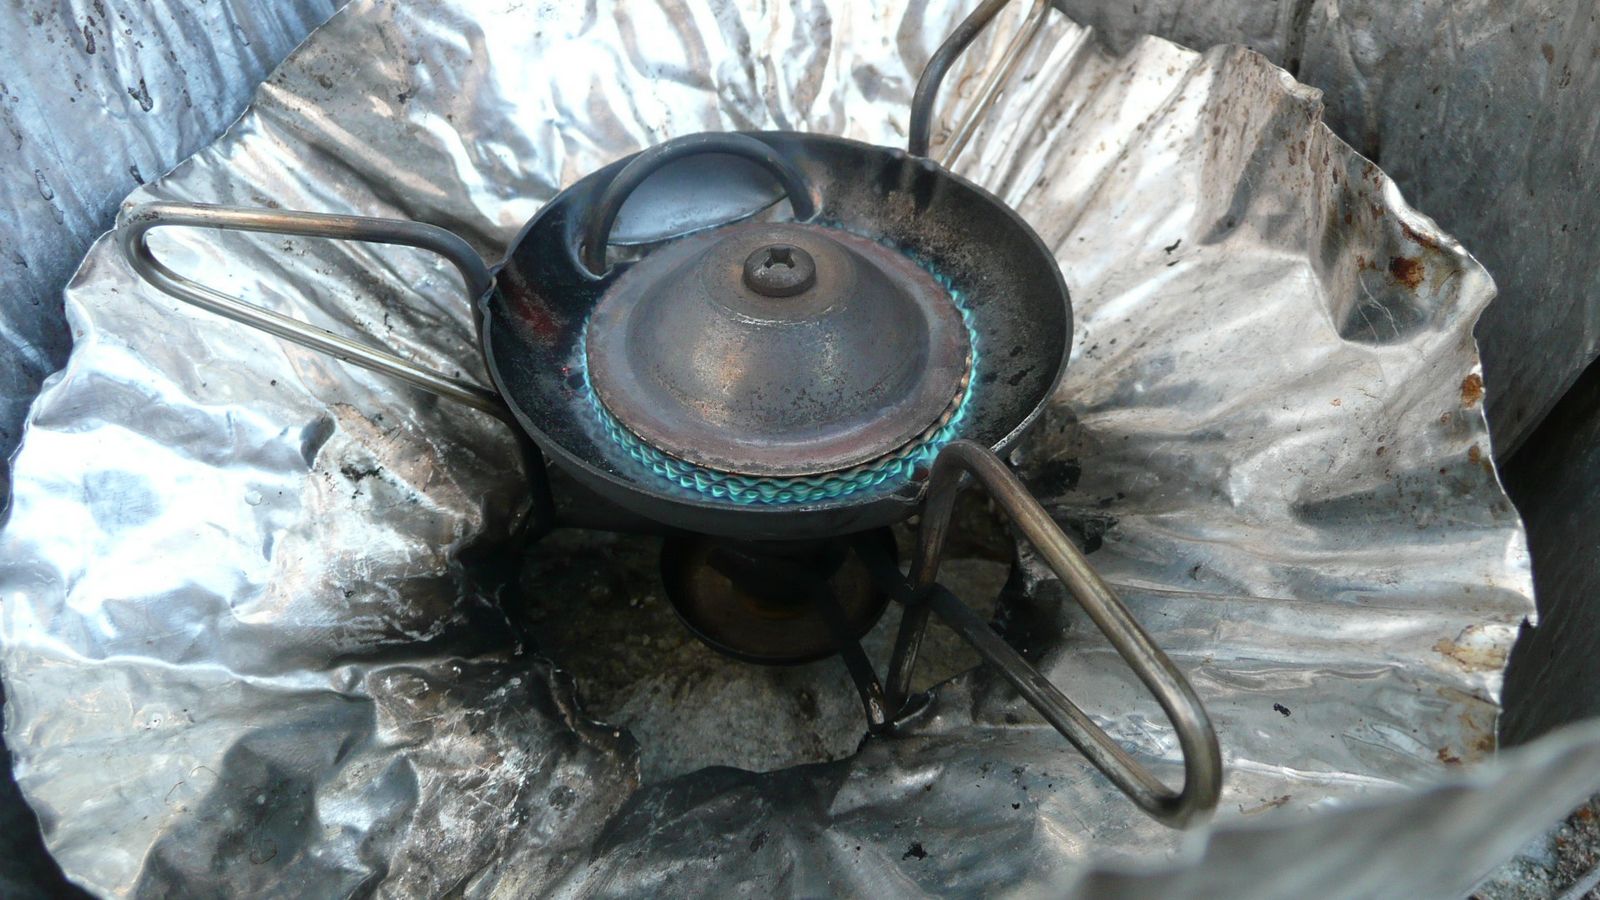
As I mentioned, with pre-shaker jet Whisperlites, it is possible to get them to a relatively low flame.  Compare this flame.
With this flame.
Yes, a Whisperlite can simmer.  It's not automatic, but it can be done fairly easily on a consistent basis.

Well, it looks like my water is boiling,

so it's time I had a cup of cocoa...

...here in this little nook that I call "Stove Test Area 2.".


I thank you for joining me on another adventure in stoving.

HJ.

The MSR Whisperlite
What's good about it?
Economical
Quiet
Fairly compact
Reasonably powerful (not as powerful as an XGK)
Reasonably Reliable (not as reliable as an XGK)
Stable
Efficient

What's bad about it?
Difficult to simmer (although pre-shaker jet models simmer pretty well)
The wire pot supports are difficult to get back into "true" if they get bent.  (so don't bend them!)
The fuel line is a little stiff particularly when compared to newer stoves like the Simmerlite.
A tad heavy when compared to newer stoves like the Simmerlite.

Overall, recommended.  This is a good, economical basic stove for those who want a liquid fueled stove.

Wednesday, March 2, 2011

Stove of the Week: MSR XGK II (Pre-Shaker Jet)

Great strides are made by great men.  In the world of modern pack stoves, one man stands out:  Mr. Larry Penberthy, founder of MSR. Larry Penberthy (March 11, 1916 - November 24, 2001) was an iconoclastic genius. 

Behold his creation:  what is now known as the MSR XGK stove:

Penberthy observed that one of the leading contributers to the cold weather killer, hypothermia, was dehydration.  Why were mountaineers getting dehydrated?  When all the world around you is cold, hard, and white, water is tough to come by.  The stoves of the day were largely tank mounted brass stoves, beautiful works of art still cherished to this day, but hardly light.  Many mountaineers, unwilling to pack their excessive weight faced dehydration instead, risking hypothermia.  Penberthy, a mountaineer himself and a first rate engineer, set out to design a stove.  He noticed that climbers of the day tended to carry spare fuel in Sigg aluminum fuel bottles.  Why, he reasoned, should people carry in effect two fuel tanks (one as part of the stove and one in the form of the Sigg bottle)?  He designed a pump that would screw into a Sigg fuel bottle, turning the bottle into a pressurized fuel tank capable of delivering fuel to a burner.  His stove, now no longer sitting on top of a fuel tank was lower to the ground, making it relatively stable and bringing it down out of the wind.  He then added a sheet of approximately 6" x 31" heavy aluminum foil as a windscreen.  On stoves where the tank was directly attached to the burner, a windscreen of Penberthy's design could trap too much heat and cause the fuel tank to explode.  On this new type of stove where the fuel tank was separate, a windscreen could be safely used.  Today, we look at things like a fuel bottle used as a fuel tank with the fuel well away from the burner and an aluminum windscreen as obvious.  Let us not forget that it took a visionary like Penberthy to come up with something so simple and yet so effective.

He also made his stove field maintainable:  The jet could be unscrewed for cleaning or replacement with a simple slot head screwdriver.  He added a cable that ran down the fuel line that could be used to scour out carbon deposits.  Penberthy made the stove solid as though his life depended on it -- for in fact his life did.  Penberthy climbed using his own inventions.  Penberthy designed not only his brilliantly innovative stove but also ice axes, helmets, and other climbing equipment.  When taken as a body of work, his genius is clearly seen.

Penberthy's stove design revolutionized climbing stoves, providing a relatively light weight, relatively wind proof, effective stove, a stove that climbers were not only willing but glad to carry.  Sadly perhaps, Mr. Penberthy's design may have contributed to the demise of the classic brass pack stove.  Penberthy's first production stove was the Model 9.  The Model 9 was a white gasoline only stove.  The Model 9 was then joined by the "MF," a multi-fuel stove.  Later, the Model 9 became the G (gasoline) stove, and the MF became the GK (gasoline/kerosene) stove.  Later still, the G and GK stoves were merged into one stove, the XGK.  It is by the moniker "XGK" that this line of stoves is generally known.  The XGK was supplanted by a somewhat redesigned XGK II which dropped the wire coil around the generator, removed the surge dampener, eliminated the flint ignition, and did away with the aluminum cup which used to come with the XGK.  The XGK II had three versions:  the first without a shaker jet, the second with a self cleaning "shaker" jet, and the third also with a shaker jet, a redesigned spreader plate, and a new "X" type of removable pot support. Eventually, the XGK II was replaced by today's XGK EX.

To this day, many a mountaineer swears by the XGK.  In cold weather, the efficient, powerful XGK is the snow melting stove of choice.  Recently, I noted with interest some photos on a polar explorer's web page.  The stove in the photos?  The MSR XGK. A year or so ago, I had an MSR XGK on the table in front of me at a Sierra Club function.  One of the members, a serious climber, remarked, "on Aconcagua, that was the only stove that worked."  Aconcagua (22,841 ft/6962 m) is the highest point in the Western Hemisphere. 
It is only fitting that in my series on winter capable stoves that the XGK be included.

This week's stove is the first of the XGK II's, the pre-shaker jet XGK II.

The pre-shaker jet XGK II originally came in a long black bag, shown here beside a more modern XGK II bag:

The bag was marked with the old "Matterhorn" MSR logo.

The stove came with the following contents:  The stove itself, a third generation gray and black pump, a windscreen, a heat reflector, an alcohol squirter bottle, a stuff sack (the bag in the photo is not the original XGK II type bag), instructions, and a small parts and maintenance kit.

A closer look at the contents
 
This interesting insert came with this particular XGK II, an early model XGK II evidently produced shortly after the cutover from the XGK to the XGK II.  This insert was intended to supplement the regular instructions -- which were the instructions for the original XGK.

The original instructions say some fascinating things.  Take number "6" below.  It says "Use kerosene as a fuel and provide adequate ventilation..."  The rest has been crossed out by hand with a black marker, but it's still readable and says, "should weather conditions necessitate the use of the stove inside a tent."  There you have it, folks, the "elephant in the living room."  Everyone knows that in really bad weather that you have to cook inside your tent, yet every modern stove manufacturer prints warnings in big letters to never cook inside a tent.  Things were different back then.  They leveled with you instead of hiding behind their lawyers.

Nowadays, MSR says "only use MSR bottles with MSR stoves."  That's a pretty funny thing to hear from MSR when you consider that MSR stoves were designed to work with Sigg brand bottles!  Indeed, the thread of every MSR pump and every MSR bottle is based on Sigg's threads.  Again, in the old days, MSR was a lot straighter with you.  These instructions, though hand crossed out, say "Exercise care in the selection and use of other manufacturers bottles."

Next, let's look at the pump.  This is MSR's third generation of pumps, the gray and black pump.  The very first pumps were white, the second generation, of which there were many variants, was yellow and black.

I won't go into all the details here, but basically the gray and black pump was a step backwards for MSR.  The gray and black pump is inferior in every way except for the re-designed air supply tube which is an improvement.  MSR took a step backwards?  What happened?  Well, in 1980, Larry Penberthy sold MSR to REI.  REI started making changes to cut costs.  They redesigned the XGK, eliminating several costly items like the surge dampener, the flint ignition, the protective aluminum cup, and the coil on the generator.  They also completely redesigned the pump, coming up with the gray and black pump pictured above, a pump far less robust but much cheaper to produce.  MSR then gained a reputation for having crappy, unreliable pumps.  The next two iterations (red and gray, red and aquamarine) of MSR pumps were no better than the gray and black and possibly were worse.  Fortunately for stove users, MSR came out with their current "duraseal" pump some time around 2005, a much improved pump.  Is the duraseal as good as the old yellow and black pumps?  Perhaps, but the jury is still out on that.

Well, let's have a look at the stove itself, shall we?
Note the rigid fuel line.  The fuel line, when locked into the fuel tank (via the pump), forms part of the support of the stove.  The XGK is actually a fairly stable stove despite its relatively small base.  In the photo above, you will note the aluminum foil collar around the stove.  This is the heat reflector and is designed to reflect heat up to the pot, maximizing efficiency.  Note also the large diameter of the generator (pre heat loop).  The XGK can handle some pretty crude fuels.  Indeed, many a mountaineer has benefited greatly from the XGK's rugged, robust design when burning rather questionable third world kerosene while high on a remote mountain.

Included with this stove are the below shown parts:  a wrench/tool, a pricker for cleaning the jet, a "sintered" brass fuel filter, and a spare jet.

Note the letters stamped into the jet, an "X" and a "K".  The "X" indicates that this is an XGK jet (as opposed to any of MSR's other stoves), and the "K" indicates that this is the jet for kerosene.  The jet that comes installed with the stove is typically marked "X" and "G" indicating that the factory installed jet is the XGK jet for gasoline.  The "G" jet should be used with Coleman fuel, true white gasoline, automotive gasoline, naptha, panel wipe, "environmental" gasoline (e.g. Aspen 4T), aviation gasoline etc.  The "K" jet should be used with kerosene, diesel, jet fuel, Kleen Heet, etc.  Note:  Coleman type fuel and kerosene will always be the best fuels for pretty much any petroleum based liquid fueled stove.  In a pinch, you can burn some of these other fuels, but your stove will not run as well, will clog more (hope you know how to field maintain your stove), and may produce some pretty noxious emissions.  Use "alternate" fuels (fuels other than Coleman type fuel and kerosene) only when you have to.

Also included was this small squeeze bottle, intended to be used for alcohol for priming.
Alcohol is the traditional means of priming stoves that run on petroleum based liquid fuels.  It burns more cleanly (especially when compared to the nasty business of priming with kerosene), is easier to control the amount dispensed, and is far less prone to producing a fireball that can shoot up from the stove. Fireballs are particularly common when priming with gasoline type fuels.  Oddly, MSR no longer encourages priming with alcohol.

Here, the stove is set up and ready for use.  I've removed the windscreen for visibility's sake.

Here, the windscreen has been emplaced.

Time to fire her up and put the kettle on!

The XGK passes the "tea test" with ease.

Let's have a look at the flames, shall we?  The XGK is known for it's power and rightfully so.

  But note this shot here:
Now, I won't call that a simmering flame, well, not exactly, but that is a pretty low flame.  It took some fiddling, but I was able to get some relatively low flames out of an XGK.  I and other owners of older XGK's have noted that older XGK's are capable of a lower flame than newer XGK's.  Why might this be?  The pre-shaker jet XGK II and the shaker jet XGK II are so very similar; shouldn't the flames be the same?  I honestly don't know why the flames are different, but possibly there's something about having more empty space inside the jet that makes simmering more difficult -- empty space that has to be there in order for the shaker to, well, shake.  That's my theory anyway.  I notice the same thing on my pre-shaker jet MSR Whisperlite, that it simmers better than any shaker-jet Whisperlite.  This isn't isolated.  I've used multiple pre-shaker jet MSR stoves.  Every pre-shaker jet MSR stove that I've used has consistently simmered better than any shaker jet MSR stove that I've used.

Well, there you have it, the mountaineer's friend, the ultimate snow melting machine, the MSR XGK.

Thank you for joining me on another adventure in stoving,

HJ

The MSR XGK
What's good about it?
Powerful
Reliable
Stable
Efficient

What's bad about it?
Expensive (The XGK line in general -- although used ones can be a true bargain)
Loud
Difficult to simmer (although pre-shaker jet models simmer better)
The swiveling wire pot supports tend to move around too much during use.  (Newer models have done away with the old swiveling pot supports)
The rigid fuel line, while adding significant stability, is a bit hard to pack  (Pretty minor issue)

Overall, highly recommended.