In 1980 Mountain Safety Research (MSR) was bought out by Recreational Equipment Incorporated (REI). Prior to the buy out, MSR was mainly a fairly specialized equipment manufacturer catering mostly to mountaineers. REI wanted to change that and turn MSR into a company that would cater to a wider audience. One of the first big projects undertaken during the REI years was the MSR Whisperlite.
Prior to the Whisperlite, MSR stoves all had roarer type burners. As the name "roarer" implies, such burners tend to be rather noisy. MSR therefore decided to go with a different type of burner, a baffled burner, which is a far quieter type of burner. To herald this change, MSR named the stove the
Whisperlite. Indeed, I've had friends remark on just how quiet the Whisperlite is compared to other stoves. The "lite" portion of the stove's name, as one might expect, reflects the fact that the Whisperlite was at that time MSR's lightest stove. MSR had another goal: to produce an economical stove that would have broader appeal than the higher end stoves that they had theretofore been producing. In this regard, MSR hit a home run, launching one of the most successful of modern white gasoline type stoves. Introduced in 1984, the Whisperlite is still sold today. Backpackers quickly adopted the Whisperlite despite its occasional clogs. In a survey of through hikers on the Appalachian Trail in 1989, the number one most commonly carried stove was the Whisperlite, and this only five years after its introduction. In about 1996, the Whisperlite's jet was redesigned. MSR made the jet larger and inserted a weighted cleaning needle. When the stove was shaken up and down, the weighted needle would move in and out of the jet's orifice, clearing the jet. MSR named this redesigned jet after its method of use: the shaker jet. Unfortunately, MSR stoves with the shaker jet generally do not simmer as well as pre-shaker jet models. Now why the average person couldn't simply use the wire pricker to clean the jet I am not sure, but MSR apparently felt that they needed to do something to allay customer's fears about clogs.
Well, let's have a look shall we? This week's stove is the pre-shaker jet version of the MSR Whisperlite. The early Whisperlites came with this red stuff sack, marked with the MSR "Matterhorn" logo:
These older stuff sacks are in my opinion nicer than the newer black stuff sacks. The old red stuff sacks included small pockets which were handy for holding spares, matches, a lighter, etc.
The Whisperlite is a fairly compact stove, certainly more compact than its predecessors, the XGK line of stoves or the Firefly.
I should mention that this particular stove is special to me: This is my very first pack stove. I bought it from Sport Chalet in La Canada in about 1987. It has served me faithfully for now almost a quarter of a century with very few problems.
The early Whisperlites came with a fabric covered rubber fuel hose that was crimped at both ends.
Later versions came with a woven metal sheath with brass fittings on either end. The later fuel lines are generally superior to the earlier ones.
Well let's assemble her and get ready to fire her up. Here are the basic components (clockwise from top, left): The burner, the fuel bottle with windscreen wrapped around it and fuel pump in place, and the heat reflector.
Tip: Note that I have wrapped the windscreen around the fuel bottle. This helps prevent the windscreen from getting all bent up when packed and avoids having to fold the windscreen for storage. The points at which windscreens are folded often become points of failure. Believe it or not the windscreen shown in the photo is the original windscreen that came with this stove that I purchased in about 1987. I keep the windscreen wrapped as shown, and then I put the whole ensemble in a plastic bag before I put the fuel bottle in my pack. This technique protects not only the windscreen but also the contents of the pack from damage. I also put my burner in a small plastic bag before placing it in the stuff sack. This keeps the inside of the stuff sack clean.
Tip: Note also that I keep the pump in the bottle when in the field. I leave the bottle's cap at home. Do be sure to release the pressure when the stove is not in use.
Do not release the pressure near the stove when the stove is hot. Release the pressure away from flame or heat sources.
Here's a photo of the heat reflector unfolded. Note the hole in the center.
The legs of the stove, while still folded, are inserted through the hole...
...then the heat reflector is moved up around the mid section of the burner...
...and then the legs are rotated into position. The "hourglass" shape of the legs holds the heat reflector in position above the fuel line and below the burner.

This is a good design and when combined with the windscreen makes for efficient cooking. In later models of the heat reflector, MSR removed the center hole. This is most likely a cost cutting measure. The heat reflector, instead of sitting just below the burner now sits underneath the whole stove. This is a bad idea for two reasons: 1. Now the reflector is farther away from the burner which is less efficient and 2. the aluminum reflector is slick. Putting a stove on a slick surface on uneven ground invites the disaster of the spilled supper. The original design was better. One can improve the newer heat reflectors by cutting the hole oneself or one can simply omit the heat reflector. The heat reflector does make the stove more efficient, but the reflector is not essential on newer stoves. On older stoves that have the fabric covered fuel line, I recommend that you always use the heat reflector lest heat damage the fuel line in some way.
After the reflector is in place, emplace the windscreen. Early MSR windscreens had a diagonal cut on the lower corners of the windscreen. When the ends were joined, a small "V" shaped opening remained. One is supposed to thread the fuel line through the "V" as shown.
The only problem with this is that if one has a smaller pot, then a substantial gap will exist between the edge of the pot and the windscreen. Wind can enter via this excessively large gap, reducing the effectiveness of your stove.
What I prefer to do is to wrap the windscreen more tightly and hold it in place with a paper clip.
Note that in the second photo, the gap is reduced but not eliminated. Because of the reflector, it's difficult to reduce the gap further than shown, but the reduced gap that we do have should buy us some increased efficiency. If one were having trouble in higher winds, one could curl the edges of the heat reflector upwards so that the windscreen could be drawn more tightly around the pot.
Now, in drawing the windscreen more tightly around the pot, we've closed the little "V" shaped opening, but this is no big deal. Simply place the windscreen on top of the fuel line.
Yes, there is now a bit of a gap between the ground and the lower edge of the windscreen, but in practice I have not found this gap to cause any trouble. In really windy conditions if wind were sweeping in through this small gap, one could pile up dirt to close the gap.
Now, let's get some water from the creek. By the way, boiling water is the most effective treatment for killing water borne pathogens and is more effective than filtering, ultraviolet treatment, or chemical treatment.
Now, we'll need to prime the stove. You can prime the stove with the stove's own fuel, white gasoline, but I prefer to bring a small squeeze bottle of denatured alcohol.

Why alcohol? First, it's hard to control the amount of fuel dispensed when using the stove's own fuel. Too much fuel, and you can get a very large "soccer ball sized" fireball (MSR's words). It's easy to control how much alcohol is dispensed from a squeeze bottle. Second, alcohol burns more cleanly and leaves less soot on your stove. Third, alcohol is less volatile which further reduces the chance of a fireball. To prime, squirt in some alcohol, fire it up, let it burn down a bit, and then just as the priming flame is about to go out, open the stove's valve a bit to add fuel. I typically open the valve just a crack and then immediately close it, allowing the flame to burn down a bit before opening the valve again. I go through a couple of iterations of opening the valve a crack, closing the valve, letting the flame burn down a bit, and then opening the valve again before I leave the valve open. This sounds complicated, but after a few times of doing it, it becomes second nature.
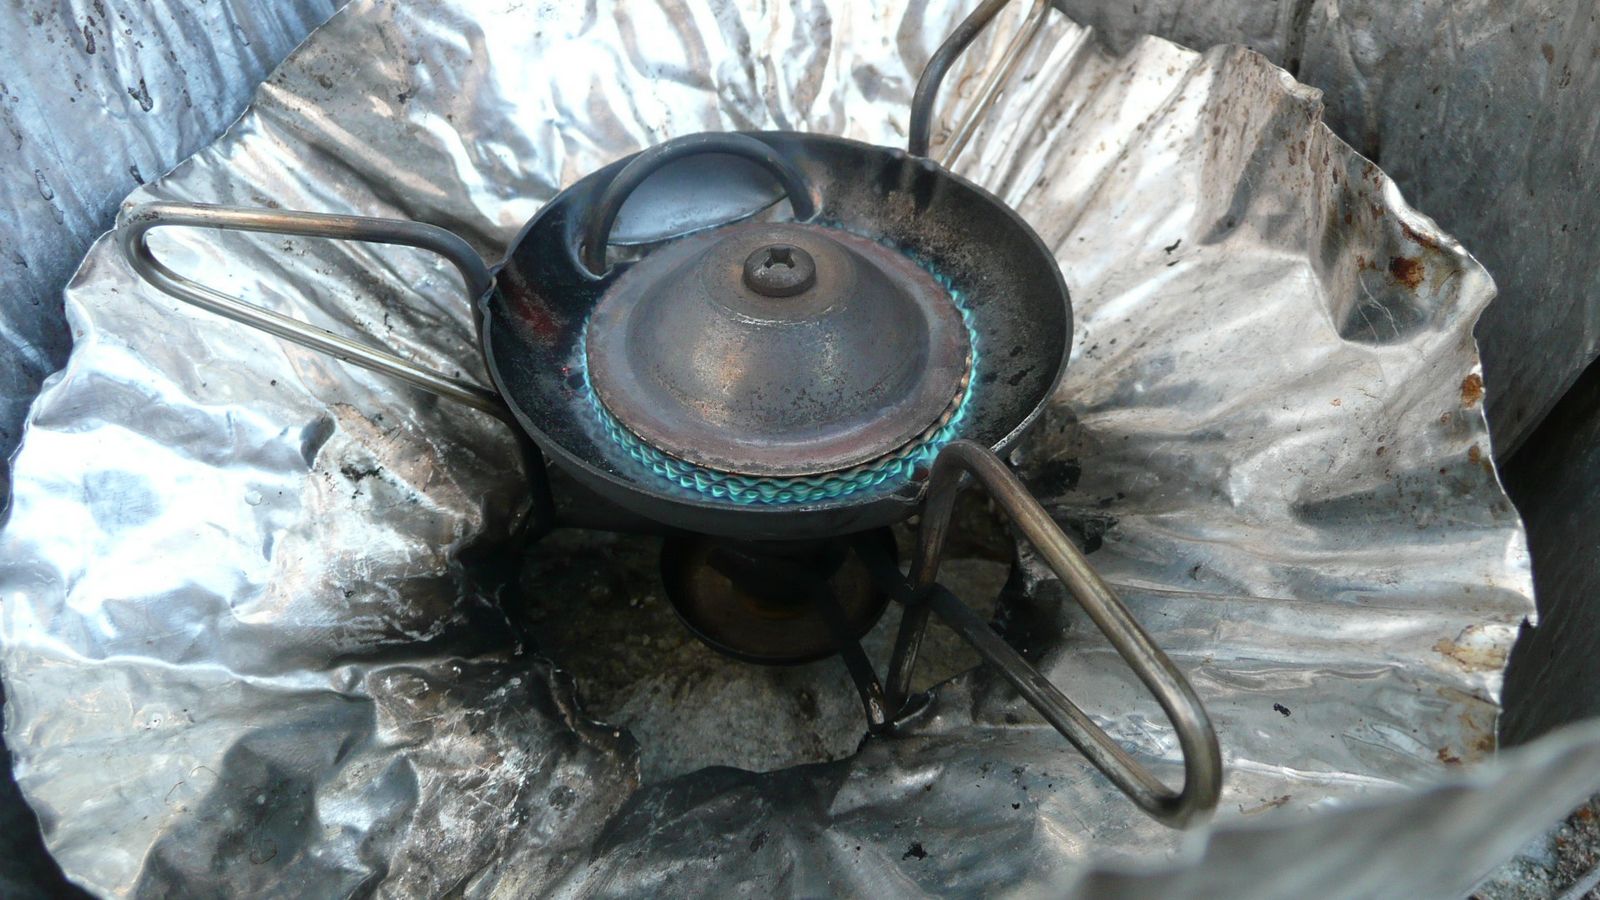
When your stove is fully warmed up, your flame should be a nice steady blue and should look something like this.
As I mentioned, with pre-shaker jet Whisperlites, it is possible to get them to a relatively low flame. Compare this flame.
With this flame.
Yes, a Whisperlite
can simmer. It's not automatic, but it can be done fairly easily on a consistent basis.
Well, it looks like my water is boiling,
so it's time I had a cup of cocoa...
...here in this little nook that I call "Stove Test Area 2.".
I thank you for joining me on another adventure in stoving.
HJ.
The MSR Whisperlite
What's good about it?
Economical
Quiet
Fairly compact
Reasonably powerful (not as powerful as an XGK)
Reasonably Reliable (not as reliable as an XGK)
Stable
Efficient
What's bad about it?
Difficult to simmer (although pre-shaker jet models simmer pretty well)
The wire pot supports are difficult to get back into "true" if they get bent. (so don't bend them!)
The fuel line is a little stiff particularly when compared to newer stoves like the Simmerlite.
A tad heavy when compared to newer stoves like the Simmerlite.
Overall, recommended. This is a good, economical basic stove for those who want a liquid fueled stove.