QuietStove.com

Showing posts sorted by date for query leak. Sort by relevance Show all posts

Sunday, May 7, 2017

The MSR Windburner – New 1.8 Liter Size

The MSR Windburner is basically your best friend in really windy conditions.  Hungry?  Windburner.  Done.

Recently, I pulled into camp late, exhausted.  I didn't want to screw around with building a rock wall or crawling behind some boulders to cook.  With the Windburner, it basically doesn't matter.  There's no screwing around with trying to get your stove to work in wind.  It just works.  Boy, was I glad I had brought a Windburner that trip.

UPDATE 12 May 2017:  I have now created a Comparison of the 1.8 L MSR Windburner with the 1.8 L Jetboil Sumo.

For a more comprehensive look at Integrated canister stoves, please see:
For a look at the entire realm of Canister Stoves, please see:
The MSR Windburner with 1.8 L pot.
I think many people look at the Windburner as only a "personal" cooking system (i.e. for just one person), which it is – in its original form.  But no more.

When I wrote my initial review of the MSR Windburner, that's all that was available, a "personal" system with a one liter pot.  Yes, the Windburner is fast enough that you could just take turns, but if you had a meal that required a bit more capacity or you wanted to eat together, the Windburner, back then, really wasn't your set up.  Then MSR introduced their new 1.8 liter pot for the Windburner.
NOTE:  The burner is the same size for all versions of the Windburner.  All Windburner pots and pans fit with all Windburner burners.  The 1.8 L pot will, for example, work with the burner from a 1.0 L set.  Likewise the pan will fit the burner from either a 1.8 L set or a 1.0 L set.
The 1.8 L pot for the MSR Windburner
Now, I could just make this a slam-dunk review.  I mean, the 1.0 L size is a really great stove, so I could just say "same stove, bigger size, works great, the end," and be done with it, but I thought I'd say just a bit more – and there are a few changes as well that I thought I'd point out.

The bulk of the system is in fact the same, so by all means you should read my original review:  The New MSR Windburner.

Let me just say here that since the publication of my original review just over three years ago, the Windburner has become my absolute favorite desert backpacking stove.  Why?  Because it's always freaking windy in the desert.  Really windy.  And, no, sticking it behind a rock just doesn't cut it in high gusty winds.
The Whitewater River flowing into the California desert from the San Bernardino Mountains
When the desert winds come wailing down those desert canyons, there's no better stove than the MSR Windburner (well, maybe the MSR Reactor, but that's the same technology).  Trip after trip, the Windburner has earned my trust and confidence.  Whether desert canyons, open plains, or windswept ridges, this is the stove to have if you're going out into windy conditions.  If you're interested in my real world testing of the Windburner, please see my latest trip report:
The Road to Hell is Paved with... Weather Balloons?

Canister Stand
One of the things that's different here are the new, and I think improved, canister stand (sometimes also called a "canister legs" or "canister feet").
The new 1.8 L version of the Windburner comes with improved canister legs.
There were some complaints that the original canister stand that came with the Windburner took too much room and was too fragile.  MSR quickly put out an improved version 2.  This current version is the third version that I'm aware of, and it's a good one as far as I'm concerned.

The new Windburner canister stand folds
What's new and improved?  It stretchy and it folds.  There's nothing brittle or fragile about it.  You can easily find a place to pack it inside the capacious 1.8 L pot.
There's plenty of room inside the 1.8 L pot for a spoon, lighter, and the canister stand.
The new canister stand fits any size of canister.  One never knows what you may find in a small town.  All that may be available is some other brand of canister, a canister that does not have the same diameter as an MSR canister.  Coleman 220 g canisters for example are a little bit bigger than MSR 227 g canisters.  Likewise, the old Primus 220 g canisters are a little smaller than MSR 227 g canisters. If you've only got two settings on your canister stand (the width of an MSR 110 g or 227 g sized canister), good luck with other brands, especially if you're traveling in Asia where who knows what you'll find.  The new Windburner canister stand stretches and will fit just about any canister diameter from about 8 cm to about 12 cm.

What Fits Inside?

First, I wrap everything in a bandana, see above, so that I don't scratch up the pot.  With that in mind, the following will fit:
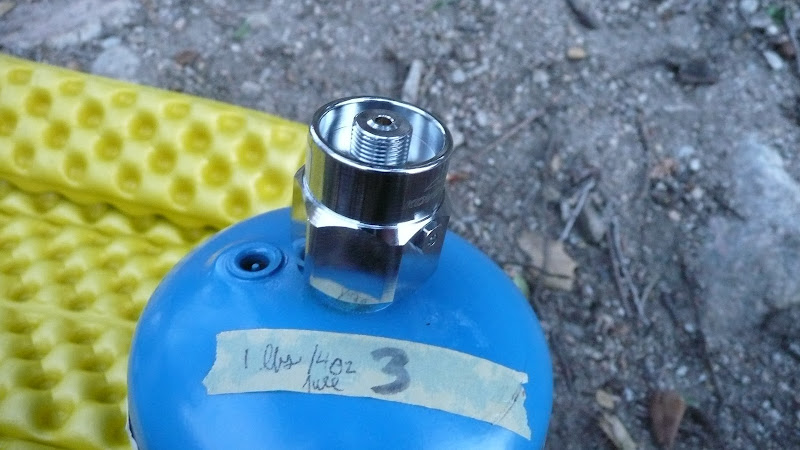
  • A 110 g sized canister fits easily with room to spare the burner, the 110 g canister, a spoon, the canister stand, and a large windproof torch type lighter.
  • A 227 g sized canister fits the burner, the 227 g canister, the canister stand, and a small lighter.  The canister stand is a bit of a trick, but if you fiddle with it a bit, it all fits.  I couldn't fit my particular spoon into the pot with the 227 g canister, but different spoons may fit.
  • A 450 g sized canister will fit, but not much else will fit.  You cannot fit in the burner if you put a 450 g sized canister inside.  The canister stand and a lighter will fit even with a 450 g size canister.  NOTE:  MSR does not recommend the 450 g size for use with the Windburner since the resultant assembly would be so tall.
The pot is fairly deep, so a 8.5"/21 cm spoon is a good fit.
Recommended Utensils
The 1.8 L pot is about 7 inches/17.5 cm deep.  I think a spoon (or other untensil) of about 8.5 inches/21.5 cm is about right.  In order to fit your spoon in the pot, you'll want a collapsing or folding spoon.  I recommend plastic so that you don't scratch up the nice anodized pot.  

The 1.8 L Windburner's bowl is a very functional 850 ml size.
The pot lid snaps to the bowl in addition to the pot.

The Bowl
The bowl has a nice improvement over the original:  It doesn't get jammed onto the pot.  On the original, sometimes the bowl would ride up too far on the pot, and it was all you could do to get it off again.  MSR, thankfully, has corrected the problem, and the bowl pops on and off the pot easily.

As with the original, the pot lid fits the bowl equally well as it fits the pot.  The bowl is a full 850 ml (about 29 fluid ounces) in size, which is great for mixing things in – or eating out of.  The bowl is well marked with volume increments.
The bowl has English units up through 24 oz/3 cups or metric units to 600 ml
For travel with two, one person can eat out of the bowl and the other out of the pot. No measuring cup is needed since both the bowl and the pot have volumetric markings.

Functional Pot Size
The pot has volume markings up to 44 oz and 1.4 L.
Maximum recommended fill is 1.0 L.
Maximum recommended fill is 1.0 liter for safety, however, I think that if a person were careful and the pot were on firm ground, 1.5 liters would be practical.  There's a lot of power in this stove, and a boil over is a real possibility.  Your best bet is to keep the stove on a relatively low setting if you're going to put more in it than the recommended maximum amount.  DO NOT let the stove boil over.  If the stove boils over, 212 Fahrenheit/100 C water will be spilling onto the canister beneath.  What's the maximum temperature specification of the canister per the EN 417 standard?  50 Celsius (122 Fahrenheit).  Boiling water is twice as hot as the specification.  That could get ugly.  Do not let the stove boil over.

The vents on the Windburner are on three sides of the pot.
Turn the side without the vents into the wind.
Wind Tips and Tricks
I haven't seen this documented anywhere on MSR's site, but I always turn the portion of the pot without vents into the wind.  This gives the best results in my experience.

Sometimes getting the stove lit can be a bit of a trick in high winds.  Regular matches and regular lighters don't work very well.  Personally, I like using a torch style lighter like the Soto Pocket Torch.  Note however any lighter with a piezoelectric ignition will become unreliable somewhere around elevations of 8000'/2400m or higher.  Fire steels also work well in windy conditions and are not affected by elevation.

In addition to the new 1.8 L pot (seen at left in blue), MSR has also introduced a Windburner skillet.
What Else Is New?
MSR has also introduced a hard anodized frying pan/skillet for use with the Windburner.  In my testing, I found the skillet to be a very capable cooking implement.
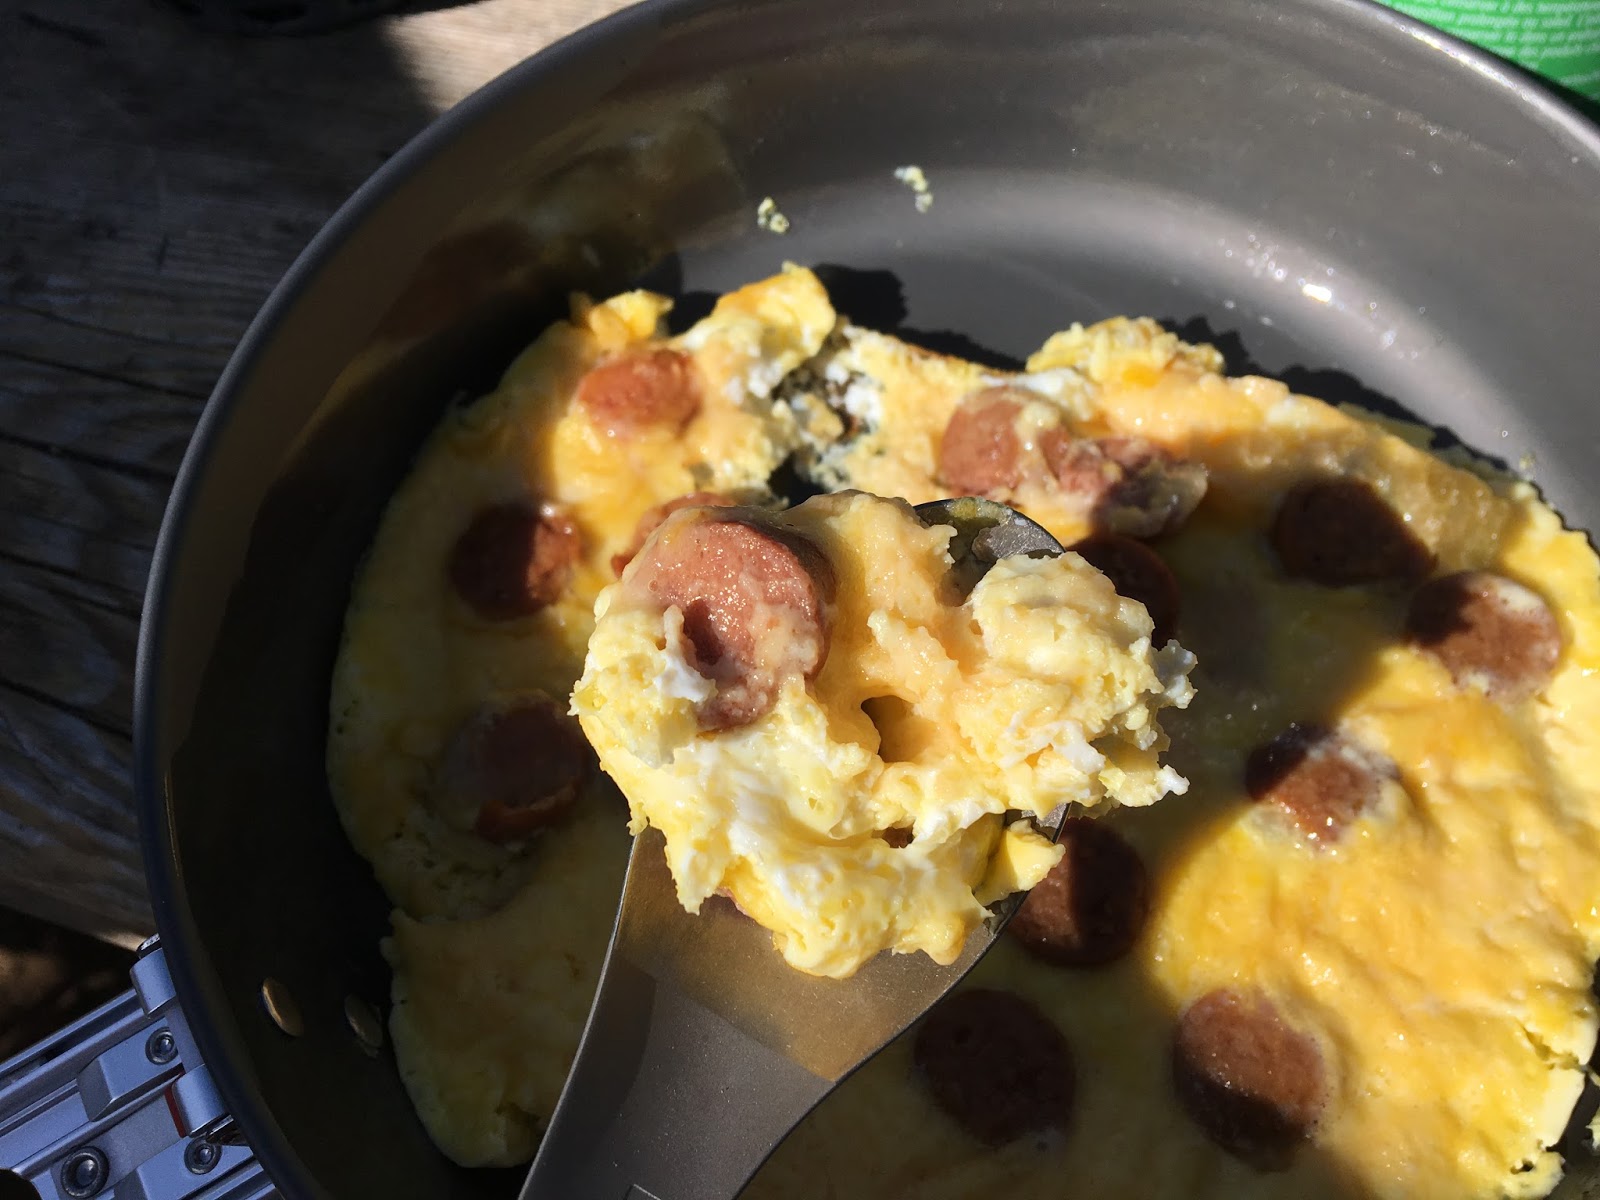
A very nice, moist omelette prepared in a Windburner skillet.

Problems
There is one minor problem with the 1.8 L MSR Windburner pot, and I'm a little disappointed here.  This same problem existed in the original version of the Windburner, and I really would have expected MSR to have corrected this by now.  The problem is simply this:  MSR hasn't really figured out a good way to secure the pot cozy in place.  Why does that matter?  Well, if the pot cozy slides up, as it sometimes does, then the lid will not seal fully.  You'll get a little dribble under the pour spot which will go down inside the cozy.
Using the pour spout on the the lid of the MSR Windburner.
Nice feature, but you have to make sure the pot cozy is moved down a few mm or it won't seal.
A little dribble isn't too big of a problem if you're just using water, but soups etc can be a big mess if they go down inside the honey comb plastic under the surface of the cozy.
You don't want food spills to go down inside the plastic honeycomb of the pot cozy.
The "fix" is fairly simple:  Just manually slide down the cozy a couple of mm and then seal the pot lid.  This isn't too big of a deal, but you do have to remember to do it.  My preference would be for MSR to have corrected the issue.  The pot cozy should, in my opinion, be designed such that it just can't slide up past a certain point and cause a leak, no matter how minor that leak may be.
Slide the pot cozy down a couple of mm in order to get the lid to seal properly.
The MSR Windburner is such a nice, well-thought out system that it's a shame to have this one minor flaw, and, yes, in the greater scheme of things, this is a pretty nit-picky complaint.  Hey, I'm a stove nerd; what can I say?  :)  Overall, it's a great system.  This little flaw certainly doesn't keep it out of my pack.

Summary – The MSR Windburner, 1.8 L Size

What's Good About It?
  • Utterly bombproof in wind
  • Good fuel efficiency and good speed
  • Nice bowl (with volume markings)
  • Nice pot capacity for two (and can accommodate spoon, lighter, etc.)
  • Robust and durable
  • Good heat control (It can do a lot more than just boil water)
  • Twelve attachment openings (so that it doesn't matter which way you turn the pot)
  • A handle that actually works

What's Not So Good About It?
  • If the pot cozy slides up, the lid may not seal properly for pouring.
  • It would be nice if they could make it an ounce or two lighter.  Note that the Windburner is about the same as other stoves in this class; this is just a "wish list" kind of a thing.
The MSR Windburner, 1.8 L Size:  Highly Recommended

Please see also all weights and technical data in Appendices I and II, below.

Thanks for joining me on another Adventure In Stoving,

HJ


Appendix I – Component Weights

Windburner stove system with 1.8 L  pot
Item Grams Ounces
Burner 200 7.0
Pot 227 8.0
Cozy 71 2.5
Lid 20 0.7
Bowl 54 1.9
Stand 20 0.7
TOTAL 592 20.8
Manufacturer's stated weight is 19.25 oz whereas my measured weight is 20.8 oz, about a 1.5 oz difference.  They may not be including the canister stand in their weight or perhaps the bowl.  My weights include everything that comes with the set.

Windburner skillet
Item Grams Ounces
Pan 234 8.3
Note:  All weight were measured in grams.  There may be minor inconsistencies in weights stated in ounces due to rounding or cumulative errors.

Appendix II – Manufacturer and Technical Data

Date Available:  January 2016.  Currently available as of this writing
Manufacturer:  Mountain Safety Research (MSR), a subsidiary of Cascade Designs.
Manufacturer's Website:  http://www.cascadedesigns.com/MSR
MSRP:  $160 for the Windburner system with 1.8 L pot.  $140 for the Windburner system with 1.0 L pot.  $90 for just the 1.8 L pot.  $70 for just the skillet.
Weight (measured):  See Appendix I
Materials:  Aluminum pot.  Plastic and nylon cozy.  Polypropylene bowl and lid.  Burner is primarily steel with brass threads.  The regulator valve assembly is brass.  The burner grip is plastic.
Packed dimensions:  8" x 5" (20.5 cm x 12.5 cm).
Size/Model tested:  1.8 L pot.
Colors available:  Blue or black.
Requirements:   A standard threaded canister of gas, sold separately.
Warranty Information:  Contact Cascade Designs through their website (see above).

The author, climbing a wind-swept desert ridge near Desert Hot Springs, California.
The MSR Windburner is the ultimate desert cooking machine.


Thursday, January 19, 2012

Refilling Gas Canisters

I refill my own gas canisters.  This procedure is not recommended by any manufacturer.  There may also be certain legal sanctions against refilled canisters.  I'm not a lawyer, but my understanding is that in the US refilled canisters may not be transported across state lines and that refilled canisters may not be sold.

UPDATE 26 March 2017:  There is a another method of canister refilling, a method using the G-Works Gas Saver.  The G-Works Gas Saver is cheaper and easier to use than the adapter I used in the below post.  The G-Works Gas Saver is also better in that it does not use 100% butane (which is only good for warmer weather).  Please see:  The G-Works R1 Gas Saver – Refilling Backpacking Canisters II.

There are certain dangers that go along with using gas, even if you're using your stove in exactly the manner prescribed by the manufacturer.  Gas is flammable.  Gas can explode.  Know and understand the dangers before working with gas.

If one chooses to refill his or her own canisters, there are certain additional dangers including but not limited to:
  1. Overfilling.  If you fill a gas canister beyond it's stated capacity, the internal pressure may cause the canister to leak, burst, or explode.
  2. Gas leaks.  Gas may escape during refilling with or without equipment failures or malfunctions.  Such gas could ignite or explode.  Leaking gas can also be very very cold, and cold injuries could result.
  3. Damage to valve or threads.  The valve or threads could become damaged or worn during refilling.  No problem may occur during the refilling itself, but the damaged threads or valve could be hazardous later on.
  4. Refilling with gases with too high a vapor pressure.  Canisters come with a specific mix of gases.  If one were to refill with different gases or a different mix of the same gases, the vapor pressure of the resultant mix might exceed the strength of the canister.   Do NOT fill backpacking type canisters with 100% propane under any circumstances.
Clearly, there are dangers to canister refilling.  If you choose to refill gas canisters, you are making a decision to engage in a practice that you know to be dangerous.  If you of your own free will choose to engage in a practice that you know to be dangerous, don't blame me or anyone else for your choices.

That said, I will describe how I refill canisters.  I will also describe what steps I take to partially mitigate the dangers of refilling, but understand that no matter how safe your procedures are, refilling gas canisters is by its very nature dangerous.  You might be able to somewhat reduce the danger, but refilling is dangerous no matter what.

Step one is of course to get an empty canister.  Today, I'm going to refill a Coleman brand standard threaded 220g canister.

Caution
The newer orange label Coleman canisters do not work with many brands of stoves. The older green label Coleman canisters seem to work fine.
A Coleman brand 220g standard threaded gas canister.
The first step in refilling is to weigh the canister.  Why weigh the canister?  I weigh the canister to establish a maxium full weight.  You do NOT want to overfill the canister.  The best practice is to weigh the full canister when you first bring it home from the store.   The weight of the full canister when you bring it home from the store should be considered the maximum full weight.  

What if I forgot to weigh the canister when it was new?  Well, if you weigh the canister when it is empty and then add the capacity of the canister, in this case 220g, then you should also be able to determine the maximum full weight of the canister.
The empty weight of a Coleman 220g canister is approximately 143g 
The empty weight of a Coleman brand 220g canister is 143g.  The capacity is 220g.  Therefore, the maximum full weight is 363g.  Do NOT exceed the maximum full weight when you refill.  If you exceed this weight, the pressure inside the canister may exceed the strength of the canister.  If the canister leaks, bursts, or explodes, very serious injuries could result.  Do NOT exceed the maximum full weight of the canister.

Next, I mark the weights on the canister.  I tend to lose slips of paper, so I mark the canister itself.
The empty and full weights, marked directly on the canister.
Next, I mark the canister as refilled by writing an "R" on the bottom of the canister.  I then put a hash mark next to the "R" every time I refill the canister.  One hash mark indicates one refill, two hash marks indicates two refills, and so on.  
An "R" on the bottom of the canister indicates that the canister has been refilled.  Hash marks indicate the number of refills.  This canister has been refilled one time.
Eventually the valve may become weakened with use.  After I've refilled a canister 12 times, I take the canister to the recycling center.  Twelve is an arbitrary number, but it is a relatively low number.  So far twelve has been a safe number.  I visually inspect the canister and threads/valve before refilling. If it looks bad, it is bad, and it goes in the recycle bin.

Now, after all that, I take out my refiller.
A refiller for standard threaded gas canisters.
I bought this refiller via eBay seller world_wide_2009 who apparently is in Japan.  I believe I paid $37.00 USD for the refiller.  I've had the refiller for at least two years.  With this somewhat expensive but high quality refiller, I feel like there is a) a reduced risk of damaging the threads or valve on a receiving canister, and b) very little gas leaks -- about the same amount as would normally leak when hooking up or unhooking a stove.  Very little in other words.  I've seen lots of scary looking homemade rigs of questionable quality.  I personally would rather pay the extra money and do it right. 

The instructions that came with the refiller were in Japanese but did include helpful pictograms.  Notice that I have the weight written on the refiller itself (88g).  While I'm in the process of refilling, I can weigh the canister without removing the refiller.  I just subtract 88g from the weight displayed on the scale in order to know the weight of the canister I'm in the process of refilling.

Note in the above photo that the connector shown attaches to a standard threaded backpacking type canister.  What does the other side connect to?
This side of the refiller connects to 100% butane canisters.
The opposite side of the refiller connects to the inexpensive 100% butane canisters of the type used in the restaurant industry.  Why butane?  Well, first butane is cheap.  If you're going to do your own refills, then you'd better have a source of gas cheaper than backpacking canisters.  If your refill gas isn't cheaper, why would you refill?  You'd just go buy the regular backpacking gas.  In my area, 227g of butane is $1.25 USD.  Backpacking canisters are about $5.00 for 110g or $6.00 for 220g.  100% butane is far cheaper.  Personally, I use 110g canisters more than any other size.  With refilling, I'm in effect paying $0.63 per 110g canister.  If you saw perfectly good 110g canisters on sale for $0.63, wouldn't you pick a few up?  I bet most people would.  My canisters are always on sale for $0.63.  I never hesitate to take out the gas stove whether on a day hike or a backpacking trip.  You want another cup of coffee?  Sure!  Why not?  How about two?  I rather like having an abundant source of cheap gas.  YMMV.  Each to his or her own.

Second, butane is relatively safe.  Pick up one of those little clear plastic cigarette lighters some time.  Hold it up to the light.  That clear liquid you see in there is butane.  Of the gases commonly used for backpacking canisters, butane has the lowest vapor pressure.  If that little cheap plastic lighter can hold the pressure of butane, your steel backpacking canister certainly can.  No matter what mix originally came in your backpacking canister, butane will have a lower vapor pressure.  Butane is pretty safe to use for refilling.  Do NOT fill backpacking type canisters with 100% propane under any circumstances.

The next step in refilling is to hook everything up.  First I screw the refiller onto the receiving canister.
The refiller screwed on to an empty 220g backpacking type gas canister
Next, I hook up the donating butane canister.  The larger hook on the connector clips onto the collar on the butane canister.
The collar on the butane canister clips on to the larger of the two hooks on the connector of the refiller.
The smaller of the two hooks on the refiller's connector slips through the notch on the collar of the butane canister.
The smaller of the two hooks on the refiller goes through the notch on the butane canister's collar.
The canister is then rotated to the right approximately 1/16th of a turn, locking the canister into the connector on the refiller.
The butane canister turns to the right and locks in place.
When all is said and done, the rig looks like this:
A refiller all hooked up and ready to transfer fuel.
Now, simply open the valve, and gravity will do the work for you.  The liquid butane in the donor canister will flow into the receiving canister.  Recall though that there is one complication:  There is a vapor feed tube inside the canister.
There is a plastic vapor feed tube inside the butane canister.
That tube aligns with the notch in the collar of the butane canister.   For maximum transfer, you want to tilt the canister at a bit of an angle with the notch on the collar of the butane canister pointing down
Prop the canister at a steep angle as shown with the notch pointing down.
The transfer is very slow.  Normally, I set it up and then go about my business.  I check it after a couple of hours.  The vapor feed tube appears to vary slightly brand to brand.  As a purely practical matter, MegaOne gas seems to be the easiest brand to transfer gas from.  GasOne is a bit more tricky.  Sometimes I've had to chill the receiving canister and warm the donating canister to get it to work right.  Each canister brand has a "sweet spot," that is an angle where the transfer works best.  You'll just have to experiment with that.  I've tried three different brands of butane thus far.  I've always been able to get it to work although some brands require more fiddling than others.

Since I'm writing a blog post, I don't want to wait a couple of hours for my results, so I'll just detach the refiller now and weigh it after only a few minutes.  Recall that our receiving canister weighed 143g when empty. 
The canister now weighs 184g
Not the world's clearest photo, but the canister now weighs 184g, a gain of 41g in just a few minutes.  I notice that there's typically a rush of gas when I first open the valve, and then a very very slow bubbling after that.  I can only hear the slow bubbling if I physically press my ear up to the donating canister.  When using a slow gravity feed like this, I haven't had a lot of problems with overfilling, but remember to periodically check the canister, especially with the small 100g class canisters.  When filling a 220g canister from a 227g canister, there is no worry of any significant overfilling.  I often leave 220g canisters hooked up overnight and simply unhook them in the morning.  The transfer is never 100%.  The donating canister almost always has at least a few grams of gas left behind.  Such is life.

NOTE:  These photos were all taken indoors where the light is good.  I typically refill outdoors where vapors cannot build up and there are no sources of ignition.

That's it.  That's how to refill canisters.  Remember, no matter how you go about it, refilling is innately dangerous.  Refill at your own risk.

Thanks for joining me on another Adventure in Stoving,

HJ

Appendix -- Advantages and Disadantages of Refilling

Advantages
1.  Lower cost in the long run.
2.  Custom filling.  If I am going on a trip where I'll need 140g of gas, I fill my canister to 140g and stop.  I do not need to carry a full 230g canister.  Weight savings: 70g.
3.  Topping off.  Say I come back from a trip with a canister with only 25g left.  Before I had a refiller, that gas would just sit on a shelf with no real value to me.  25g is too little to bother with.  Now, I just top off the canister, and the canister is as useful to me as the day I bought it.
4.  Reduced environmental impact.  Reusing anything reduces one's overall impact on the environment.  Yes, canisters can (and should!) be recycled, but recycling has environmental costs.  Yes, recycling is better than the landfill, but there are transport, processing, re-manufacturing, and distribution costs associated with recycling.  Yes of course I have the empty butane canister to deal with after refilling, but I'm primarily refilling the small 110g canisters from the larger 227g butane canisters.  I'm therefore reducing the overall number of waste canisters.  Ideally, I'd like to find an even bigger canister to refill from, but that opportunity has so far failed to materialize.

Disadvantages
1.  "Fiddle" factor.  You have to spend some time to refill the canisters.  Of course, any such fiddle is done in advance.  There is zero extra fiddle out on the trail.  I much prefer filling in advance over using an adapter out on the trail.
2.  Butane is only good for warm weather use.  100% butane is only good so long as the fuel stays above about 40F/5C.  If the fuel gets colder than 40F/5C, then your stove will have lackluster performance.  I personally do the majority of my backpacking and hiking in warmer weather, so this is not an inconvenience to me.

Tuesday, January 17, 2012

Butane Adapters II

In my last post, I took a look at one of the various butane adapters on the market.  In this post, I'd like to take a quick look at another type of butane adapter, the type with two legs as shown in the photo below.
A two legged butane adapter (lying on it's back)
This type of adapter has a larger hook that hooks onto the collar of the butane canister and a second, smaller hook that fits through the notch in the collar of the canister.
This type of butane adapter has a large hook (bottom) and a smaller hook (top).  The smaller hook fits through the notch in the collar of a butane canister.
To fit the adapter onto the butane canister, we turn the adapter 180 degrees from it's position as seen in the photo above, fit the large hook over the collar on the canister, fit the small hook through the notch, and rotate the canister approximately 1/16th turn to the right.  We then have something that looks like the below photo.  CAUTION:  There is no valve inside the butane adapter.  As soon as you put it on the canister, butane will start coming out.  For this photo, I used an empty canister.  In real life, attach the stove first, then attach the canister.
A butane two legged butane adapter fitted onto an empty butane canister. 
Now notice that unlike the butane adapter in my last blog post, this adapter has two legs.  This is good.  The two legs prevent the canister from rolling -- which could cause a very nasty flare.

You then hook the fuel hose from your gas stove to the adapter as shown below.
A butane adapter, attached to a butane canister with a stove's fuel hose attached to the adapter.
OK, so in the above configuration, you're all set to go.  Uh, except for one little thing.  These adapters are shoddy junk.  Yep, the legs are the right idea, but beyond that, the thing is junk.  They're loose and they rattle.  Worse still, they leak.  Nice legs, but there's no way that I can recommend these.  I've seen one of these that was fine, but every other one of them as been loose, shoddy junk.

Now, I got mine on eBay from a seller called Plus2City from Hong Kong.  Plus2City also appears to be behind a couple of other online sellers that sell this type of adapter.  All of the adapters from Plus2City and allied sellers appear to be worthless (or worse, dangerous) junk.  Maybe there's some other source that is producing good quality adapters of this type, but I haven't seen any yet.  Sorry to be so blunt, Plus2City, but clean up your act, and I'll put up a much nicer post.  What you're selling now is junk at best and dangerous at worst.

Butane adapters of this type are definitely not recommended.

HJ

Thursday, January 12, 2012

100% Propane for Backpacking II

I've described 100% propane as the "Holy Grail" of cold weather backpacking for canister stoves.  Why?  Take a look at the below table of the vaporization points of the gases used for canisters stoves.

Boiling (vaporization) point
n-butane    -0.5C    31F
isobutane    -12C    11F
propane      -42C   -44F

If temperature falls below the values indicated below, you'll have a liquid not a gas.  Ever try to run a gas stove on liquid fuel? Good luck.  Propane has the lowest vaporization point by far.  When other fuels are rendered useless by cold, propane will still be good to go.

So, why don't backpackers all just use 100% propane in cold weather?  Well, two reasons:  1) most stoves designed for 100% propane are big kludgey (by backpacker standards) affairs that were never intended to be carried on one's back and 2) 100% propane has some seriously high vapor pressure.  Those little thin walled backpacking canisters are not going to safely hold something like 100% propane.  You have to carry a heavy duty canister.

Well, we can't do anything about the heavy duty canister side of things (unless you can find a Bernzomatic PowerCell), but what if you could lose the big kludgey car camping stove?  I mean, that's half the battle, right?

How?  With a Kovea LPG (propane) Adapter which I've covered previously.  In this post, I'd like to talk about the practicalities of 100% propane for backpacking.

First, when I say propane, what's typically available that is portable?
A 100% propane cylinder
100% propane canisters typically look like the above (although they're usually green).  Typically such canisters contain 16.4oz/465g of 100% propane.  Bernzomatic brand contains 16.92/479g for some reason.  The connector is the same on 14.1oz/400g propane cylinders commonly used for propane torches.

Let's have a look at the female connector on the tank.
The female connector on a typical propane cylinder 
If you compare that connector to the male connector on a backpacking stove, you'll quickly see that the two aren't compatible.
A male connector on a backpacking stove (top) and a female connector on a propane canister.
How to bridge the gap?  An adapter.
A Kovea LPG (propane) adapter
The adapter threads onto the top of the propane cylinder.
A propane cylinder with a propane adapter.
Our backpacking stove then screws into the adapter.
A Markill Hot Rod backpacking stove in use with a 100% propane cylinder
What's the problem with this set up?  Well, it's just a tad tippy for one.  And a bit of a trick to shield from wind.  THIS SET UP IS DANGEROUS AND IS NOT RECOMMENDED.
A backpacking canister stove atop a 100% propane cylinder.  This configuration is DANGEROUS and is not recommended.
So, let's change it from an "upright" configuration (as shown above) to a "remote" configuration.  First, we'll need a Brunton Stove Stand (or the equivalent).
A Brunton Stove Stand
There.  Well, that's a little better.  But still, that cylinder might fall over.  This set up is unstable.  Not recommended.
A "remote" set up with a backpacking stove and 100% propane.  This is not stable and is not recommended.
Couldn't we just lay the propane cylinder on its side?  I mean, wouldn't that be a lot more stable?
A backpacking stove running with a propane cylinder laying on its side
Indeed we can, and with 100% propane, it works.  Be aware that when you lay a canister on its side, you are sucking liquified propane out of the canister.  I'm running in weather that is about 45F/7C here, which is plenty warm for propane to vaporize before it gets to the burner.  At some point, as the temperature drops, you'll have to shunt heat from the flame to the fuel in order to maintain vaporization.  I really don't know at what temperature you will need to start shunting heat.   I do know that propane vaporizes at -42C/-44F, so as you approach about -37C/-34F, you'll definitely have to start shunting heat to the fuel to maintain vaporization, but I suspect you may have to shunt heat even before that.

So, there you have it, there's how to use 100% propane with backpacking stoves.

Now, even if we eliminate the bulky, heavy car camping stoves, just having to carry that big, heavy duty 100% propane cylinder is pretty heavy.  Why would anyone want to carry it?

Here are a few possible reasons for going to the trouble to carry 100% propane:
1.  Cold weather -- Mechanical Reliability.   Gas stoves typically are more reliable than liquid fueled stoves.  Gas stoves clog less and have no pump to fail.  One might bring propane so that one could continue to use in cold weather the more reliable gas stove.
2.  Bad weather -- Safety.  OK, you're on the mountain.  A storm hits.  What?  You're going to go outside to cook?  Are you nuts?  In a storm?  You tired of life or something?  Yes, I know the instructions on your stove say "never cook indoors."  I'm sure the corporate lawyer who wrote that really feels your pain right now.  Look, you've got to cook up there on that mountain; Mr. Lawyer doesn't.     Cook inside your shelter.  It's the only reasonable alternative.  Gas stoves don't require priming.  BIG advantage if you're tent-bound even for only one meal.
3.  Cold weather -- Functionality.  Propane will work at temperatures way below the temperatures that the gas blend in a typical backpacking canister will work in.  One might bring propane simply because that's the only gas that will work when it gets cold enough.  Some people prefer gas stoves (or hate liquid fueled stoves) that strongly. Gas stoves typically are more fuel efficient and have much better flame control.
4.  Cost.  At least in the US, a standard threaded 450g backpacking canister of gas typically costs $9.00.  A 465g cylinder of propane is $2.56 if you buy a two pack at Wal-Mart.  An adapter and some cheap propane could be really handy for a night before the trip trailhead camp.  You use your backpacking stove, but you run it on cheap propane that first night at the trailhead.  In the morning, you hit the trail with a 100% full backpacking canister, which, depending on the trip, might allow you to carry a smaller canister or not have to take a second canister.

Even if you don't see an immediate application, it's there if you ever need it:  100% Propane for Backpacking.

Now, words of warning:  Propane has higher vapor pressure than the gas blends used in backpacking canisters.  Higher pressure means higher danger.  You could get flame "lift off" where the flame rises up,  away from the burner.  In that situation, the flame may go out while the gas is still flowing.  You've now got a hot stove with no flame but the gas is still coming out.  This could get ugly.  Gas + air + heat = KABOOM!  So, be careful because:
Propane is a highly flammable and potentially explosive gas.
Backpacking stoves are not designed to operate on 100% propane.  Use at your own risk.  Risk includes loss of property, serious bodily injury, and death.

Here are some tips.  These tips might reduce the risk, but no matter how many safety tips you incorporate, working with 100% propane in a backpacking stove is dangerous.  Period.
a) Hook everything up and listen for any sound of escaping gas.  If you hear any gas, STOP.  Correct the leak before proceeding.
b)  Start with the gas turned down low
c) Turn things up slowly
c) NEVER open the valves fully
In this set up, you are the safety device.  The set up has no inherent safety mechanism.  This set up is inherently dangerous, and you are deliberately choosing to do something dangerous if you copy what I have done.
Adapters open up a whole new world in terms of fuel and stove combinations that can be used. Adapters also open up a whole new world of hurt if you exceed the limitations of a particular set up. Just because you can hook up something up doesn't mean it's a good idea. Above all else, be careful.

Thanks for joining me on another Adventure In Stoving.

HJ

The Kovea LPG (Propane) Adapter

I recently picked something up that turns out to be pretty useful:  A Kovea LPG (Propane) Adapter.  This adapter allows one to run a standard threaded canister gas type backpacking stove off of one of those green Coleman 16.4oz/465g cylinders of 100% propane, you know the typical propane canisters that everyone uses for camping stoves and camping lanterns for car camping.
An LPG (propane) adapter made by Kovea
Whoa!  Running a backpacking stove off of 100% propane?  Couldn't that be dangerous?

Well, maybe, and I certainly wouldn't have bought a no-name adapter made in China, but Kovea is a top gas stove manufacturing company with an excellent reputation world wide.  If Kovea makes it, it's quality, and I wanted to give it a look.  Speaking of which, let's take that puppy out of the packaging.

First impression:  This thing is beautiful.  I mean look at it.  Really nice build quality.
A Kovea propane adapter.  This end connects to a typical 16.4oz/465g cylinder of propane of the type that are used for camp stoves and camp lanterns.
A Kovea propane adapter.  This end connects to a typical threaded backpacking stove.
It is made from really solid feeling metal, so it is heavy (105g), but boy is the thing well built.

Now, notice something.  On the side of the adapter there is a little set screw which helps regulate the gas.
There is a set screw on the side of the adapter to help regulate the pressure.
When I tested the adapter, I didn't need to use the set screw.  In other words, it worked just fine out of the box, but it's nice to know that it's there if you need it.  Now, a word of warning:  propane is going to have a higher vapor pressure than the gasses typically used for backpacking.  Yes, the gasses typically used for backpacking include propane, but not 100%.  Usually propane is no more than about 1/3 of the total mix.

Higher vapor pressure could mean higher danger, so pay attention.  If the pressure is too high, you could get flame "lift off" where the flame is blown away from the burner.  In that situation, the flame will frequently die out while the gas is still flowing.

OK, let me get this straight.  I've got a hot stove with the flame out but the gas is still gushing out.  Um, couldn't that be a little dangerous?

Why yes, as a matter of fact it could.  Gas + air + heat = KABOOM!  If you're lucky, all you'll lose is your eyebrows.  If you're unlucky, you'll be finding out for 100% sure whether or not there really is a God, if you know what I mean.  So, warning:

Propane is a highly flammable and potentially explosive gas.  
Backpacking stoves are not designed to operate on 100% propane.  Use at your own risk.  Risk includes loss of property, serious bodily injury, and death.

The first rule, if you've made the decision to accept the risk of using a backpacking stove with 100% propane, is to turn things down low.  Start low, and turn things up slowly.  There's no law that says you have to open the valve completely, so don't.

The adapter comes with some instructions.
The instructions for the "set screw" on the side of the adapter.
Unfortunately, the instructions are written in Korean, which is not a language with which I am conversant.  Still, it's pretty obvious from the pictogram what the set screw does.

Another diagram shows the method of employment, although it will probably be fairly straightforward for anyone who has used both 100% propane camping appliances as well as canister gas backpacking stoves and lanterns.
How to hook up the adapter (shown in orange)
Just in case you're Korean isn't up to speed, here's what the adapter looks like when you hook it up (below).  Note that the propane canister I'm using happens to be blue.  The canister is blue because of the  particular brand of the canister.  Typically canisters are green, but whatever, the adapter hooks up the same.
A Kovea LPG (propane) adapter attached to a propane canister. 
Your backpacking stove then screws into the threads that you can see on the adapter in the photo above. Inside the adapter is the equivalent of a Lindal valve.  In other words, gas doesn't start immediately come shooting out of the adapter when you hook it up.
A Markill Hot Rod backpacking stove in operation on 100% propane.
Really pretty straightforward, but as with any backpacking stove, be freaking careful.  Always listen after hooking everything up before firing up the stove.  If you hear a leak, proceed no further until you've resolved the problem.  Failure to do so could have catastrophic results.

I'll cover the more practical aspects of 100% propane use for backpacking in a separate post.  In this post, I just wanted to showcase the adapter.


Final warning:  Adapters open up a whole new world in terms of fuel and stove combinations that can be used. Adapters  also open up a whole new world of hurt if you exceed the limitations of a particular set up. Just because you can hook up something up doesn't mean it's a good idea. Above all else, be careful.


Thanks for joining me on another Adventure in Stoving,

HJ