QuietStove.com

Thursday, November 24, 2011

Gas Blends and Cold Weather Performance (Why not just use propane?)

I got a good question recently:
Hikin Jim, I see you refill [your backpacking canisters] with butane. What is the advantage over straight propane if propane works in lower temps? For that matter, why are these cartridges blended at all? I have wondered about this for a while.

An excellent (and important) question. It has to do with vapor pressures. Take a look at the following boiling points table.
 Boiling point
n-butane    -0.5C    31F
isobutane    -12C    11F
propane      -42C   -44F
 
As you can see, propane will vaporize (boil) at extremely low temperatures whereas n-butane ("regular" butane) has a vaporization point some seventy five Fahrenheit degrees higher. Quite a difference!

Let's say you have liquid propane in a container and the ambient temperature is a nice, comfortable 75F (24C). 75F is some one hundred nineteen degrees (Fahrenheit) above the boiling point of propane. Propane at that temperature desperately wants to boil and exerts tremendous vapor pressure against the walls of the tank, vapor pressure so strong that you need a fairly heavy steel container to hold it safely, such as those found on the big green 16.4oz (~460g) propane canisters from Coleman. The little lightweight canisters that backpackers carry could literally turn into a hand grenade at those pressures.

On the other hand, n-butane is relatively benign at those temperatures. Take a look at a clear plastic lighter some time. That clear liquid inside is n-butane. Yep, all that's needed to contain n-butane is some flimsy plastic. Contrast that with a 16.2 ounce Coleman canister! Of course the problem with n-butane is that if the fuel temperature falls below about 40F/5C, the vaporization isn't strong enough to run a typical gas stove.

Well, if propane is great but would catastrophically burst a backpacking canister and n-butane is easily contained but useless in cold weather, what to do? Well, you blend the two. The liquid blend takes on properties that lie somewhere between low pressure n-butane and high pressure propane. Better still, you get a chemist to rearrange the internal structure of the n-butane molecules a little and create isobutane. Isobutane is what is known as an isomer of butane. It's the same stuff, but the internal components have been put into a different arrangement, an arrangement that in this case works in our favor in that the boiling point drops by twenty degrees Fahrenheit! Nice, eh? It's like re-packing the trunk of your car. It's the same stuff, but in a different order. In the case of your car's trunk, things fit better. In the case of butane, the properties change a bit, and we've got a better cold weather fuel. The best cold weather blend for upright canister stoves is therefore isobutane mixed with propane. Note that I stressed the word "upright." More on that in a minute (see the second of the two below links).

The problem with this blending arrangement is that the higher pressure propane tends to boil off a bit faster than than the n-butane or isobutane. Toward the end of the life of the canister, all you have left is the "lesser" (in terms of cold weather performance) of your fuels. This is one reason why in cold weather you can get the dreaded "canister fade" where your flame slowly fades out toward the end of the life of your canister, and you can't operate your stove even though, when you shake the canister, you can still hear fuel sloshing around in there.

There are two things you can do to get good performance and avoid canister fade in cold weather.  One, you can take action to warm the canister or two you can switch to a liquid feed gas stove.

With respect to liquid feed gas stoves:  If gas is kept under sufficient pressure, it liquefies, i.e. the form of the fuel changes from a vapor into a liquid.  If you feed the fuel in liquid form to your stove, you no longer have to worry about which fuel in your blend has a tendency to boil off faster into a gas.  With liquid feed, the blend you start with is the blend your finish with.  Since the blend doesn't change with liquid feed, it's not quite so critical that the non-propane component of your fuel be isobutane.  Again, since the blend doesn't change, the cold weather performance of your fuel is just as good at the end of your canister as it was at the beginning, and you don't get such pronounced "canister fade" toward the end of the canister.

There are a lot of advantages to using a stove in liquid feed mode in cold weather, but be aware that not all gas stoves can be used in liquid feed mode.   Be sure to read the above linked article to find out what type of stove may be used safely.  You also need to buy the right brand of gas in order to get good cold weather performance.  Not all brands are equal.  For more information, please see my post on What's the Best Brand of Gas for Cold Weather?

As for refilling backpacking canisters, butane is cheap, readily available, and of lower pressure than the original contents (and therefore reasonably safe). Although reasonably safe, the one problem with refilling backpacking canisters with 100% butane is that they're no good if the fuel temperature gets much below about 50°F/10°C.  So, I just use my refilled canisters on fair weather trips.  I tend to prefer fair weather trips anyway, so refilling backpacking canisters works very well for me.  YMMV.  :)  I wish I had a source of cheap isobutane, but alas I do not. Refilling with 100% isobutane would also be reasonably safe if the canister originally contained a propane-isobutane blend. Refilling a backpacking canister with 100% propane could be a very deadly enterprise and should be avoided. But this post is really about why we blend gas and why we don't use 100% propane in backpacking canisters.  At some future point, I'll dedicate an entire post to the subject of refilling canisters.

Hope that clears things up a bit.

HJ


Related articles and posts:

Wednesday, November 23, 2011

Hexamine (ESBIT) Stoves

Hexamine (such as ESBIT brand) stoves are very interesting.

Ultralight hikers prize them for their light weight, but they can be a nice addition to any kit as an emergency stove. They've got about the most stable fuel around. The fuel doesn't evaporate or go bad. You can generally burn 40 year old fuel that hasn't been sealed without problems. I keep mine sealed and protected (they can be crushed or chipped pretty easily), but I've seen some old hexamine fuel that burned just fine. They're great for long term storage in a kit that you don't plan to touch often.

The down side is that they don't put out a lot of heat, can be hard to light (particularly in wind), and the low velocity flame really needs a windscreen. They also leave a residue on the bottom of your pot.  I usually keep my pot in a plastic bag if I'm going to be burning hexamine.

One trick for lighting them is to set the tablet on the edge of the stove at first. Get your flame under the tablet. Once it's lit, then move it to the center of the stove with a stick or something. This trick is a little easier with the larger ESBIT brand rectangular tablets than the smaller "pill shaped" tablets that some companies produce.

Hexamine's not bad stuff, but it's not particularly powerful either. It's worth playing with it a few times in order to get used to its quirks. Don't set it down in the bottom of your pack untried and then expect to pull it out and be comfortable with it out on the trail. It's no big deal, but it's worth getting used to how to light, how to cook with, how to extinguish, etc. before you head out.

Despite the fact that hexamine is not volatile, hexamine is not permitted on airline flights. Hexamine is a precursor to explosives such as RDX/Cyclonite. You wouldn't want to go into an airport with the scent of hexamine about you.

HJ

Friday, November 18, 2011

A Look at the Trangia Alcohol Burner

People have asked me what I think about the Trangia burner in and of itself.
A Trangia alcohol burner
I think the Trangia burner is a good one. It's meant to be used in conjunction with other components, but if we consider the burner alone for a moment:
1. It's brass. Can you say solid? Yeah, you can still break them, but the chances of it crushing in your pack are pretty much nil unless you fall off a cliff or something (in which case you probably have more to worry about than what shape your burner is in). ;)  Brass conducts heat well which is an advantage in cold weather where alcohol sometimes can be difficult to vaporize. Titanium burners, while lighter, do not conduct heat well.
2. It's an open design. You just pour your alcohol in. To light it, you flip in some sparks with your fire steel or use a lighter or match. The point being that it's really easy to work with. There are some alcohol stoves where you've got to get the alcohol in a tiny little hole, and you have to prime them even in warm weather, all sorts of fiddly stuff like that. No thanks. The Trangia burner is a practical, easy to use burner.
3. The Trangia burner is a nice balance between speed and efficiency. The Trangia isn't the fastest out there -- but that's a good thing. The faster burners tend to eat through your alcohol which means you're running out of fuel when the guy next to you still has a couple of days supply of fuel. Yet on the other hand they've got enough power that they aren't at the mercy of the slightest breeze. Some really efficient burners are such low power burners that unless you set the windscreen up perfectly, your pot will never boil.
4. The Trangia burner has a lid that can be sealed. Ever try to get left over alcohol out of a burner? It's a pain in the butt. Most guys either burn it off (i.e. waste it) or manage to recover only a portion of it (again, wasted fuel). With the Trangia burner? No problem. Just seal it up. Next time you need the burner, it's already fueled. As a precaution, I put my burner inside a Ziploc bag, sometimes two. They do leak a few drops some times.
The lid of a Trangia burner has an "O" ring which forms a tight seal so that alcohol can be carried in the burner

5. The Trangia burner can simmer when the simmer ring is used. Relatively few alcohol stoves can really simmer. Simmering means you can cook real food not just "boil in a bag" type meals.
The simmer ring of a Trangia burner (sitting in a pan).  The "door" can be nearly shut to get a low  flame or completely shut to extinguish the stove.
So, you've got a really solid burner that conducts heat well, that is practical and easy to use and is a balance between speed and efficiency that can be sealed so you don't waste fuel that can simmer. That's a half a dozen reasons why the Trangia is one of the most popular alcohol burners out there and why so many systems are built around a Trangia burner (Clikstand, Trangia Triangle, WestWind, plus dozens of home made ones).  For the weights of each component, please see the Technical Appendix below.

It's a good burner.

HJ

Related posts and articles:
Technical Appendix (with weights of all components)
  • Trangia Burner:  67g/2.4oz
  • Trangia Burner Lid:  21g/0.7 oz
  • Trangia Burner Simmer Ring:  23g/0.8oz
  • Total Trangia Burner Weight:  112g/4.0oz

Tuesday, November 15, 2011

Cold Weather Tips for Alcohol Stoves

I can recommend at least four "tricks" for alcohol stoves in cold weather:
  1. Keep your alcohol in a coat pocket or somewhere where it will stay warm.
  2. Use methanol such as comes in the yellow bottle of HEET that can be purchased at Walmart, auto parts stores, etc. Methanol generally has a higher vapor pressure than denatured alcohol and will work better in cold. DON'T drink methanol, don't breath the fumes, and don't get it on your hands. Methanol is toxic and can lead to severe neurological problems, blindness, and death. Yipes!  But if you're safe how you pour and burn, it's no big deal.  Don't be intimidated; just be careful.
  3. Use a priming pan. I use the lid from an old tin of tea. The lid is slightly bigger in circumference than my stove.  Put the lid underneath your stove. Pour some alcohol in the priming pan and ignite. The alcohol in the priming pan will warm the stove and provide for faster vaporization.
  4. Insulate! Put something like some closed cell foam cut from an old backpacking pad under the stove. You don't want snow or cold ground sucking the heat out of your stove. I wrap my closed cell foam in duct tape to a) protect the foam and b) prevent spills from getting into the foam which could catch fire while operating the stove. Don't ask me how I know that last bit. ;)  On top of the foam, I set a circular cut out of approximately 36 ga. aluminum sheet on top of which I set the alcohol stove.  The little circle of aluminum helps diffuse the heat so you don't screw up your duct-tape wrapped pad.
Got other tips?  Please send 'em my way. 

HJ

Related posts and articles:

Monday, November 14, 2011

Stove of the Week: The Trangia 27

Let's say you wanted a reliable stove.  A really reliable stove.  A stove where there's nothing to go wrong.  A stove that's going to work in any conditions, no matter what.

What's  that?  It's a trick question?  No, there really is such a stove, the Trangia.  The Trangia alcohol stove system is, simply put, the most reliable backpacking type stove in the world.
A Trangia 27
Now here's the funny thing about what is possibly the world's most reliable backpacking stove:  It's relatively unknown in the United States.  Alcohol stoves have long taken a back seat in the American outdoors scene.  However, in the last decade or so the ultralight movement has swept over American backpacking, and alcohol stoves have exploded on the scene with a vengeance almost as though making up for lost time.
One little problem for the Trangia:  it's hardly ultralight.  So, even though alcohol stoves are all the rage in the US backpacking community right now, you may not see more of the complete Trangia system, at least in the US.  I am seeing the excellent Trangia burner used in a variety of configurations including the excellent Clikstand set up.  Internationally though, the Trangia has an enduring reputation for reliability and the ability to function under any conditions.  The Swedish call it a stormkök -- storm cooker.  The name says it all.  Though the Trangia is a bit bulky and heavy, particularly for an alcohol stove, there are many who swear by it and will bring nothing less into the back country.


Somewhat unusual for an alcohol stove, the Trangia is actually able to simmer with the use of a "simmer ring" (see more below).  The Trangia is therefore an alcohol stove that one can do real cooking on and not merely just boil water.

The Trangia stove system came out in 1951.  Rather than replicate here what is more than adequate elsewhere, I provide you with the following link on the history of the Trangia company for those who are interested.

There are three basic models of the Trangia:
The Trangia 25, which comes with 1.75 L and 1.5 L nesting pots and a 22cm diameter fry pan/lid and is intended for three or four people.
The Trangia 27, which comes with two 1.0L nesting pots and an 18cm diameter fry pan/lid and is intended for one or two people.
The Trangia 28 (aka the "mini Trangia"), which comes with one 0.8L pot and a 15cm diameter fry pan/lid and is intended for solo use.

The Trangia 25 and 27 are essentially the same stove except that the 25 is larger and the 27 is smaller.  Models 25 and 27 are complete in and of themselves and need no additional components in order to function well.  The Trangia 28 (the "mini Trangia") needs a windshield (not included) in order to function well.

Models 25 and 27 are available in "ultralight" aluminum or hard anodized aluminum.  Several configurations of models 25 and 27 are available.  The configurations include such things as non-stick coatings and an optional tea kettle.  I won't try to list all of the possible combinations, instead, I encourage you to head on over to the Trangia website where all possible combinations are listed. There is only one configuration available of model 28.  The alcohol burner is the same across all models and configurations of Trangia stoves.  An optional gas burner is available for some configurations of the Trangia as is a multi-fuel burner.

Now, then, this week's stove is the Trangia model 27.  My model 27 Trangia was built in the late 1970's or thereafter but prior to 1988 based on the information provided at the above history link.  Today's Trangia 27's are nearly identical to mine but do have some differences such as a lighter weight modern alloy and openings for use with a gas burner.

So, let's have a look at this famous stove. The Trangia 27 consists of six main components:  A lower windscreen/base, an upper windscreen, two pots, a lid, and a burner.  The Trangia also comes with a strap to hold everything together and a pot gripper/pot lifter.

One of the wonderful things about the Trangia is that all of the components nest together in a nice package.
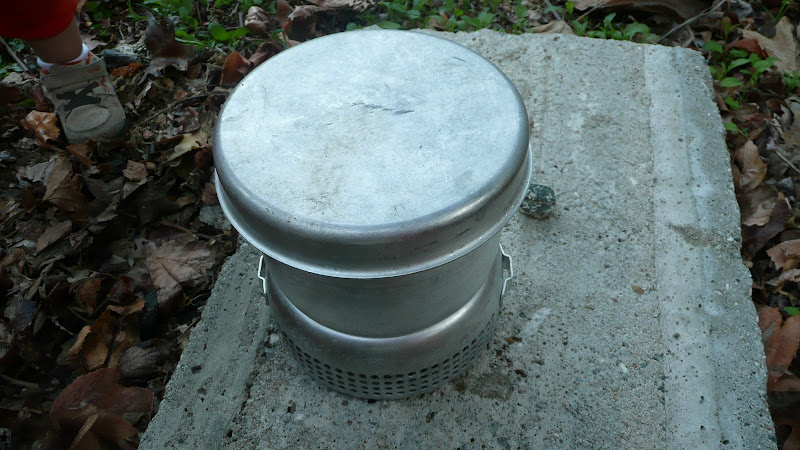
All of the Trangia 27's components fit neatly together.
A strap secures everything together.  This strap is of the period but is not original and is not a Trangia product.
  Let's take a look at what's inside the package.
A Trangia 27 with the lid off but still all nested together.
Inside my Trangia 27, I carry the burner, a lighter, a pot gripper (not original), and a fuel bottle.  There's also room for a spoon, tea bags, or other items.
A closer look at the contents of my Trangia 27
Now let's take a look at the base (lower windscreen) of the stove.  Note how there are ventilation holes on one side of the lower windscreen but not the other.  Note also the air holes that surround the large central hole.  These air holes are a key component in the Trangia's design and what allow it to function in heavy winds.
The base (lower windscreen) of a Trangia 27.
Take a look at this diagram of the air flow within a Trangia stove.
A diagram of the air flow within a Trangia stove system.
The air holes in the lower windscreen are faced into the wind.  The air is then forced up around the burner in a controlled fashion.  The wind acts just like a bellows, oxygenating the burner.  The air is heated by the burner.  The heated air is forced up through the gap between the upper windscreen and the pot.  The narrowness of the gap prevents too much air, air that might rob the system of heat, from flowing through.  The air that does flow through is forced to stay close to the pot which increases heat transfer.  In short, you've got a very efficient stove capable of operation in heavy winds.

The burner mounts in the base.
The Trangia burner mounted in the Trangia base.
The upper windscreen is then emplaced on top of the lower windscreen. 
Upper Trangia windscreen mounted on lower windscreen
Note in the photo above that the put supports are flipped up into the "up" position.  When the put supports are in the "up" position, the lid may be used as a fry pan.
A Trangia 27 in frying mode
A Trangia 27 with the pot supports flipped up

A Trangia 27 with the pot supports flipped down.
With the pot supports down, a pot fits neatly inside, suspended at the ideal height above the burner.
A Trangia 27 with a pot in place.
 Now, let's take a look at the two pots.  The two pots nest neatly within one another.
The two pots of a Trangia 27 nested together.
The two pots of a Trangia 27 separated.
The two pots fit together only one way.  They both have the same volume, but one is tapered differently than the other.  Put the more tapered pot on top, and it nests neatly in.  Put the more tapered pot on the bottom, and the two pots stack in such a manner that both pots can be used simultaneously.  Ingenious!
The two pots of a Trangia 27 in stacked one atop another ready for simultaneous use.
One of the pots is inscribed with volumetric markings.  Wisely, the markings can be read not only from the outside but from the inside of the pot.
One of the pots has 0.3 L and 0.5L markings.
With a pot in place, the lid fits neatly on, sealing in the heat.
A Trangia 27 fully set up, with one pot.
It doesn't look quite as neat with two pots, but we're here to cook, not look good, yes?  We could even turn the lid over and cook some meat balls or something in the lid while the pasta cooks in the bottom pot and the sauce warms up in the top pot.  Pretty slick!
A Trangia 27 fully set up, with two pots in place.
OK, so now let's take a look at the burner.  The burner consists of three pieces:  A simmer ring, a lid, and the burner itself.  Only the burner itself is required.  The lid and the simmer ring may be left behind if so desired.

The simmer ring is a ring shaped piece of brass that fits over the burner.  Attached to the ring is a "door" that can be slid back and forth opening up or restricting the burner which causes the flame to correspondingly increase or diminish.  When you want to extinguish the flame completely, simply close the simmer ring door completely.
The simmer ring of a Trangia burner.
A simmer ring in use on a Trangia 27.  Can you spot the flame?
The lid of the Trangia burner is threaded such that it forms a relatively tight seal on the body of the burner.  A rubber "O" ring is emplaced at the end of the threads so that a really good seal is made.  Because of the "O" ring, alcohol can be carried in the stove.  So, if at the end of cooking you still have alcohol left inside the stove, no worries, just leave it there.  There's no need to go through the hassle of trying to drain the stove.  Simply let the stove cool and cap the stove.  Off you go with no hassle.  Be sure to let the stove cool first before putting on the cap or you'll melt the "O" ring.  DO NOT use the cap to extinguish the stove. You'll melt the "O" ring for sure if you use the cap to extinguish the stove.  Use the simmer ring to extinguish the stove.  If you've left the simmer ring at home, you could yank the "O" ring out of the cap and then extinguish the stove, but that's a bit of a hassle.  If you do melt the "O" ring, not to worry.  Replacements can be had easily, and your stove will still work without an "O" ring (or without the entire lid for that matter).
The lid of a Trangia burner.  DO NOT use the lid to extinguish the flame.
As for the burner itself, the Trangia burner is an open jet style of burner.  The open style of the burner means that it's very easy to add fuel; simply pour it in.  Except in cold weather, no priming is required.  Simply apply a flame from a match or a lighter to the center of the open cup, the alcohol will ignite, and the stove will prime itself.  In no time at all, the alcohol will be hot enough to vaporize, vaporized alcohol will be coming out the jets, and the stove will be up and running properly.
A Trangia burner.  Note alcohol inside the burner.
The Trangia burner is a good compromise between speed and efficiency.  The Trangia burner is not the fastest alcohol burner out there in terms of boil times, but faster isn't necessarily better.  Faster burners tend to require more alcohol to do the same amount of boiling.  A more efficient burner like the Trangia means that you don't have to carry as much fuel.  But the Trangia is by no means slow.  As I say, the Trangia strikes a very good balance between efficiency and speed.

A Trangia 27 just after being lit.  Note flame (a bit hard to see)
As I have said, the Trangia is no slouch when it comes to boiling up water.  It's not a gas or liquid fuel stove, but it takes only a minute or two longer than petroleum fueled stoves.
Passing the "tea test" on a Trangia 27.
Water boiling on a Trangia 27
Now, of course, the whole point of a stove is to have a warm refreshing beverage or something nice and hot to eat.
Cooking oatmeal on a Trangia 27
My assistant seems to be getting the point, don't you think?  :)
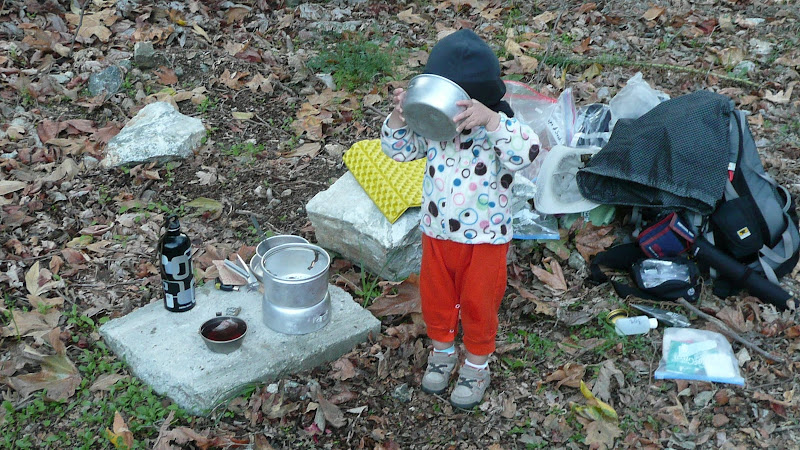
My assistant is ever so helpful when it comes to the eating portion of my stove hobby.  :)
The Trangia stove:  Good to the last drop.
Good thing I brought an assistant.  ;)
I hope you've enjoyed this Adventure in Stoving.

HJ

Related posts and articles: