QuietStove.com

Showing posts with label cold weather gas. Show all posts

Monday, March 19, 2012

Canisters, Cold, and Altitude: Gas in a Nutshell

OK, so here's the deal on canisters in cold weather and at higher elevations, in step-by-step form:

1.  Choose good gas.  For weather below 50°F/10°C, avoid butane mixes. Get an isobutane mix.  I've got all the major US brands sized up on my blog in What's the Best Brand of Gas for Cold Weather?  Above 50°F/10°C, it typically doesn't matter what brand or blend you buy.

2.  Know your limits.  Canisters containing isobutane mixes work reasonably well down to about 20F/-7C at sea level throughout the life of the canister if you use good gas (see item #1, above) and good technique (see item #4, below).  Now, that's just a number, which isn't a bad number if you just want the short version, but if you want to know more about that number, how I came up with it, and how to plan using it, see Gas Stoves: How Cold Can I Go?  Canisters get colder as you use them (canister "chilling") which can negatively impact performance.  See item #4, below, for how to compensate for canister chilling.

3.  Adjust for Altitude.  The higher you go, the lower the outside pressure.  The lower the outside pressure, the colder you can operate a canister gas stove.  You receive approximately a 1F per 1000' of gain colder advantage (about 0.5°C per 300m gain).  The idea that canister gas stoves don't work well at altitude is a myth.

4.  Use good technique.  Basically, start with a warm canister and keep the canister warm.  For "best practices," see Cold Weather Tips for Gas Stoves.

Now, in the above, I'm speaking primarily about "regular" gas stoves, the kind that screw right on to the top of a canister.  If you have a remote canister stove that is capable of inverted operation (see my Stoves for Cold Weather II article in Seattle Backpacker's Magazine for more information), then the limit in item #2, above, changes from about 20°F/-7°C to about 0°F/-18°C.  All of the other items still typically apply.  If you want to go out in weather that is that cold, I strongly suggest you do your homework, part of which should be to read Gas Stoves: How Cold Can I Go?

There, in the proverbial "nutshell," is how to deal with cold weather and adjust for altitude for canister gas stoves.

HJ

Related articles and posts:

Tuesday, January 24, 2012

The Kovea Camp 5 Remote Canister Stove

Introduction
If it's cold out and your remote canister stove has a generator (a pre-heat mechanism), then you can invert (turn upside down) the canister.  Inverting the canister means that you're sucking liquid off the bottom of the canister instead of sucking vapor off the top.  Now, liquid fuel goes to the burner where the heat of the flame vaporizes fuel.

If the heat of the flame is doing the vaporization, you're far less dependent on the weather.  In fact, all you need from the weather is just enough warmth to keep a little pressure in the canister, just enough pressure to get some liquefied gas to the burner where the heat of the flame will take care of the rest.

And that pressure should be pretty easy to come by.  Unlike upright operation, the propane content of your canister does not burn off faster.  With inverted operation (liquid feed gas), your gas mix -- and thus your canister pressure for a given outside temperature -- stays fairly constant.  As a practical matter, you can run your stove inverted in weather that's about 20F/10C colder than if your ran your stove upright.

Wow, gas in colder weather? All the simmering, none of the priming, how sweet is that?  Um, but what's the catch?

Well, the "catch" is that remote canister stoves that can handle inverted operation usually weigh two or three times what an upright stove weighs.  But we're making progress. Today, we feature a guest post by Geoff R from Australia.  Geoff reviews the Kovea Camp 5 (KB-1006).  The Camp 5 weighs 142g/5.5oz.  Which, while not as light as an upright stove, is a step in the right direction, particularly when you compare the Camp 5 to other remote canister stoves like the MSR WindPro (227g/8oz) and the Primus Express Spider (198g/7oz).

The selection of lightweight remote stoves in the US is pretty limited, so I am particularly happy to welcome Geoff's contribution to Adventures In Stoving.  So, without further ado, I turn things over to Geoff...


Since I acquired my MSR Dragonfly in 1998, I have been a firm believer in liquid-fuelled stoves.  Partly that was because of the underwhelming performance of gas stoves I had used before that – such as the Bleuet 206, especially in the wind.  Gas stoves have however advanced a lot in the intervening 14 years.  Hence I decided to investigate getting a gas stove again to enjoy benefits such as lower weight and simplicity of use again.

My criteria were to find a second stove which would be useful when two stoves are required to cook a meal, for taking with on day walks when I just want a quick cuppa, or as a more lightweight solution for longer overnight walks.  After some research I decided to take the plunge and order the Kovea Camp 5.
The Camp 5 comes in a nifty-looking plastic container
  
The Camp 5, which weighs in at 156g/5.5oz, comes with a separate piezo-igniter and is packaged in a nifty-looking brown plastic container.  I initially struggled to pack the stove back into its container.  With practise, I have now worked out how to fit everything back together properly.  The separate igniter weighs in at 14g/0.49oz and the container weighs another 60g/2.12oz, bringing the total package to 230g/8.11oz.  While not the lightest stove on the market, it is still probably one of the lightest remote canister stoves, and is a featherweight compared a packed weight of 502g/17.71oz for my Dragonfly.
The Camp 5 comes with a separate piezo-igniter.  Editor's note:  The AA sized battery is shown for scale only.  The stove does not run on batteries!

While some may take issue with the separate igniter, I prefer not to have the igniter continually being cooked all the time while the stove is on.  Also, if it breaks, I won’t have a piece of ballast attached to the stove.  In addition to the stove itself, I also purchased an adaptor from Kovea to permit the use of cheap long butane cans with the stove, as a fuel source in warm weather.  (This kind of adaptor has already been reviewed in Butane Adapter WARNING.)  Editor's note:  One must be very careful with this type of adapter.  If the canister rolls, the stove can go into liquid feed mode unexpectedly.  However, since the Camp 5 has a generator/pre-heat mechanism, use of such an adapter should be fairly safe with this stove if reasonable care is exercised.  

Initial impressions
On unpacking the stove, the overall impression is that it feels quite solid for something that weighs only 156g/5.5oz.  The legs feel quite sturdy.  My only concern was with the pot supports, which look quite flimsy, and which rotate loosely on the ends of the arms coming out of the stove body.  I don’t think the pot supports would stand up to rough handling or very heavy cookware.
The pot supports rotate loosely on the ends of arms coming from the stove body
The stove legs and the arms which run up to the pot supports feel quite securely attached to the stove body, and are articulated together by sets of teeth which ensure that the legs and stove supports lock securely in position when the stove is unfolded.
The legs and stove support arms are articulated together by sets of teeth

Another feature, which was a major in my decision to choose the Camp 5, is the fact that it has a small generator tube.  Based on my initial research on the stove it is capable of running in liquid feed mode, with an inverted gas canister.  More on this later.  The canister hose itself feels very flexible, and it rotates freely at the point where it is attached to the stove.

The burner, visually appears to be the same as that on the Kovea Flame Tornado, which is widely believed to be the same stove as the MSR MicroRocket, bar some cosmetic changes.  (One of those cosmetic changes between the MicroRocket and Flame Tornado is the burner itself.)

In Action
The first impression on firing up the stove is that it seems more like a flame-thrower than a stove.  The flame is very concentrated.  This does raise some questions about its ability to cook omelettes!
The first impression on firing the stove up is more flame-thrower than stove
After getting the stove running, one of the first tests I performed, with both a butane can and a propane-butane-isobutane mix was to invert the canister.  All the documentation I received with the stove was in Korean, so I have no idea whether inverted canister operation is officially sanctioned by Kovea.  Try this yourself at your own risk.


It is definitely advisable to turn the stove right down before inverting the canister.  The rate of fuel delivery does increase considerably on inverting the canister, especially with a propane/butane mix.  Apart from the fact that you need to be cautious of the much higher flame output, I had no issues with inverted canister operation.  I was not able to turn the valve open all the way, since the stove quickly got to a point where it could no longer suck in enough air for the amount of gas being delivered.
Inverted canister operation was no problem apart from the much higher output
Kovea seems to have erred on the conservative side when stating that the time taken to boil 1l of water is 30m30s.  During my tests, I was able to achieve a good deal less than this using a full 230g canister of propane/butane/isobutane mix from Primus.  I used the Dragonfly as a control to compare with a relatively well-known stove.

Stove
Fuel
Feed
Boil time
Fuel used
Camp 5
Butane
Vapour
4:36
16g
Camp 5
Butane
Liquid
3:47
16g
Camp 5
Propane/Butane
Vapour
3:19
14g
Camp 5
Propane/Butane
Liquid
3:18
18g
Dragonfly
Shellite
n/a
3:54
22g

Editor's note:  "Shellite" is a brand of white gas available in Australia.  Shellite is similar to Coleman Fuel.

It would appear that with a propane/butane mix, in liquid feed mode, the stove is no longer operating efficiently.  Turning the stove down a little would probably help on the efficiency front.  While I did not perform enough tests to build a statistically relevant sample, it appears that butane may be a little less efficient than a propane/butane mix.  The time quoted for the Dragonfly only includes the time from the point when the stove had reached full output and the billy of water was put on it, until the time when the water boiled.  The fuel used by the Dragonfly includes the fuel used for priming.  This test once again verifies the fact that gas stoves use less fuel than liquid-fuelled stoves.


The tests were performed at an ambient temperature of 22°C/72°F and 24°C/75°F at an altitude of approximately 7m/23ft above sea level.

Getting Out
Unfortunately I haven’t managed to get out on the trail with the Camp 5 yet, so a few tests on the gravel path in the back yard would have to do.  The small feet of the stove do have a tendency to bury themselves in a loose or soft surface.   That is however a problem I would expect any stove with small feet to have.  I didn’t have the expectation for this stove to have the same level of stability as the Dragonfly anyhow.
The feet of the Camp 5 have a tendency to bury themselves in loose gravel
While I was outside there was a nice sea breeze blowing.  The breeze was “nice” enough to blow over a potted yellowwood tree, which I have in the most sheltered corner of my back yard.  A windshield was definitely advisable under these conditions.  With the windshield, cut from a piece of aluminium flashing, in place I was still able to turn the gas right down to a low simmer.  As I turned the gas down, however, the circle of bubbles on the base of the billy became smaller and smaller – an indication that this stove may not be good at evenly cooking your simmering bolognaise.

Conclusion
I’m looking forward to getting out into the bush with this little stove.  I would hardly say it is perfect, but so far it is pretty much living up to my expectations.  I believe that every stove is a compromise of some sort.  For my purposes, I think the Camp 5 will be the right one.  It still isn’t without its disadvantages though.  In summary, here is a short list of the  Camp 5’s pros and cons from my point of view:

Pros:
·      Light weight (for a remote canister stove)
·      Ability to use cheap butane cans with an adapter
·      High power output
·      Ability to turn output down to a light simmer
·      Overall build quality feels solid
·      Generator tube makes it possible to operate the stove in liquid feed mode (I am not sure if this is officially sanctioned by Kovea.)

Cons:
·      Flimsy-looking pot supports
·      Very concentrated flame – possibly not great for simmering
·      Difficult to get the stove back into its container
·      Small feet bury themselves in loose or soft substrates

Note: I do not have any affiliation to Kovea.  All images in this post are © GM Rehmet 2012 and have been licensed to Adventures in Stoving.  No images may be reproduced without permission.  For licensing details, please refer to http://www.rehmet.alt.za/copyright/


A big thank you to Geoff for his contribution to Adventures In Stoving!

HJ


Other Kovea Related Posts
Kovea MoonWalker vs. MSR WindPro II -- Packability

Monday, November 28, 2011

Gas Stoves: How Cold Can I Go?

Gas stoves (also called canister gas stoves) can struggle in cold weather.
Frozen lake and snow, Sierra Nevada Mountains
UPDATE, 17 December 2014:  I've almost completely re-written this article.  I've tried to talk more about the overall process of planning for cold weather trips.  I've also tried to talk about more than just the gas in a canister; I've added discussion of the practicalities of cold weather canister operation.  One should not rely on the gas alone but also on one's own planning and techniques.

So, how cold can I go with my gas stove?

Good question.  Do you want the short answer or the long answer?

The "Short" Answer
The short answer is that for the typical upright canister stove (that's the kind where the burner screws directly onto the canister), about 20°F/-7°C can be used as a rough planning number.  For a longer answer, see the appendix.  Understand though that the colder it gets, the more your stove will struggle even if it's warmer than my planning number.  Your stove will not work just as well at 20°F/-7°C as it will at 75°F/24°C, at least not without planning and intervention on your part. You will need to know the basics of cold weather gas stove operation which are:
  • Choose good fuel.  See What's the Best Gas for Cold Weather?
  • Start with a warm canister.  Keep the canister in your sleeping bag with you before breakfast, put the canister under your clothing before supper, etc.
  • Keep the canister warm. Put some insulation under the canister (closed cell foam works well), protect the stove from wind, and put the canister in a bowl of (liquid!) water.
  • Heat the canister if needed. How can you tell if you need to heat the canister?  Poor performance.  If your flame is insipid in cold weather, you need to (carefully! slowly!) heat the canister.  See my Stoves For Cold Weather article in Seattle Backpackers Magazine for some ideas on how to heat the canister.  
Now, I've described 20°F/-7°C as a rough planning number.  What do I mean by that?  Well, if you follow the basics of cold weather gas stove operation (select good gas, start with a warm canister, keep the canister warm, and heat the canister if needed) and use your head, it shouldn't be too difficult to keep an upright gas stove going in temperatures at or above the planning number.  If you look at a weather forecast for the area and elevation in which you intend to use your stove, you should be able to get some idea of what temperatures you can expect.  If the temperatures are well above 20°F/-7°C, you might plan to bring an upright canister stove. If the temperatures are forecast to be close to or below 20°F/-7°C, you might plan on bringing something else.  For some alternatives, read the Alternatives for Colder Weather section of this article.

Note that 20°F/-7°C isn't carved in stone anywhere.  This is just my fairly conservative rough planning number.  Particularly with a fresh canister, you might be able to go colder.  You may also get some cold weather performance increases at higher elevations where the boiling point of the fuel is lower.  More on that in the appendix if you're interested.  Note that this "planning number" is but one part of the overall planning process.  There are many factors that should be considered when choosing gear for a particular trip, and this planning number is just one of them.  My "planning number" is meant to be incorporated into one's overall planning process.  It is not intended to trump the planning process.

Warning
I've said that the canister needs to be heated in cold weather in order to get good performance from a canister gas stove, but NEVER OVERHEAT A CANISTER.  If the canister feels so hot to your bare hand that it's painful, that's too hot.  Take IMMEDIATE action to reduce the heating of the canister.  Overheating a canister can do a number of bad things including causing the canister to explode.
Crags and peaks, Sierra Nevada Mountains

Alternatives for Colder Weather
If you need to go colder than 20°F/-7°C, you have a couple of options.  One is to switch from a canister gas stove to a liquid fueled stove, that is a stove fueled by white gasoline or kerosene (or similar).   That's certainly a pretty tried and true approach.

But many people either don't feel comfortable with or don't want to hassle with liquid fueled stoves.  In particular, many people are intimidated by having to prime a liquid fueled stove.  Are there any options for canister gas in temperatures lower than my rough planning number of 20°F/-7°C?  Well, if you want to use canister gas, you might want to bring a stove that can handle liquid feed gas, a remote canister stove with the canister inverted in other words.  See my article, Stoves for Cold Weather II, for more information on liquid feed gas.  With liquid feed gas stoves, one can use gas in colder temperatures, something on the order of 20 Fahrenheit/11 Celsius degrees colder than upright canister stoves – if you use your head and follow the basics of cold weather gas stove operation.  My rough planning number for upright canister stoves is 20°F/-7°C and inverted canisters stoves have roughly a 20 Fahrenheit/11 Celsius degree advantage over upright stoves, therefore I use 0°F/-18°C as the rough planning number for inverted canister stoves.

Note that even with liquid feed gas, one still needs to have some pressure in the canister to drive the process.  Therefore you must keep the canister "warm" relative to the outside environment.  Placing the canister in water is a safe way to keep the canister warm.  Water freezes at 32°F/0°C, so, as long as the water is liquid, your canister will be warmer than 32°F/0°C.  Keeping the canister above 32°F/0°C should give you more than enough canister pressure to run your stove.

The planning numbers I suggest are guidelines for reducing risk; there are no guarantees in the back country.  The planning numbers I suggest are temperatures in which you should be able to keep your fuel sufficiently warm to operate a canister gas stove.  Keeping the canister warm requires intervention on your part.  Note however that "stuff happens."  If temperatures drop, if winds pick up, or if you are exhausted or injured, you may not be able to keep your fuel warm.  You must be prepared to handle these and any other unexpected changes or emergencies that may occur.  These planning numbers cannot be used alone.  You must engage in proper planning, bring the proper equipment, and you must know and use the basics of cold weather canister operation.

Finally, the colder you go, the harder it is to keep the gas warm in a canister.  If you're going out in really cold weather, ask yourself:  "Can I really keep the canister warm?"  In cold weather, an abundance of caution is the best advice I can give you.

HJ


Appendix – The "Long" Answer
So, what am I basing my planning numbers on?  Well, let's talk a little bit, at a high level, about the chemistry of canister gas.  If this gets too boring or confusing or if you disagree or you just plain don't like what I've written, I commend to you a much simpler approach in Cold Weather Tips for Gas Stoves.

Now for the "long" answer:  Canisters for backpacking typically contain propane mixed with either isobutane or "plain" butane (n-butane).  The boiling points (vaporization points) at sea level of each of these gases are as follows:
 Boiling Point
n-butane    -0.5°C    31°F
isobutane    -12°C    11°F
propane      -42°C   -44°F

When you blend the fuels together, your boiling point will be somewhere in between the boiling point of the various fuels.  Calculating the exact boiling point is not trivial.  Not only that, but the proportions of the fuel mix will change over time with an upright canister stove.  Why will the mix change over time?  If the canister is used in the normal, upright position, the propane will boil off at a faster rate than either n-butane or isobutane because if its higher vapor pressure.  Since the propane is boiling off faster, there will be less and less propane in the mix over time.  As the percentage that is propane declines, the boiling point rises.

OK, so why all this blather about boiling points?  Well, the boiling point is the temperature at which your fuel will turn to vapor, i.e. change from liquid to gas.  Canister gas stoves require gas to operate, but that's a liquid inside your canister.  Just shake the canister if you don't believe me.  That's a liquid in there.  The fuel inside the canister is under such high pressure that the gas liquefies (turns into a liquid).  In order to run a canister gas stove, that fuel has to vaporize.  In order to vaporize, the fuel must boil.  If the fuel temperature is lower than the boiling point, it won't vaporize, and your stove won't run.  For canister gas stoves in cold weather, we want the lowest boiling point possible so that the fuel will turn to gas so that we can run our stove.  We must then keep our canister warmer than the boiling point of the fuel.

Well, OK, if the propane is burning off and the boiling point is constantly changing, how the heck can I figure out how warm I have to keep the canister!?  Well, toward the end of a canister, all of your propane will have burned off, and you will just have the fuel with the highest boiling point remaining (either isobutane or n-butane).  Therefore the boiling point of your fuel will never be higher than the boiling point of the fuel that remains at the end of a canister.  All we have to do now is keep the fuel temperature is above the boiling point of the worst cold weather performing fuel.  Isobutane boils at 11°F/-12°C; n-butane boils at 31°F/-0.5°C.  Isobutane therefore is a much better fuel in cold weather.  This is why I stress that one should avoid n-butane and only purchase fuels containing isobutane and propane for cold weather use.

I've just described in the preceding paragraph how the propane burns off more quickly when the canister is used in upright mode.  If you read the "Alternatives for Colder Weather" section, I talk about using a stove that can handle the canister in inverted (upside down) mode.  One of the advantages of using a canister in inverted mode is that your fuel mixture doesn't change much over time.  Since you're pulling liquid off the bottom instead of gas off the top, it doesn't matter which fuel boils at what rate so long as there's enough boiling to produce sufficient canister pressure.  Since you're not losing your propane (your best cold weather fuel), your boiling point stays low.  Remember, you want the lowest boiling point fuel for cold weather.

Now there's another matter:  Canister pressure.  Just being above the boiling point isn't necessarily enough.  If our fuel boils at 31°F/-0.5°C, and the fuel temperature is 32°F/0°C, then it's not going to boil very vigorously, and we're really not going to have enough pressure to run a stove properly.  To illustrate this, think of the "chattering" lid on a pot of boiling water.  If the water is just barely boiling, the lid is quiet.  But if you turn up the heat, the water will start boiling vigorously, producing enough steam to literally lift the lid for a moment.  The lifting (as the pressure builds up) and falling (after the pressure is released) is what causes the noise of a "chattering" lid on a pot of boiling water.  In order to run a stove, you want the fuel temperature to be high enough to produce a vigorous boil.  How high above the boiling point does the fuel temperature have to be to have enough pressure to properly run a stove?  Well, I suppose it depends on your definition of "properly" (as well as some external factors like atmospheric pressure and temperature), but the bottom line is that if you turn on the stove and the flame isn't strong enough to cook with, then the fuel is most likely too cold and you may have to warm the canister.  If you want numbers, if the fuel temperature is 20°F/7°C degrees above the boiling point of the worst performing fuel, then generally you should have good canister pressure.  The performance of your stove, however, is the bottom line as to whether or not your fuel is warm enough.  Caution:  If you heat the canister, and performance doesn't improve, think.  Could there be some other problem, for example, a blockage in the jet or an empty canister?  If you keep adding heat and performance doesn't improve, there's something else going on.  Never heat the canister to the degree that the canister feels painfully hot.

And there's yet another issue:  Canisters get colder as you operate the stove, through the process of evaporative cooling.  Canisters cool from within and get colder than their surroundings.  Take a look at the below photo.
Ice forming on the lower portion of a canister in cold but not freezing weather
That's ice forming on the sides of the canister even though the temperature is not below freezing.  Why?  Because as I use the gas, evaporative cooling occurs, and the canister gets colder than its surroundings.  So starting with a canister that is warm enough in the beginning is no guarantee that the canister will stay warm enough throughout the time that you are cooking.  This is why I suggest heating the canister if needed.  Heating the canister counteracts the effects of internal canister cooling as well as cooling due to heat lost to the environment.  Here's another advantage to using stoves with the canister inverted:  the canister doesn't cool from within to the same degree as a canister does when you use it upright.  Thus, there are two advantages to using the canister upside down (if your stove will support it!):
1.  Your propane won't be leaving the mix.
2.  Your canister won't get as cold.
More propane + warmer canister = better pressure.  Inverted canister stoves are definitely superior for cold weather.

Now, another complication, but this one generally works in our favor:  As you ascend, the higher you go, the lower the atmospheric pressure.  As the atmospheric pressure drops, so does the boiling point of your fuel.  Generally, the drop is about 1.8 degrees Fahrenheit for every thousand feet in elevation gained.  In metric units, that's about 1.0 degrees Celsius colder for every 300 meters in elevation gained.  Note the use of the word "about."  The actual values are slightly higher, particularly above 10,000'/3000 m, but I'm going to be conservative here.  I'll say more about why in a moment.  Take a look at the below chart.
A chart showing:
The relationship between boiling point and elevation for isobutane, navy blue line, 
Temperature vs. elevation for an internal canister pressure of 5 psi gauge (psig) for isobutane, red line.
Temperature vs. elevation for an internal canister pressure of 10 psi gauge (psig) for isobutane, gold line.
The relationship between the freezing point of water and elevation, green line.
Values are illustrative not exact.
The navy blue line shows how the boiling point gets lower as elevation increases.  Now, of course it's atmospheric pressure that's the real issue, but since atmospheric pressure declines relative to elevation at a fairly steady rate over the interval shown here, I show elevation.  In reality atmospheric pressure varies not only with elevation but also with conditions, and the change relative to elevation is not really linear (but it's close).  The chart is a simplification of what's really going on.  But recall that we're just after a rough planning number, a planning number that will be incorporated into our overall trip planning process, not a number that will override all else, so this chart is sufficient for our purposes.

OK, now why do I only use 1.8 degrees Fahrenheit per 1000 feet in elevation gain (about 1.0 C per 300 m) even though the actual change in boiling point is (slightly) greater?  Well, let's look at the red and gold lines on the above chart.  The red and gold lines illustrate what we're really after:  Canister pressure. Notice that the red and gold lines are not parallel to the navy blue line.  As it happens, the pressure inside a canister is lower in cold even if we're the same number of degrees above the boiling point.   In colder temperatures, the fuel temperature must be higher above the boiling point to produce the same internal canister pressure.  Notice how the red lines and gold lines get progressively farther away from the navy blue line.  The red and gold lines represent a constant pressure (5 psig and 10 psig, respectively).  In order to maintain a constant pressure, the red and gold lines get progressively farther away (more heat required) from the navy blue line as temperatures get colder.   Note that these lines are not exact; in fact I've exaggerated them slightly for illustrative purposes. Also, the actual functions are not linear in progression (but they're close).  We're not planning a Mars mission here.  We just need a rough planning number.  Approximating the true, non-linear progression with a linear one will get us in the ballpark.
An MSR Reactor operating at over 23,000 feet/7000 meters elevation on Muztagh Ata (24636'/7509m) in far western China. Overnight lows approached -40°F (which is also -40°C; the scales are equal at -40°). One person died on the mountain during this expedition.  It was cold.  Note that the canister is labeled "Isobutane" on the side.
Photo credit: Reuben Brimfield
Another note:  You can't out climb low canister pressure.  Some people have jumped to the conclusion that I'm saying "just keep climbing to the elevation where the boiling point is so low that your stove will start working."  Uh, no.  Temperatures fall faster than boiling points.  In other words, as you climb, it's going to get colder faster than the elevation change will improve your stove's performance.  The proper thing to do is to get a good understanding of the temperatures you'll be facing on a given outing and be prepared for them.  Don't try to climb to improve your stove's performance.

Now, look at the green line.  This represents the freezing point of water.  Note that the line is flat.  The freezing point of water does not vary with elevation the way that the boiling point of our fuel does.  Any liquid water will generally be warmer than the temperature that the green line represents.  Yes, the presence of certain minerals can change the freezing point of water, but for the purposes of our rough planning number, we will assume that any water that is liquid will be warmer than the green line.  Note that the green line is almost always above the gold line.  In other words, if we put a canister in water, you should have good canister pressure, so long as the water remains liquid.  I'm assuming here that you followed the other basics of cold weather canister operation as well.  This is the beauty of using water as a method of heating the canister.  By the mere fact that the water is liquid, we generally will have enough pressure with which to cook.  However, if you're not getting the performance you need, you should be prepared to take action.  One action might be to take some water out of the pot that you're heating and put it into the bowl that the canister sits in.  Don't get it too hot!  If you add just a touch of warmer water (slowly!) to the water that is already in the bowl, you will bring the water temperature up a bit and increase your stove's performance.  There are other ways to heat the canister, but liquid water is pretty safe so long as the canister never feels hot to the point of pain to the (unfrozen) bare hand.

Of course you can modify the stove to divert heat to the canister from the flame directly instead of using water, but there are risks in doing so. Be very careful.  Overheated canisters can and do explode.  A canister explosion is a potentially life threatening event.  ALWAYS  monitor the canister temperature with your (unfrozen) hand.  If the canister feels hot to the touch, turn it down immediately. 

Now you may be thinking, "if I can heat the canister, what's up with these planning numbers you keep talking about?  Shouldn't I be able to go as cold as I want so long as I keep the canister warm?"   Well, yes you can.  My planning numbers are an attempt to be conservative and thereby reduce risk (reduce, not eliminate).  The colder it gets, the harder it is to keep the canister warm.  If you're going out in really cold weather with a gas stove, think.  Can you really keep your canister warm in those temperatures?  What happens if the temperature is colder than you expected?  Can you compensate?  In really cold weather, your life may depend on your stove functioning.  Take no short cuts.

Summary:
1.  If you use a canister right side up, the best cold weather fuel, propane, boils off at a faster rate, so you must be able to rely on the other components of your fuel.  Therefore choose isobutane and avoid n-butane.
2.  If you use a canister upside down (inverted), the propane stays in the mix and your fuel has better cold weather performance.  Most stoves cannot handle inverted operation.  Do your homework before trying this.
3.  If used upright, canisters experience significant cooling from within.  Therefore, it is the fuel temperature which matters, not the ambient temperature.  Your fuel temperature will be usually be colder than the surroundings after operating the stove for a while.
4.  If you use a canister upside down, the canister will not experience cooling (well, at least not to the degree that it does in upright operation).
5.  In order to have enough pressure to properly operate a stove, your fuel temperature must be warmer than the vaporization point (boiling point) of the fuel.  Generally, about 20°F/11°C degrees above the vaporization point will give you good operating pressure, but the actual performance of the stove is the bottom line.  Poor performance probably means that your fuel needs more heat.  Therefore you must be able to heat the canister.  Water is typically a safe way to heat the canister.
6.  NEVER heat a canister to the degree that it is painfully hot to the touch of an (unfrozen) bare hand.
7.  The higher you go, the colder the weather your gas stove will operate in, but the colder it gets, the harder it is to keep the canister warm, irrespective of elevation.  As you climb, temperatures fall faster than the performance of your stove increases.  You cannot out climb cold.
8.  If you heat the canister, you are not as constrained by the ambient temperature.  However common sense still applies here.  Can you realistically keep the canister warm enough in the temperatures expected?  What happens if the weather is colder than expected? What happens if a storm moves in?
9.  You must know and use the basics of cold weather canister operation (select good fuel, start with a warm canister, keep the canister warm, and heat the canister if needed). You must also be prepared for emergencies and the unexpected.


    Related articles and posts:

      Friday, November 25, 2011

      What's the Best Brand of Gas for Cold Weather?

      For warm weather (above 50°F/10°C), it doesn't much matter what brand of gas you buy.

      Caution!
      The one exception to the above is Coleman gas canisters. At least for the Coleman canisters with the orange label, Coleman canisters do not work consistently with many brands of stoves.  You can however use Coleman canisters which are very cheap at Walmart to refill other canisters.  See:  Refilling Backpacking Canisters II.


      NOTE:  This post was last updated on 11 April 2017.


      For cold weather, the brand of gas you buy does make a difference.  Typically, gas canisters contain some blend of propane mixed with either "plain" butane (n-butane) or isobutane. Some canister brands contain all three gasses.  For cold weather use, you generally want a canister with as little n-butane as possible.  Even though propane is the best cold weather gas, I'd take a canister with 10% propane and 90% isobutane over a canister with 30% propane and 70% n-butane.  Why?  Because the propane will burn off at a faster rate than the n-butane, leaving you with nothing but n-butane toward the end of your canister.  Butane is a poor performer in cold weather.
      Frozen lakes and snow, Sierra Nevada Mountains, June 2014
      Why is butane a poor cold weather performer?  Why do we use blended gas?  Why don't we just use 100% propane?  That's all covered in my post on Gas Blends and Cold Weather Performance.

      How can we cope with cold weather?  For more info on canister stoves in cold weather, see:  Gas Stoves in Cold Weather – Regulator Valves and Inverted Canisters
      A frozen lake, Sierra Nevada Mountains, June 2014
      What companies have got the best blend?  I don't have all the data, but here below is what I have.  This data is for the United States of America.  Brands and blends available elsewhere may vary.

      GOOD WINTER GAS BRANDS:
      • Olicamp Rocketfuel is the best cold weather blend available in North America – at least based on the label.  It has 75% isobutane and 25% propane.  It's performance will not be radically better than an 80/20 mix, but Olicamp's 75/25 is a slightly better mix – if it is pure.  Any time there is isobutane, there will always be a certain percentage of plain n-butane present as well.  Here, quality control is essential.  How committed is Olicamp to quality control?  I don't know, but generally Olicamp Rocket Fuel's reputation is good.  Olicamp specifically advertises their blend, so they are clearly aware of the implications of the mix and are marketing it on that basis.
      • MSR is a good winter blend, 80% isobutane and 20% propane.  These numbers are confirmed on MSR's website.  MSR is pretty committed to the climbing and mountaineering community.  They are pretty committed to quality control.  I tend to trust MSR's numbers and believe that they have very low percentages of n-butane.  I generally go with MSR on my cold weather trips.  Your mileage may vary.
      • Snow Peak is 85% isobutane and 15% propane.  These numbers are confirmed on Snow Peak's website.  I tend to trust Snow Peak's numbers more since they are willing to commit to them in writing.  This mix isn't quite as good as Olicamp's or MSR's but is still a reasonably good mix.
      BRANDS OF UNKNOWN QUALITY (in no particular order):
      • Jetboil is supposedly 80% isobutane and 20% propane.  Possibly.  I have not been able to confirm these numbers.  How much n-butane does it contain?  I don't know.   No where will Jetboil put down in writing what their actual numbers are.  This tells me that their blend varies a lot.  Jetboil wouldn't be my first choice simply because Jetboil will not commit, in writing, to any set of numbers.  My understanding is that they can have more than 5% n-butane and still advertise that their mix as "isobutane" so long as it's mostly isobutane.
      • Brunton is reputedly an 80/20 mix.  Maybe.  I have not been able to confirm these numbers.  Brunton's reputation isn't that good in cold weather.  They may have a relatively high percentage of n-butane (which again they can advertise as isobutane so long as the majority of the butane is isobutane).  Brunton would not be my first choice since they won't commit to a particular blend.
      • Sterno is an isobutane mix according to the label on their cans.  What is the mix?  Unknown.  How much n-butane does their "isobutane" mix contain?  Unknown.  If nothing else were available, I guess you could go with it, but I myself would probably go with a brand that will commit to a certain set of numbers.
      • GSI, likewise, is an isobutane mix according to the label on their cans.  What is the mix?  Unknown.  How much n-butane does their "isobutane" mix contain?  Unknown.  If nothing else were available, I guess you could go with it.  I'd rather have a commitment, but sometimes you don't have every brand available at a given location.  I'd go with an "unknown" like GSI over a known mix if the known mix were labeled as containing n-butane.

        BRANDS NOT RECOMMENDED* FOR WINTER USE (in no particular order)
        • Coleman regular threaded canisters (not Powermax) are 30% propane and 70% butane.  These numbers on on the side of the canister.
        • Primus is 25 % propane, 25 % isobutane, and 50 % butane per their website.  I suppose it's better than Coleman brand, but I'd still rather have a fuel with no regular butane at all.  Note that this is their "regular" mix.  They do have a winter mix and a summer mix.  Definitely don't use the summer mix for cold weather!  The winter mix may be good, but I haven't been able to track down any numbers.
        • Optimus brand is 25% propane, 75% butane, as printed on the side of the canister.  Since it contains regular butane, I wouldn't use it in cold weather.
        • Glowmaster is 20% propane and 80% butane per the side of the canister. 

        One caveat to the above:  If you're using standard threaded canisters in liquid feed mode (in other words, the canister is used upside down) or you're using a canister that is designed for liquid feed (e.g. a Powermax canister), the n-butane vs. isobutane issue matters less, although I would still generally prefer isobutane had I a choice.  In liquid feed mode, the liquefied gas stays blended and all of the fuels burn together at a constant rate.  With liquid feed, the propane does not burn off more quickly, and you're not left holding the bag with nothing but crummy (in cold weather) n-butane left.  In other words, with liquid feed, "regular" butane isn't such a bad thing provided that you've got plenty of propane content.

        For "normal" (canister right side up) use, avoid "regular" butane for cold weather.

        HJ

        *Because they contain "regular" butane, a very poor fuel in cold weather.

        Related articles and posts:

        Thursday, November 24, 2011

        Gas Blends and Cold Weather Performance (Why not just use propane?)

        I got a good question recently:
        Hikin Jim, I see you refill [your backpacking canisters] with butane. What is the advantage over straight propane if propane works in lower temps? For that matter, why are these cartridges blended at all? I have wondered about this for a while.

        An excellent (and important) question. It has to do with vapor pressures. Take a look at the following boiling points table.
         Boiling point
        n-butane    -0.5C    31F
        isobutane    -12C    11F
        propane      -42C   -44F
         
        
        As you can see, propane will vaporize (boil) at extremely low temperatures whereas n-butane ("regular" butane) has a vaporization point some seventy five Fahrenheit degrees higher. Quite a difference!

        Let's say you have liquid propane in a container and the ambient temperature is a nice, comfortable 75F (24C). 75F is some one hundred nineteen degrees (Fahrenheit) above the boiling point of propane. Propane at that temperature desperately wants to boil and exerts tremendous vapor pressure against the walls of the tank, vapor pressure so strong that you need a fairly heavy steel container to hold it safely, such as those found on the big green 16.4oz (~460g) propane canisters from Coleman. The little lightweight canisters that backpackers carry could literally turn into a hand grenade at those pressures.

        On the other hand, n-butane is relatively benign at those temperatures. Take a look at a clear plastic lighter some time. That clear liquid inside is n-butane. Yep, all that's needed to contain n-butane is some flimsy plastic. Contrast that with a 16.2 ounce Coleman canister! Of course the problem with n-butane is that if the fuel temperature falls below about 40F/5C, the vaporization isn't strong enough to run a typical gas stove.

        Well, if propane is great but would catastrophically burst a backpacking canister and n-butane is easily contained but useless in cold weather, what to do? Well, you blend the two. The liquid blend takes on properties that lie somewhere between low pressure n-butane and high pressure propane. Better still, you get a chemist to rearrange the internal structure of the n-butane molecules a little and create isobutane. Isobutane is what is known as an isomer of butane. It's the same stuff, but the internal components have been put into a different arrangement, an arrangement that in this case works in our favor in that the boiling point drops by twenty degrees Fahrenheit! Nice, eh? It's like re-packing the trunk of your car. It's the same stuff, but in a different order. In the case of your car's trunk, things fit better. In the case of butane, the properties change a bit, and we've got a better cold weather fuel. The best cold weather blend for upright canister stoves is therefore isobutane mixed with propane. Note that I stressed the word "upright." More on that in a minute (see the second of the two below links).

        The problem with this blending arrangement is that the higher pressure propane tends to boil off a bit faster than than the n-butane or isobutane. Toward the end of the life of the canister, all you have left is the "lesser" (in terms of cold weather performance) of your fuels. This is one reason why in cold weather you can get the dreaded "canister fade" where your flame slowly fades out toward the end of the life of your canister, and you can't operate your stove even though, when you shake the canister, you can still hear fuel sloshing around in there.

        There are two things you can do to get good performance and avoid canister fade in cold weather.  One, you can take action to warm the canister or two you can switch to a liquid feed gas stove.

        With respect to liquid feed gas stoves:  If gas is kept under sufficient pressure, it liquefies, i.e. the form of the fuel changes from a vapor into a liquid.  If you feed the fuel in liquid form to your stove, you no longer have to worry about which fuel in your blend has a tendency to boil off faster into a gas.  With liquid feed, the blend you start with is the blend your finish with.  Since the blend doesn't change with liquid feed, it's not quite so critical that the non-propane component of your fuel be isobutane.  Again, since the blend doesn't change, the cold weather performance of your fuel is just as good at the end of your canister as it was at the beginning, and you don't get such pronounced "canister fade" toward the end of the canister.

        There are a lot of advantages to using a stove in liquid feed mode in cold weather, but be aware that not all gas stoves can be used in liquid feed mode.   Be sure to read the above linked article to find out what type of stove may be used safely.  You also need to buy the right brand of gas in order to get good cold weather performance.  Not all brands are equal.  For more information, please see my post on What's the Best Brand of Gas for Cold Weather?

        As for refilling backpacking canisters, butane is cheap, readily available, and of lower pressure than the original contents (and therefore reasonably safe). Although reasonably safe, the one problem with refilling backpacking canisters with 100% butane is that they're no good if the fuel temperature gets much below about 50°F/10°C.  So, I just use my refilled canisters on fair weather trips.  I tend to prefer fair weather trips anyway, so refilling backpacking canisters works very well for me.  YMMV.  :)  I wish I had a source of cheap isobutane, but alas I do not. Refilling with 100% isobutane would also be reasonably safe if the canister originally contained a propane-isobutane blend. Refilling a backpacking canister with 100% propane could be a very deadly enterprise and should be avoided. But this post is really about why we blend gas and why we don't use 100% propane in backpacking canisters.  At some future point, I'll dedicate an entire post to the subject of refilling canisters.

        Hope that clears things up a bit.

        HJ


        Related articles and posts:

        Sunday, July 31, 2011

        Advantages (?) of Regulator Valved Stoves, Part I

        UPDATE 10 FEB 2013:  Advantages (?) of Regulator Valved Stoves, Part II is now available.


        INTRODUCTION
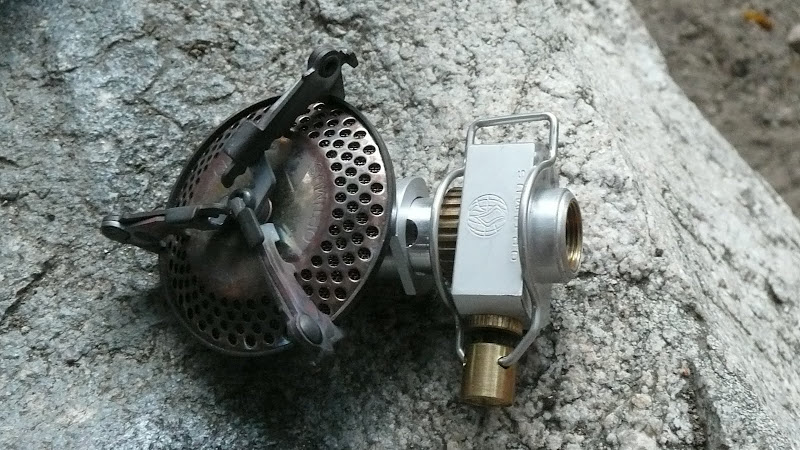
        Soto Outdoors recently introduced their OD-1R Micro-Regulator stove.  Soto created a good deal of buzz when they posted the following video which makes it look as though a regulator valved stove has quite an advantage over a conventional needle valved stove.  The relevant segment starts at 1:03.


        What advantages, if any, do regulator valved stoves offer?

        This post is Part I of Advantages (?) of Regulator Valved Stoves, an investigation into the advantages, if any, of stoves that have a regulator valve.

        Part II can be seen here:  Advantages (?) of Regulator Valved Stoves, Part II

        Several people have mentioned in passing that their canisters were more fully drained after using a regulator valved stove than when using a conventional needle valved stove.  In addition, in a discussion with an individual who has worked a good deal with LPG commercially, said individual felt that a regulator valve would function at lower gas pressures (such as those in a seemingly exhausted canister) than a needle valve.  If in fact a regulator valved stove were to make more full use of the gas carried when backpacking, this more full use would be of value to backpackers.  I set out to conduct a simple experiment to see if indeed a regulator valved stove might make more full use of the gas in a canister.  My experiment would exhaust a canister using a needle valved stove and then replace the needle valved stove with a regulator valved stove to see if the regulator valved stove could operate on a canister that, to a needle valved stove, was exhausted.


        ENVIRONMENT
        Location:  Stove Test Area 1 (UTM: 11S 383294 3792457), Haines Canyon, City of Los Angeles, California, USA
        Date/Time:  30 JUL 2011, 1830 hours
        Elevation:  2600'/792m MSL

        Conditions:
        27.20 InHg/921 mBar
        80F/27C
        Little to no wind (no audible susurrus, no visible leaf motion)


        EQUIPMENT
        Regulator Valved Test Stove:
        -Soto OD-1R Micro Regulator
        P1070137.JPG


        Conventional needle valved stoves for comparison:
        -MSR Superfly
        P1070136.JPG

        -Optimus Crux
        P1070134.JPG

        -Snow Peak GST-100
        P1070135.JPG
        All stoves together:
        P1070133.JPG


        Fuel:
        -Canister 1.  Snow Peak 110g, weighing 88g
        -Canister 2.  Snow Peak 110g, weighing 93g
        -Canister 3.  Snow Peak 110g, weighing 166g

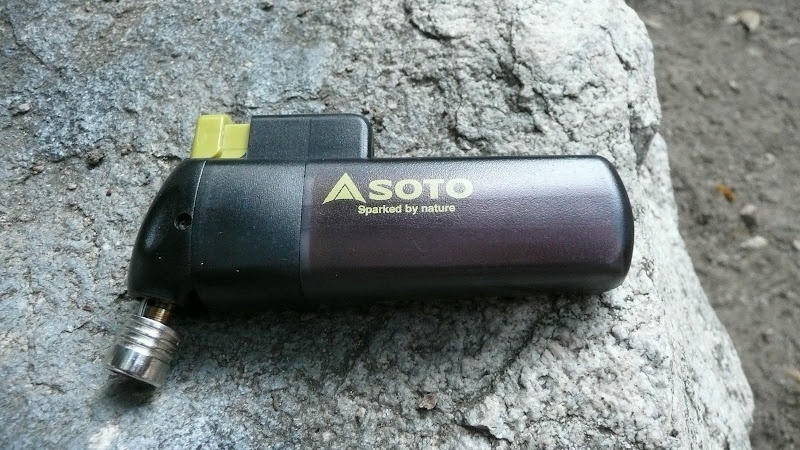
        Ignition source:  Soto Pocket Torch. 
        P1070138.JPG


        TEST RESULTS
        Test 1, canister 1 (88g)
        A.  Superfly, valve fully open, flame on, run to exhaustion.  Flame out.  Cannot restart.  No sound of gas escaping.
        B.  OD-1R, valve fully open, cannot start stove.  No sound of gas escaping.
        C.  GST-100, valve fully open, cannot start stove.  No sound of gas escaping.
        D.  Crux, valve fully open, cannot start stove.  No sound of gas escaping.

        Test 2, canister 2 (93g)
        A.  Crux, valve fully open, flame on, run to exhaustion.  Flame out.  Cannot restart.  No sound of gas escaping.
        B.  OD-1R, valve fully open, cannot start stove.  No sound of gas escaping.
        C.  GST-100, valve fully open, cannot start stove.  No sound of gas escaping.
        D.  Superfly, valve fully open, cannot start stove.  No sound of gas escaping.

        Equipment Checking, canister 3 (166g).  Each stove tested for normal operation.
        A.  Superfly.  NORMAL
        P1070139.JPG

        B.  Crux.  NORMAL
        P1070141.JPG

        C.  GST-100.  NORMAL
        P1070142.JPG

        D.  OD-1R.  NORMAL.
        P1070140.JPG


        DISCUSSION
        Two very nearly empty canisters of gas were used to conduct the experiment.  A third canister containing far more gas was used to verify that each stove used in the experiment was working properly.  All stoves were in fact working normally.  To avoid the chance that the results might be skewed by some unknown, unusual characteristic in one of the needle valved comparison stoves, multiple comparison stoves were used.  A butane torch was used as the ignition source for all stoves whether or not a given stove had a piezoelectric ignition so that ignition failures could not skew the results.  At random, a needle valve stove was chosen and used to exhaust the canister.  When flame out occured, a brief re-ignition was quickly attempted in order to confirm exhaustion of the canister.  If the re-ignition failed, the needle valve stove was swapped out for the regulator valved stove, and an attempt to run the regulator valved stove was made.
        I ran two tests.  See TEST RESULTS section above for details.  In both cases, the Soto OD-1R could do no more than a conventional needle valved stove.  An exhausted canister to a needle valved stove was an exhausted canister to a regulator valved stove.  For additional confirmation, after the test with the Soto OD-1R, the remaining needle valve stoves were tried.  No stove was able to operate after intitial exhaustion.  A exhausted canister was an exhausted canister, irrespective of the stove used.  After the test, canister 1 weighed 86g, and canister 2 weighed 86g.

        CONCLUSION
        A Soto OD-1R regulator valved stove is not able to burn off more gas from a canister than a conventional needle valved stove.  This is not to say that a regulator valve might not have some value in keeping a flame constant as canister pressure drops, but when the canister is finally exhausted, a Soto OD-1R regulator valved stove offers no advantage over a conventional needle valved stove.