MSR has just released (January, 2013), a new, lighter weight version of their Reactor stove system, with a 1.0L pot. Think of it as a "mini Reactor" (my name for it, not MSR's).
 |
| The original Reactor (1.7L), left, and the new "mini" Reactor (1.0L), right. |
A Substantially Lighter Version
Now, I know what you're thinking, "well, of course it's lighter, it's
smaller."
Yes, I understand that, but I mean this one really is lighter, substantially lighter, lighter than you would expect just based on size alone. Typically, a larger pot is actually lighter
per unit of volume. For example, my 0.9L Primus LiTech kettle weighs 164g, which is a ratio of 0.182g/ml. My 1.5L kettle of the same brand and type weighs 219g, which is a ratio of 0.145g/ml. Yes, the larger kettle is heavier overall, but it's lighter
per unit of volume.
The
original Reactor pot weighs 341g (without lid), which is a ratio of 0.20g/ml. The new Reactor pot weighs 172g, which is a ratio of 0.17g/ ml. So even though smaller pots usually weigh
more per unit of volume, the new Reactor actually weighs
less per unit of volume. The weight savings here aren't just from a smaller pot but rather from a redesign.
Note: Both the original and the new mini Reactor use the same burner.
Update 25 March 2013: MSR informs me that there is also a newer version of the 1.7L Reactor pot that has the same welded fins as the new 1.0L Reactor pot. The newer version of the 1.7L Reactor pot is lighter by about three ounces (~80g) than the original 1.7L Reactor pot. If you have the newer version of the 1.7L Reactor pot, your weight savings will not be quite as substantial if you switch to the 1.0L Reactor pot.
OK, so the new Reactor is lighter than just what we would expect based on the smaller pot size, how did they do it? Well, clearly MSR set out with lightening up in mind. The heat exchanger, a significant source of weight, has been revamped.
 |
| The original Reactor, left, and the new "mini" Reactor, right |
Just take a look at the above photo. The number and thickness of the heat exchanger fins has been reduced. Notice also that on the original Reactor, the heat exchanger fins and pot appear to be of one piece where in the new mini Reactor the fins are clearly welded on. The net effect of these changes is significant: The mini Reactor is a just plain lighter set up. The mini Reactor is so much lighter that you notice it right away when you pick up the pot.
Now, MSR may face some criticism from some quarters for this design change. In the original design, the entire heat exchanger fin was in contact with the pot. In the new design, the fin only contacts the pot
at the weld. And of course there are fewer fins. Clearly, there is going to be some reduction in heat transfer. Indeed, MSR lists the boil time for one liter of water as 3.0 minutes for the original design but 3.5 minutes for the new design.
I would answer such criticism as follows:
1. Everything in life is a tradeoff. In order to lighten things up, the heat exchanger
had to be redesigned.
2. Entrainment of hot exhaust gasses continues undiminished (more on this in Appendix II).
3. The level of heat transfer effected is still exceptional – far above that of a "plain" pot.
So, yeah, you're giving up some degree of efficiency, but you're gaining a much lighter system, a system that still works exceptionally well at transferring heat. Beyond that, if you're really worried about that lost little bit of heat transfer efficiency, then just go out and buy the original version and carry the extra weight. MSR will continue to offer both versions, so take your pick. It's the best of both worlds, really.
Update 25 March 2013: As I mentioned above, there is a newer version of the 1.7L Reactor pot available. The newer version of the 1.7L Reactor pot still has higher efficiency than the 1.0L version. The original version of the 1.7L Reactor pot has been discontinued.
Now, I listed "entrainment of hot exhaust gasses" as one of the things that contributes to the Reactor's amazing heat transfer efficiency. Just what the heck does that mean? Please see Appendix II, below, for an explanation.
New Features
Not only is the new pot lighter, but they've added some new features and options. They're all nice, but I think the first is actually pretty important, particularly for serious climbers: MSR has come out with a hanging kit.
 |
| A 1.0L mini Reactor in the new hanging kit |
I'll review the hanging kit separately, but for now let me just say that the kit works well and that the kit is designed to fit all pot sizes for the Reactor system.
Note: I've only tested the hanging kit with the 1.0L sized pot so far.
Another great new feature: They've added a pour spout. Yeah, it's just a little thing, but darn is it handy. Thank you, MSR! I for one appreciate MSR's attention to detail.
 |
| The pour spout on the new 1.0L MSR Reactor pot |
In conjunction with the pour spout is a new feature on the lid: A drinking hole/strainer.
 |
| Holes on the lid of the new 1.0L MSR pot can be used for drinking or as a strainer. |
The knob on the lid has been changed. The new knob can be used to hold the lid. This may not be such a big deal for hikers and backpackers, but this might be really useful for climbers.
 |
| The knob on the pot lid can be used to suspend the lid |
Now notice also that there's a hole in the center of the knob.
 |
| The hole in the center of the knob can accommodate a coffee press |
MSR is now offering a French press that fits the new 1.0L pot. Fresh morning coffee, anyone? Nice! I'll review the coffee press in an upcoming post.
Note: MSR is also offering a separate, larger French press attachment for the original 1.7L Reactor pot.
Packability
OK, so it's smaller and lighter while still being efficient, and it's got some nice new features and optional extras. That's all great, but can I still pack everything inside the pot like I could with the original version?
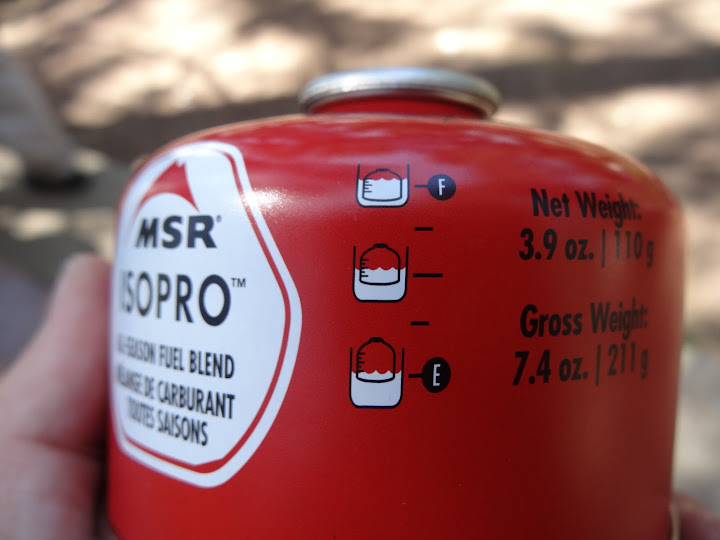
Well, as a matter of fact, yes, you can still pack everything inside. But, pay attention: Along with the new 1.0L version of the MSR Reactor, MSR also introduced a new canister format for their 4 ounce class canisters. The new canister format is more packable and contains essentially the same amount of gas as their old canisters. See
The New MSR Gas Canister for more details.
You must use the new canisters if you want to pack everything inside the pot.
 |
| The new, more packable version of the MSR 4 ounce class canister (which is now 3.9 oz/110g) |
To pack things up, first put the included little pack cloth into the bottom of the pot. This is actually fairly important for reasons that I'll explain in a minute.
 |
| First, place the pack cloth into the bottom of the pot. |
Then, place the canister in the pot upside down. Again, you must use the new 3.9oz/110g MSR canisters (or a similar canister of another brand). The old 4.0oz/113g MSR canisters will NOT fit. Go ahead and leave the cap on the canister; there is room.
 |
| Second, place the canister in upside down. |
After that, place the burner, face down, into the pot. Make sure you put the valve control into the pour spout of the pot.
 |
| Third, put the burner upside down into the pot, being careful to point the valve into the pour spout. |
It's a tight fit, you may have to give it just a bit of a shove. Now, here's where that bit of pack cloth comes in handy. The end of the valve spindle will scratch up the pot.
 |
| Scratches in the pour spout from the end of the valve spindle |
So rather than scratch up your pot, merely position one corner of your pack cloth such that it protects the pour spout, like so:
 |
| Use the pack cloth to cover the tip of the valve spindle and protect your pot from scratching |
Voila! Problem solved.
It's a tight fit, but everything does fit, and you've got a very compact unit.
Capacity
So, the pot is billed as a 1.0L pot, and if you fill the pot right to the brim, yes you can fit a liter in there. On the other hand, MSR recommends that you put only 0.5L in the pot at a time. What? Only use half the capacity of the pot? What gives? Well, the Reactor is one of the most powerful backpacking stoves in existence. You can get a violent boil very quickly, a boil that could overtop the pot in the blink of the eye and presents a very real scalding risk. And boiling hot water hitting a canister? Yipes! The pressure inside the canister could go through the roof. Your stove could flare up or behave in unexpected, dangerous ways. Not something I'd want to risk!
That said, I think a careful user, a user who kept the stove turned down and watched the pot like a hawk, could easily boil 0.75L at a time or maybe even 0.8L. However, if you boil more than 0.5L at a time, you are going against the manufacturer's recommendations and you do so at your own risk. The consequences of a boil over could be quite severe if your canister becomes overheated. Beware!
Who the Heck Needs a Reactor?
People often ask me: "Who the heck needs so
much stove?" Indeed, who does need such a powerhouse?
Well, perhaps not someone who is traveling in comparatively benign conditions. But for those who travel in heavily windswept areas, particularly mountaineers who venture into high altitude, exposed terrain, the wind proofness of an MSR Reactor makes it just the stove you want. The Reactor is
the most wind proof upright canister stove, bar none. When other stoves fail to even bring a pot to the boil, the Reactor hums along as though nothing unusual were happening. If I were on a barren, windswept, high altitude plateau, there is no upright canister stove that I'd rather have. Indeed, it is MSR's contention that the Reactor is the most windproof stove of
all classes. I haven't yet been able to corroborate that with my field testing, but it's certainly a credible claim.
But there's another application where the power of a Reactor can be properly brought to bear: snow melting. Think about it: You pull into your camp for the night. You need to melt enough snow for drinking and cooking that evening as well as enough water for your next day. You might need as many as six liters. That takes a lot of time. The Reactor's power and efficiency can be a real asset for those who need to get into the bag ASAP and get up early for an "Alpine start."
I think therefore that the Reactor will appeal most to serious climbers and mountaineers, but there will certainly be an appeal to anyone who faces significant winds or needs to melt snow quickly. In it's new compact, lighter format, the Reactor may also hold appeal to adventure racers.
Concluding Remarks
I bought an original Reactor several years ago. To be honest, I really haven't used it all that much. Is it a bad stove? No, not at all, but I'm generally not willing to carry all that weight unless I really need it. If I'm not going to need to melt some serious snow or expecting really windy conditions, I'm going to go with something lighter. With the new version, I expect to get a lot more use out of the stove.
The new version is certainly going to appeal to soloists, particularly serious climbers and mountaineers, but a Reactor is so stinkin'
fast that I think the 1.0L pot can still be of use to a small team that wants to travel light and fast. One just needs to "re-imagine" how to use the system. Instead of cooking everything at once, make small but quick courses. It would take a bit of getting used to and a bit of thinking through in advance, but the new mini Reactor is fast enough to make it practical and would allow a small team to have real weight and space savings
The new 1.0L MSR Reactor
What's good about it?
- Significantly lighter than the original 1.7L pot (and also lighter than the newer 1.7L pot, but not as dramatically)
- Great new options (hanging kit, coffee press)
- Nice new features (pour spout, drinking holes)
- Most windproof upright canister stove known to humankind, period (true of all Reactor sizes)
- Powerful snow melting capabilities (true of all Reactor sizes)
What's bad about it?
- Slightly less efficient (but hey, just go buy the 1.7L version if you really need that level of efficiency)
- Like all upright canister stoves, the Reactor is adversely affected by cold weather. Assume that you can go no colder than 20F/-7C with propane/isobutane fuel unless you know the "tricks." See Appendix III, below, for further information.
- The burner can only use Reactor specific pots (true of all sizes)
The new 1.0L MSR Reactor: Highly recommended
I thank you for joining me for another Adventure in Stoving,
HJ
Appendix I – Component Weights
| Item | Grams Measured | Stated Grams | Ounces Measured | Stated Ounces |
| 1.0L Pot | 172 | 197 | 6.1 | 6.9 |
| Burner | 178 | 179 | 6.3 | 6.3 |
| Lid | 36 | 36 | 1.3 | 1.3 |
| Pack Cloth | 4 | 4 | 0.1 | 0.1 |
| Total | 390 | 416 | 13.8 | 14.7 |
Update 25 March 2013: I've weighed my 1.0L pot at least ten times now. I get 172g. I talked to MSR. They weighed a pot there in Seattle and confirmed 197g. That's a difference of 25g (nearly an ounce). I'm not sure what the issue is here. My pot seems fine, but maybe I got an odd pot? If I can, I'll head to a local store and see if I can measure another pot, but these are new, so I haven't seen them in any stores yet. If you decide to purchase one, don't count on your pot being 172g; it may be 197g. Regardless of the precise weight, the system is well designed, well put together, and is clearly lighter than the original Reactor.
Appendix II – Entrainment of Hot Exhaust
What do I mean when I say that the Reactor "entrains hot exhaust gasses?"
Well, first let's take a look at the Reactor system. How does air flow through the system? Look at the
exhaust vents built into the pot itself. Notice that the vents are well up the sides of the pot. This is important.
 |
| The exhaust vents on a Reactor pot. |
The hot gases produced by combustion exit through these vents.
OK, if that's where the exhaust goes out, how does air
enter the system? The burner nests tight against the bottom the pot. Air can't come in around the sides of the burner.
 |
| The burner on a Reactor nestles up inside the pot. |
So how does the air get in?
Through the burner. Take a look at a Reactor's burner. Air is entering the system through the air inlet holes in the sides of the burner (well, specifically through two Venturi type ports on either side of the valve, but the essential idea is that the air comes in through the burner assembly).
 |
| Vent holes in the sides of the burner funnel air into the Reactor system. |
OK, so we've got fresh air entering through the sides burner, proceeding through the combustion area of the burner, flowing along the heat exchanger fins, then up the sides of the pot, and finally exiting through the exhaust vents. Note that the exhaust vents are well above the bottom of the pot.
 |
Airflow in a Reactor system.
Blue = cool. Red = hot. |
With a conventional pot, the hot exhaust from the burner just flows out around the bottom of the pot and dissipates into the surrounding air. With the Reactor, the hot gasses are trapped inside the heat exchanger assembly and channeled along the sides of the pot. The hot gasses cannot exit until they reach the exhaust vents. These hot exhaust gasses transfer additional heat to the pot,
heat that is normally lost in other set ups. The trapping of the hot output from the burner is what I mean by "entrainment of hot exhaust gasses" and is something that is unique to the Reactor among canister stoves. This entrainment of hot exhaust gasses is part of what gives the Reactor its very high efficiency.
Appendix III – Cold Weather and Canister Gas Stoves
Canister stoves are generally limited in their operational temperature range to about 20F/-7C
at sea level towards the end of the canister if you use propane/
isobutane
fuel (but there are "tricks;" see the article list, below). I emphasize "at sea level" here because the
higher you go, the
colder you can operate a canister stove. Generally, you can operate 2 Fahrenheit degrees colder per thousand feet of elevation that you gain (About 1 Celsius degree per 300m gain). Of course with a fresh canister, you can go colder than that, but performance will fall off as the canister empties. It is difficult if not impossible to determine how soon the performance will drop off as the canister empties, so I recommend the practice of assuming that you can go no colder than 20F/-7C at sea level with propane/isobutane fuel. Note that 20F/-7C is the
coldest temperature that you can operate at, so don't expect to
start at 20F/-7C and be able to cook for long with a half empty canister; canisters get colder as you use them. Note also my emphasis on using a propane/
isobutane
fuel. You cannot use regular butane fuel in cold weather and expect decent results. You must use a fuel that contains
isobutane.
Sound complicated? Don't despair! It does take some getting used to, but it's actually not too bad. For "tricks" to operating in cold weather, please see:
Cold Weather Tips for Gas Stoves
As alluded to above, it
matters which brand of gas you buy for cold weather. Please see:
What's the Best Brand of Gas for Cold Weather?
I've got a whole series of related articles if you'd like to read up. Here's the whole list: