QuietStove.com

Showing posts with label canister stove. Show all posts

Wednesday, April 4, 2012

Canister Stoves 101: Thread Care

Don't screw on your canister stove too tight.

Why not?

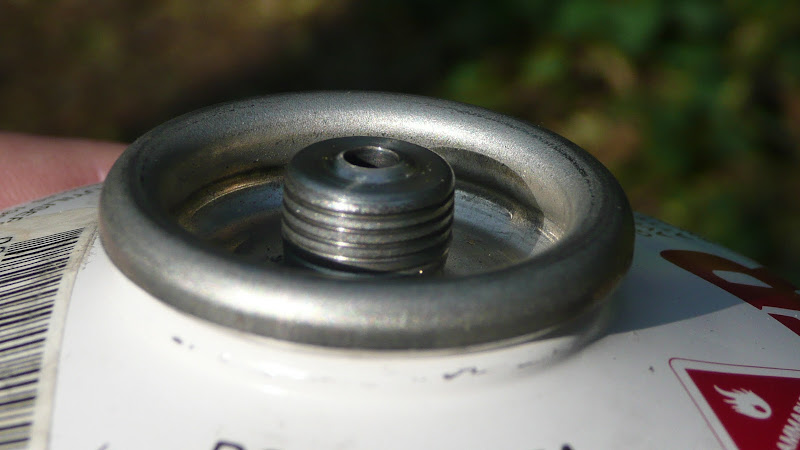
Well, take a look at the threads on a canister some time.
Notice how the threads do NOT go all the way out and form a sharp line.  These threads are rounded off.  That means that the only part of your stove's threads that are going to grip the canister is the very tip (very outer edge) of your stove's threads.

Whoa!  Wait a minute.  Do you mean to tell me that the only thing holding the stove on to a canister is the edge of the threads?

Yes, that's what I'm saying.  And that's a fairly thin bit of metal.  Too much pressure will put excessive wear on your stove's threads.  Heavy users have reported threads so worn that stoves have literally fallen off the canister.  Once your stove's threads are so worn that they no longer grip the canister, you're pretty much out of luck; you have to replace the stove.

So, Canister Stove Thread Care 101:
  • Don't over tighten.  If you're getting good gas flow and no leaking, that's tight enough.
  • Use the little cap on your canister.  Sure, it's a hassle to keep track of the little plastic cap, but dirt, sand, etc on the canister's threads could screw up that nice  stove you've got.  
  • Keep the threads clean on your stove.  Keep it wrapped in a bandana or something to keep crud out of the threads.  I normally keep my canister stove wrapped up and in my cook pot when it's in my pack.  Some stoves come with a little pouch or case which may be a good alternative if you don't store your stove in your pot.  Don't wrap your stove in something that sheds a lot.
  • Inspect the threads on your canister.  If there's damage on the canister threads, get a new canister (if available).  It's not worth it to use a damaged canister which might screw up your stove.
  • Do NOT cross thread.  Make sure you thread the canister on correctly and that it turns smoothly.  If it feels "funny," stop and check.  Cross threading is a great way to damage your stove.
I generally don't recommend lubricating the canister threads because crud might be more prone to stick to the lubricant, but I do know some people who lubricate the canister threads with silicon grease to prevent binding.  Perhaps there may be some advantage to this approach.

The main thing to remember with canister stoves is that a little care goes a long way.  Keep things clean, don't over tighten, and be careful how you screw on the canister.

I thank you for accompanying me on another Adventure in Stoving.

HJ


Related articles and posts:

Saturday, September 3, 2011

MSR Whisperlite Universal -- First Videos, Detailed Photos

I'm in the process of writing a review of the new MSR Whisperlite Universal stove.


UPDATED 10/4/2011I have written a review of the MSR Whisperlite Universal.

See also this related post which contains additional info on the new (for 2012) stoves from MSR.

The new MSR Whisperlite Universal

I'm still working on the review, but I've posted some rough videos. Don't be expecting slick production values, but if you're interested in the stove, these videos should be pretty informative.

MSR Whisperlite Universal -- First Look


Field trial: MSR Whisperlite Universal, running on canister gas.


Another video of running the MSR Whisperlite Universal on canister gas.


The MSR Whisperlite Universal -- changing from liquid fuel to canister gas:


MSR Whisperlite Universal -- Flip Stop:


I've also posted some detailed photos -- and commentary:


I'll have more to say after I get the stove out in the field, but I thought I'd give you some preliminary thoughts now.

HJ

Thursday, August 25, 2011

Stove of the Week: Hank Roberts Mini Stove, Mark III

I happen to like my old Hank Roberts stove, a stove that dates back to the 1960's. It's in very nice condition. I have the Mark III version.

So compact! And inside, the original accoutrements that came with the package.

Unfortunately, it's been some years since either the stove or its proprietary fuel canisters have been produced (see The Hank Roberts Stove -- With a Proper Canister for information on and photos of the original canister type).  Therefore, to the original contents, I add a few "essentials," all of which are easily contained within the outer shell of the stove.
Now, you probably recognize the Bic type lighter, but what of the other items?

Well, let's take a look.

The silver colored cylinder is an adapter made by Henrik from Denmark who I met on an internet forum.  Unfortunately, I've lost touch with Henrik.  :(

The hose is a spare gas hose to a Chinese made stove that I bought on eBay. The hose screws into the threaded end of the adapter, like so:

Now, let's take a look at the stove itself. That little discus you saw earlier? Here's what it looks like assembled. Pure genius.

Here's the valve assembly.
Do you see that brass "needle" to the right? That needle fits into a "rosebud" on a proprietary canister. Such canisters are alas no longer made.

Here's where Henrik's adapter comes in.
 The adapter slips over the needle.

And voila! here we are ready to cook.

Did someone say "cook?" Now, where would we be without some flame shots?

A very nice, efficient blue flame.

The Hank Roberts Mini Stove (Mark III) really has a good strong flame.

The original proprietary canisters contained a wick. The wick conducted liquefied gas into the burner. Liquid did you say? Why then we ought to be able to invert the canister and be able to run the stove in liquid feed mode. Indeed, we can do just that.

Be sure to let the stove warm up before inverting the canister. If you don't let the stove warm up a bit first, the stove will flare.  Running a gas stove in liquid feed mode allows one to operate a gas stove in much colder temperatures than in conventional upright (vapor feed) mode.

As they say, "the proof of the pudding is in the eating," so it's time for the "tea test."  Handily passed.

And if tea test, then tea.
Delicious, I assure you.

I thank you all for joining me on another Adventure In Stoving,

HJ

The Hank Roberts Mini Stove (Mark III version)
What's good about it?
Compact
Capable of operation in colder weather than conventional (upright) gas stoves
Highly adjustable flame
Good, strong flame
Stable because of nice wide base
Good pot stability because of well designed windscreen/pot support
Some wind protection from windscreen (it really needs a separate windscreen in a stronger wind)

What's bad about it?
Canisters are no longer available (but can be operated with an adapter, if you can get one)
A little heavy (about 8 oz) by modern gas stove standards
No longer available in stores (but available on eBay and such)

Hank Roberts Mini Stove:  Highly Recommended (considering its era).


Hank Roberts Stove -- Related Blog Posts

Monday, August 1, 2011

Windscreens

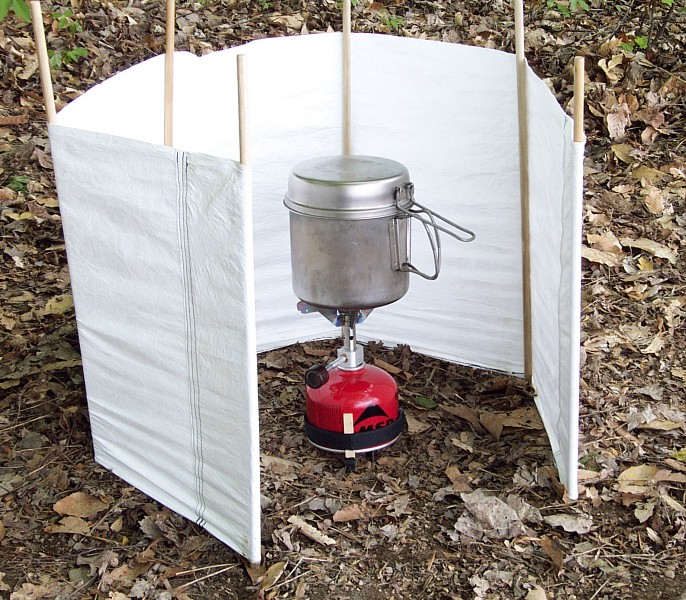
In my recent article in Seattle Backpackers Magazine (Aug 2, 2011 edition), I mentioned what my preference is in terms of a windscreen for an upright canister stove (well, at least for trips where weight isn't super critical).  Something like the below (keep reading if this looks too heavy; more ideas follow):

This is a self standing windscreen made by Olicamp.

I discuss my preferred windscreen set up in my article, and I'll go into some more detail later on in this blog post, but for now I'd like to discuss some of the alternatives that are out there.  Before you look at these alternative windscreens, you should carefully read my article and all of the safety warnings in the article.  Using a windscreen with a canister stove can be very dangerous.  Make sure that you monitor the temperature of the canister frequently with your hand.  If the canister feels hot, it is hot:  Take immediate steps to cool the canister.  DO NOT EVER LET THE GAS CANISTER OF YOUR STOVE GET HOT*.

That said, let's look at some of the options out there for windscreens for an upright canister stove:

One particularly ingenious light weight idea is Jim Wood's Kite Screen.
Photo courtesy of Jim Wood
The kite screen has an excellent reputation and is definitely a workable solution to the wind challenge. For me personally, the kite screen is a bit more set up than I like to mess with, but many people really like it. By the way, if you haven't checked out Jim's site, it's worth a look.  Lot's of valuable information.  Recommended.

Another option is construct your radiation shield such that it has a lip around the edge, like so:

 You can then use that lip to put a windscreen in place like so:
Advantages:
  • The canister is fully vented making it very unlikely that you'll overheat the canister.
  • Since the windscreen doesn't need to reach all the way to the ground, a shorter windscreen can be used.
Disadvantages:
  • It's a little hard to secure the windscreen on top of the radiation shield.  Wind tends to knock the windscreen around.  However, I've seen lots of examples of clever clips and other means to secure the windscreen in place.  This is definitely something worth experimenting with.
  • The lip on the radiation shield tends to get bent up when in my pack.  A completely flat radiation shield is easier to pack.
  • Because there is such a tight mating of the windscreen and radiation shield, it's going to get really hot inside the windscreen.  Plastic or other sensitive parts like piezoelectric ignition systems could get damaged.
  • Because the radiation shield needs to securely support the windscreen, you'll need to use a little bit heavier material for the radiation shield than you otherwise would.
  • Since the valve control is inside the windscreen, you have to lift or open the windscreen to adjust the flame.  If you're just boiling water, who cares?  Just turn the stove on and let the danged thing boil.  But if you're simmering, you may need to adjust the flame.  A huge deal?  No.  Inconvenient?  Yes.

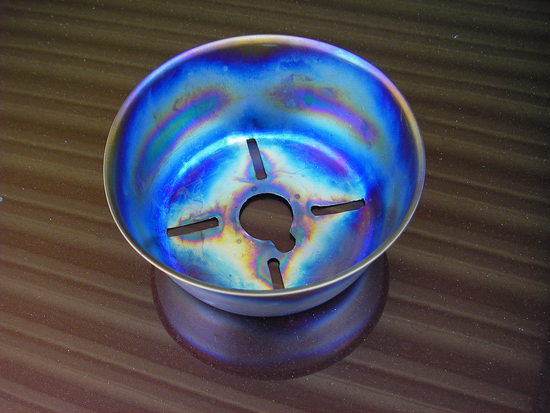
Another option is to take a titanium bowl and cut slots and holes in the bottom of the bowl such that the burner and pot supports protrude through the bottom of the bowl.
Photo courtesy of Denis Hazelwood
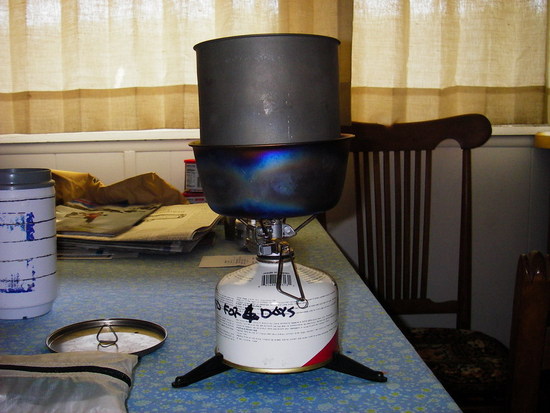
With a pot in place:
Photo courtesy of Denis Hazelwood


I think the bowl idea has a lot of merit.  Of course you have to sacrifice a titanium bowl, and it takes a bit of skill to make cuts that don't look really amateurish. The bowl in the photo was made by Denis Hazelwood.

Finally, there's always my preference:
This self standing windscreen consists of a series of stiff aluminum plates with wire rods that act as hinges.  This type of windscreen has several advantages:
1.  It's self standing.
2.  It's heavy enough that the slightest breeze doesn't knock it over
3.  It's tall enough that it can handle larger canisters and larger stoves.  The canister in the photo is a 220g Snow Peak canister, and the stove is an MSR Superfly, a relatively tall stove.
4.  It's very fast to set up (seconds)
5.  The rods that act as hinges can be pushed into the ground to help secure the windscreen.

BUT this type has a significant disadvantage:  it's heavy, weighing in at 201g (7 ounces) which is about the weight of a 110g sized fuel canister (when full)!

For a lighter windscreen that works along the same lines, simply replace the above windscreen with a windscreen made from multiple sheets of household aluminum foil, folded at the edges such that the windscreen stays together, like this:
The above windscreen is significantly lighter, but far more subject to being knocked around or blown over by wind.  You'll probably need to brace the windscreen with rocks and such.  The above windscreen is also significantly less durable.  But it does work.


So there's a very brief survey of some of common windscreen set ups that I've seen for upright canister stoves
1.  Self Standing
2.  The Kite Screen
3.  Windscreen mounted on radiation shield
4.  Windscreen made out of a bowl or similar item

For any of the common windscreen set ups, your imagination is the only limit to the types of materials that you might use.  Items such as pie tins, 36 ga. aluminum tooling fool, baking pans, catering dish lids, titanium bowls, household aluminum foil, roof flashing, etc. are all fair game.  Just remember:  DO NOT EVER LET THE GAS CANISTER OF YOUR STOVE GET HOT*.


With that in mind, get out there and use your stove for what it is intended for:  Good eats!!


HJ

*Letting the canister get some heat in cold weather isn't a bad idea; it will improve performance. You still need to monitor the canister's temperature even in cold weather. Even when it's cold out, that canister must never be allowed to get so hot that you can't comfortably touch it with your bare hand.  I'm talking about "normal" hands here.  Be careful if your hands are really cold.  Really cold hands may not give you enough sensation to tell how hot that canister really is.  Let your hand rest on the canister a while.  If the canister is really hot, you'll know it soon enough!  My point is that a quick touch with cold hands may not be enough.  Check the canister.

Sunday, July 31, 2011

Advantages (?) of Regulator Valved Stoves, Part I

UPDATE 10 FEB 2013:  Advantages (?) of Regulator Valved Stoves, Part II is now available.


INTRODUCTION
Soto Outdoors recently introduced their OD-1R Micro-Regulator stove.  Soto created a good deal of buzz when they posted the following video which makes it look as though a regulator valved stove has quite an advantage over a conventional needle valved stove.  The relevant segment starts at 1:03.


What advantages, if any, do regulator valved stoves offer?

This post is Part I of Advantages (?) of Regulator Valved Stoves, an investigation into the advantages, if any, of stoves that have a regulator valve.

Part II can be seen here:  Advantages (?) of Regulator Valved Stoves, Part II

Several people have mentioned in passing that their canisters were more fully drained after using a regulator valved stove than when using a conventional needle valved stove.  In addition, in a discussion with an individual who has worked a good deal with LPG commercially, said individual felt that a regulator valve would function at lower gas pressures (such as those in a seemingly exhausted canister) than a needle valve.  If in fact a regulator valved stove were to make more full use of the gas carried when backpacking, this more full use would be of value to backpackers.  I set out to conduct a simple experiment to see if indeed a regulator valved stove might make more full use of the gas in a canister.  My experiment would exhaust a canister using a needle valved stove and then replace the needle valved stove with a regulator valved stove to see if the regulator valved stove could operate on a canister that, to a needle valved stove, was exhausted.


ENVIRONMENT
Location:  Stove Test Area 1 (UTM: 11S 383294 3792457), Haines Canyon, City of Los Angeles, California, USA
Date/Time:  30 JUL 2011, 1830 hours
Elevation:  2600'/792m MSL

Conditions:
27.20 InHg/921 mBar
80F/27C
Little to no wind (no audible susurrus, no visible leaf motion)


EQUIPMENT
Regulator Valved Test Stove:
-Soto OD-1R Micro Regulator
P1070137.JPG


Conventional needle valved stoves for comparison:
-MSR Superfly
P1070136.JPG

-Optimus Crux
P1070134.JPG

-Snow Peak GST-100
P1070135.JPG
All stoves together:
P1070133.JPG


Fuel:
-Canister 1.  Snow Peak 110g, weighing 88g
-Canister 2.  Snow Peak 110g, weighing 93g
-Canister 3.  Snow Peak 110g, weighing 166g

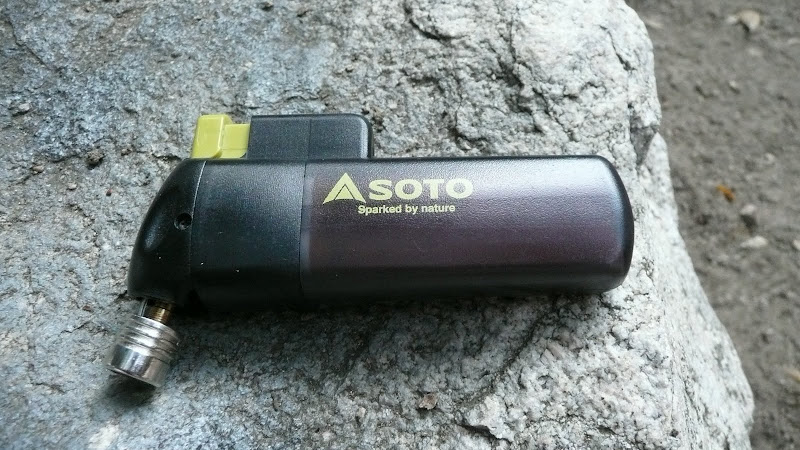
Ignition source:  Soto Pocket Torch. 
P1070138.JPG


TEST RESULTS
Test 1, canister 1 (88g)
A.  Superfly, valve fully open, flame on, run to exhaustion.  Flame out.  Cannot restart.  No sound of gas escaping.
B.  OD-1R, valve fully open, cannot start stove.  No sound of gas escaping.
C.  GST-100, valve fully open, cannot start stove.  No sound of gas escaping.
D.  Crux, valve fully open, cannot start stove.  No sound of gas escaping.

Test 2, canister 2 (93g)
A.  Crux, valve fully open, flame on, run to exhaustion.  Flame out.  Cannot restart.  No sound of gas escaping.
B.  OD-1R, valve fully open, cannot start stove.  No sound of gas escaping.
C.  GST-100, valve fully open, cannot start stove.  No sound of gas escaping.
D.  Superfly, valve fully open, cannot start stove.  No sound of gas escaping.

Equipment Checking, canister 3 (166g).  Each stove tested for normal operation.
A.  Superfly.  NORMAL
P1070139.JPG

B.  Crux.  NORMAL
P1070141.JPG

C.  GST-100.  NORMAL
P1070142.JPG

D.  OD-1R.  NORMAL.
P1070140.JPG


DISCUSSION
Two very nearly empty canisters of gas were used to conduct the experiment.  A third canister containing far more gas was used to verify that each stove used in the experiment was working properly.  All stoves were in fact working normally.  To avoid the chance that the results might be skewed by some unknown, unusual characteristic in one of the needle valved comparison stoves, multiple comparison stoves were used.  A butane torch was used as the ignition source for all stoves whether or not a given stove had a piezoelectric ignition so that ignition failures could not skew the results.  At random, a needle valve stove was chosen and used to exhaust the canister.  When flame out occured, a brief re-ignition was quickly attempted in order to confirm exhaustion of the canister.  If the re-ignition failed, the needle valve stove was swapped out for the regulator valved stove, and an attempt to run the regulator valved stove was made.
I ran two tests.  See TEST RESULTS section above for details.  In both cases, the Soto OD-1R could do no more than a conventional needle valved stove.  An exhausted canister to a needle valved stove was an exhausted canister to a regulator valved stove.  For additional confirmation, after the test with the Soto OD-1R, the remaining needle valve stoves were tried.  No stove was able to operate after intitial exhaustion.  A exhausted canister was an exhausted canister, irrespective of the stove used.  After the test, canister 1 weighed 86g, and canister 2 weighed 86g.

CONCLUSION
A Soto OD-1R regulator valved stove is not able to burn off more gas from a canister than a conventional needle valved stove.  This is not to say that a regulator valve might not have some value in keeping a flame constant as canister pressure drops, but when the canister is finally exhausted, a Soto OD-1R regulator valved stove offers no advantage over a conventional needle valved stove.

Friday, June 3, 2011

Why a Gas Stove?

I recently got a note from "DG" concerning what type of stove is best:
I vote for liquid fuel type stoves. Fast heat no matter what condition.
--DG
I don't disklike liquid fueled stoves the least bit, but I thought I'd talk a little about why I also like gas stoves.  Read on...

DG,

My first stove that was all my own (i.e. not my dad's) was an MSR Whisperlite that I bought in 1987. It's still going strong.

You're absolutely right that a liquid fueled stove will work in all conditions. But let me list out a few reasons that people might want to also have a gas stove on hand:
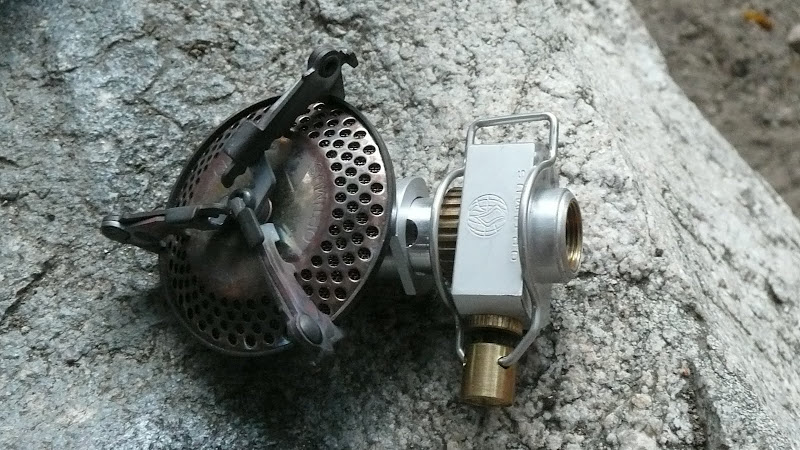
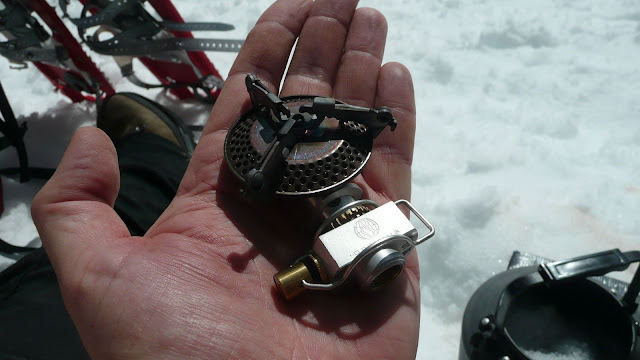
1. Bulk and weight. A liquid fueled stove typically takes a fair amount of room in the pack as does the fuel bottle. I can literally hold a little gas stove in the palm of my hand.
Optimus Crux
And in no way is a liquid fueled stove anywhere near as light as a gas stove.

2. Speed. I've been using liquid fueled stoves for years. My family used them back in the 60's and 70's when I was a kid, and I've been using them on my own since the 80's. I've got priming and set up down to a science. HOWEVER, even if you're good at set up and priming, it takes time. I started noticing that my friends were getting tired of waiting for me when we were breaking camp. I bought my first gas stove just so I could break camp as quickly as my friends.

3. Cost. You can go on down to Walmart and get an inexpensive Coleman gas stove for something on the order of $30.00. The cheapest white gas stove is at least double that. The cheapest decent white gas stove is probably another $10 to $20 more expensive than that. The cheapest decent multi-fueled (white gas or kerosene) is at least $10 over that.  Over time, a liquid fueled stove may prove cheaper -- if you stick with it. For those just trying out backpacking or who aren't going to do a lot of backpacking over time, the gas stove will be significantly less expensive.

So there you have it: Gas stoves are lighter, faster/more convenient, more compact, and less expensive than liquid fueled stoves. They're great for fair weather hikers or as a supplement to four season hikers.

All that said, I continue to use white gas as my primary stove fuel. But on those trips where the weather will be good and I want to go fast and light, gas is my choice.

HJ

Tuesday, March 15, 2011

Stove of the Week: MSR Rapidfire

OK, so this week's stove is a bit of a "sleeper" in the sense that it's not a stove that you would expect a lot from -- unless you knew better.  But you'll have to read on to find out what's so interesting about this week's stove, the MSR Rapidfire.

First, let's go through our usual run down of the stove, and then we'll get into some of it's unusual qualities.  So, what's with this thing called a Rapidfire?  Isn't it just a Whisperlite?  I mean seriously, just look at it.  It's a freakin' Whisperlite for crying out loud.

Or is it?  Take a look at the bottom of the burner column.  Hmm.  No priming cup.  OK, so what the Dickens is this thing?  Well, it is a close relative of the Whisperlite all right, but made to run on canister gas.
The Rapidfire was MSR's first entry into the gas stove market.  Prior to the Rapidfire, MSR was a liquid fuel only stove manufacturer.  When MSR saw how gas stoves were really catching on, they needed an entrant into the market.  How better to get there than to simply modify their existing "workhorse" stove, the Whisperlite?  Enter the Rapidfire.  Apparently, MSR was pretty paranoid about the volatility of gas as compared to liquid fuel; they really lengthened the fuel line which is odd when you consider that now the majority of MSR gas stoves mount directly on to the canister.

The stove itself is identical to the Whisperltie except for the aforementioned lack of a priming cup.
Instead of a priming cup, there's a threaded, knurled ring that holds the fuel line and legs in place.
At the end of the fuel line, there's a gas connector and valve rather than the open ended tube with aluminum block and catch-arm of the Whisperlite.
Now take a careful look at that connector.
Note the central pin.  It is this pin that depresses the Lindal valve inside the canister of gas.  I've seen these pins go missing.  No pin, and essentially you've got no gas.  Second, note the black rubber "O" ring.  This "O" ring must be in place for you to operate the stove safely.  Without the "O" ring, gas may leak which could be quite dangerous.

Speaking of gas, it's worth mentioning here that the MSR Rapidfire stove can use any standard threaded backpacking gas canister.  Originally, the Rapidfire used a cylindrical gas canister, but that canister had the same 7/16" UNEF standard thread as used on today's dome shaped canisters, so there's no problem with respect to finding fuel even though the Rapidfire is an older stove.  MSR discontinued production, to the best of my ability to discern, in 2001.

OK, so MSR needed a gas stove, so they pressed a modified Whisperlite into service, so what?  I mean does this Rapidfire have any redeeming features or is it just some kludgey attempt to not let all the other stove manufacturers run away with the gas stove part of the stove market?  Actually, the Rapidfire has several features that distinguish it from typical gas stoves, one of which actually makes the Rapidfire potentially pretty worth owning.  I'll get to that in a moment.
First, the Rapidfire, like its progenitor the Whisperlite, is a remote fueled stove.  In other words, the fuel is not directly attached to the burner but rather fuel is brought in via a fuel line from a remote source.  This does several things for us:  1) since there's no fuel tank under the burner, the burner is lower which brings us out of the wind.  2)  Also since the burner is lower, the stove is more stable.  3) Lastly and most importantly, since the fuel isn't local to the burner, we do not have to worry about heat radiating from the burner and overheating the fuel -- which means we can use a windscreen with complete impunity.  Use a windscreen the wrong way on a typical canister stove, and you could turn your stove from a domestic servant into a domestic terrorist.  Overheated canisters can and do explode.

Speaking of windscreens, here's a Rapidfire all set up with a heat reflector and windscreen, a very efficient cooking set up.

Now, I keep blathering about something special about the Rapidfire.  Let's take a closer look at the burner itself shall we?
Do you see that loop in the burner?  That's the fuel line.  That loop is referred to as a pre-heat loop (or generator).  The loop is exposed directly to the flame when the stove is in operation.  Fuel flows into that loop before it enters the burner, which greatly heats the fuel.  In a liquid fueled stove, that heat is what turns the liquid into a vapor so that it can be burned.

Well, that's just great, Jim, but we're working with gas here, so who really cares?

Are you?  Really?  Pick up a full canister of gas and shake it.  Hear that sloshing sound?  That's a liquid in there.

OK, great, it's a liquid in the can but it's a gas when it comes out of the burner, so I still don't care about that pre-heat loop; can we just move on?

Well, not so fast there.  Yes, you're right, it is a gas when it comes out of the burner.  Usually.  But what about cold weather?  Gotcha.  That's the problem with gas stoves.  They lose power when the weather gets below freezing because the liquefied gas in the canister won't vaporize properly.  Remember that pre-heat loop?  There's our answer.  In cold weather, we let the liquefied gas stay liquid, and we let the pre-heat loop vaporize it for us.  In that way, we don't care if it's cold or not.  We don't use the air temperature to vaporize our gas, we use the heat of the flame.

Uh, great Jim, but the connector attaches to the top of the canister, and all it's going to draw is gas off the top.  If there's no gas, we've got no fuel.

This is not a problem.  Just turn the canister over.  Note:  Do not invert the canister on a gas stove that does not have a pre-heat loop.  A serious flare up might result. 
The top of the canister is now the bottom.  That portion of the fuel that is in vapor form now acts to pressurize the canister, pushing liquid down, out of the canister, and down the fuel line.  The fuel stays in liquid form until it hits the pre-heat loop where the high heat causes it to change from liquid to gas.  The resultant gas comes rushing out of the burner, and baby you've got flame.  Note that the stove is in operation in the above photo.  When gas is fed in liquid form to the burner, the stove is said to be in liquid feed mode.  Note that I said liquid feed not liquid fuel.  The fuel will still be a gas at room temperature and pressure.  We haven't changed fuel; we've merely changed the form that the fuel is fed in.
Using a gas stove in liquid feed mode is an important capability for a couple of reasons:
1.  Normal gas stoves operate in vapor feed mode, that is the fuel is fed in as a vapor, and you have to rely on the ambient temperature to vaporize your fuel.  In liquid feed mode, you rely not on the outside temperature but on the heat of the flame.  Stoves in liquid feed mode will operate in colder weather than normal gas stoves.
2.  In normal gas stoves, the fuel is typically a propane-butane or propane-isobutane blend.  Propane, the gas that works best in cold, has a higher vapor pressure and burns off faster leaving you, toward the end of the life of the tank, with a tank full of your worst performing cold weather fuel. In fact, you may wind up with a canister that is still 30% full that you can't coax any gas out of because all the good propane has burned off and nothing is left but the lesser performing fuels.  In liquid feed mode, all the fuels are burned at a constant rate.  The fuel towards the end of the life of the canister is the same mix as at the start of the canister.  In liquid feed mode, you don't get such horrible "canister fade" like you do in vapor feed mode.

I normally recommend a cut off of about 20F/-7C for normal gas stoves -- and that's with using "tricks," having to put up with less-than-stellar performance, and potentially having fuel that you can't get to vaporize.  With a gas stove in liquid feed mode, you can easily go down to 0F/-18C without having to use a lot of tricks, with full performance, and without having a portion of your fuel being unusable.

In other words, with a gas stove in liquid mode, you get all of the convenience of gas without all the low performance and hassles associated with gas in cold weather.  Uh, couldn't I just use a regular liquid fueled stove?  Sure.  If you're comfortable with liquid fuel, go for it.  But consider this:  If it's really snowing hard and you need to cook inside your tent do you really want to use liquid fuel?  What happens if your priming gets a little out of hand?  With a gas stove in liquid feed mode, you get liquid fuel performance but without the danger of priming.  And of course you get all of the usual convenience of a gas stove.  One of those conveniences is simmering.  It's pretty tough to get the typical Whisperlite to simmer like this:
And that's without monkeying around with only filling the fuel bottle half full and only pumping a few strokes.  Easy, just about automatic simmering in other words.

Now, in all fairness, other remote canister gas stoves have pre-heat loops. Other remote canister stoves can operate in liquid feed mode.  What makes the Rapidfire a "sleeper" -- a stove you wouldn't expect much from but turns out to be a pretty good stove?  Well, take a look at the price tags on some of those stoves out there that are remote canister stoves and have pre-heat loops.  They're expensive.  The Rapidfire is an older, discontinued stove, most people haven't heard of it, and you can pick one up for a much more reasonable price than you can some of the current production stoves.  All the performance at a fraction of the price.  You heard it here on Adventures in Stoving.  :)  Also, the Rapidfire's fuel line rotates easily at the connector which makes it easy to invert the canister to put the stove into liquid feed mode.  The Rapidfire's more modern cousin, the Windpro, does not rotate easily at the connector.

Yep, the Rapidfire is a "sleeper," but don't underestimate this stove.  It's a lot of stove for the money.

Well, looks like the kettle's boiling.  I'd best get to that cup of hot chocolate before it gets cold.

Thanks for joining me on another Adventure in Stoving.

HJ

The MSR Rapidfire
What's good about it?
Able to operate in liquid feed mode
Economical
Can use a full windscreen with impunity even though it's a gas stove
Simmers well
Connector rotates easily for liquid feed mode
Quiet
Fairly compact
Reasonably powerful
Reliable
Stable
Efficient

What's bad about it?
The wire pot supports are difficult to get back into "true" if they get bent.  (so don't bend them!)
The fuel line is a little stiff particularly when compared to newer stoves like the WindPro.
A tad heavy when compared to newer stoves like the WindPro.

Overall, recommended.